
Finance
In Finance Setup, you can set company's financial related options. This Finance setup is divided in 6 parts:
-
Basic
-
Attribute
-
Basic Default Ledger
-
Default GST Ledger
-
Default Employee Ledger
-
Depreciation Rate
To Update all these details, follow the below mentioned procedure:
-
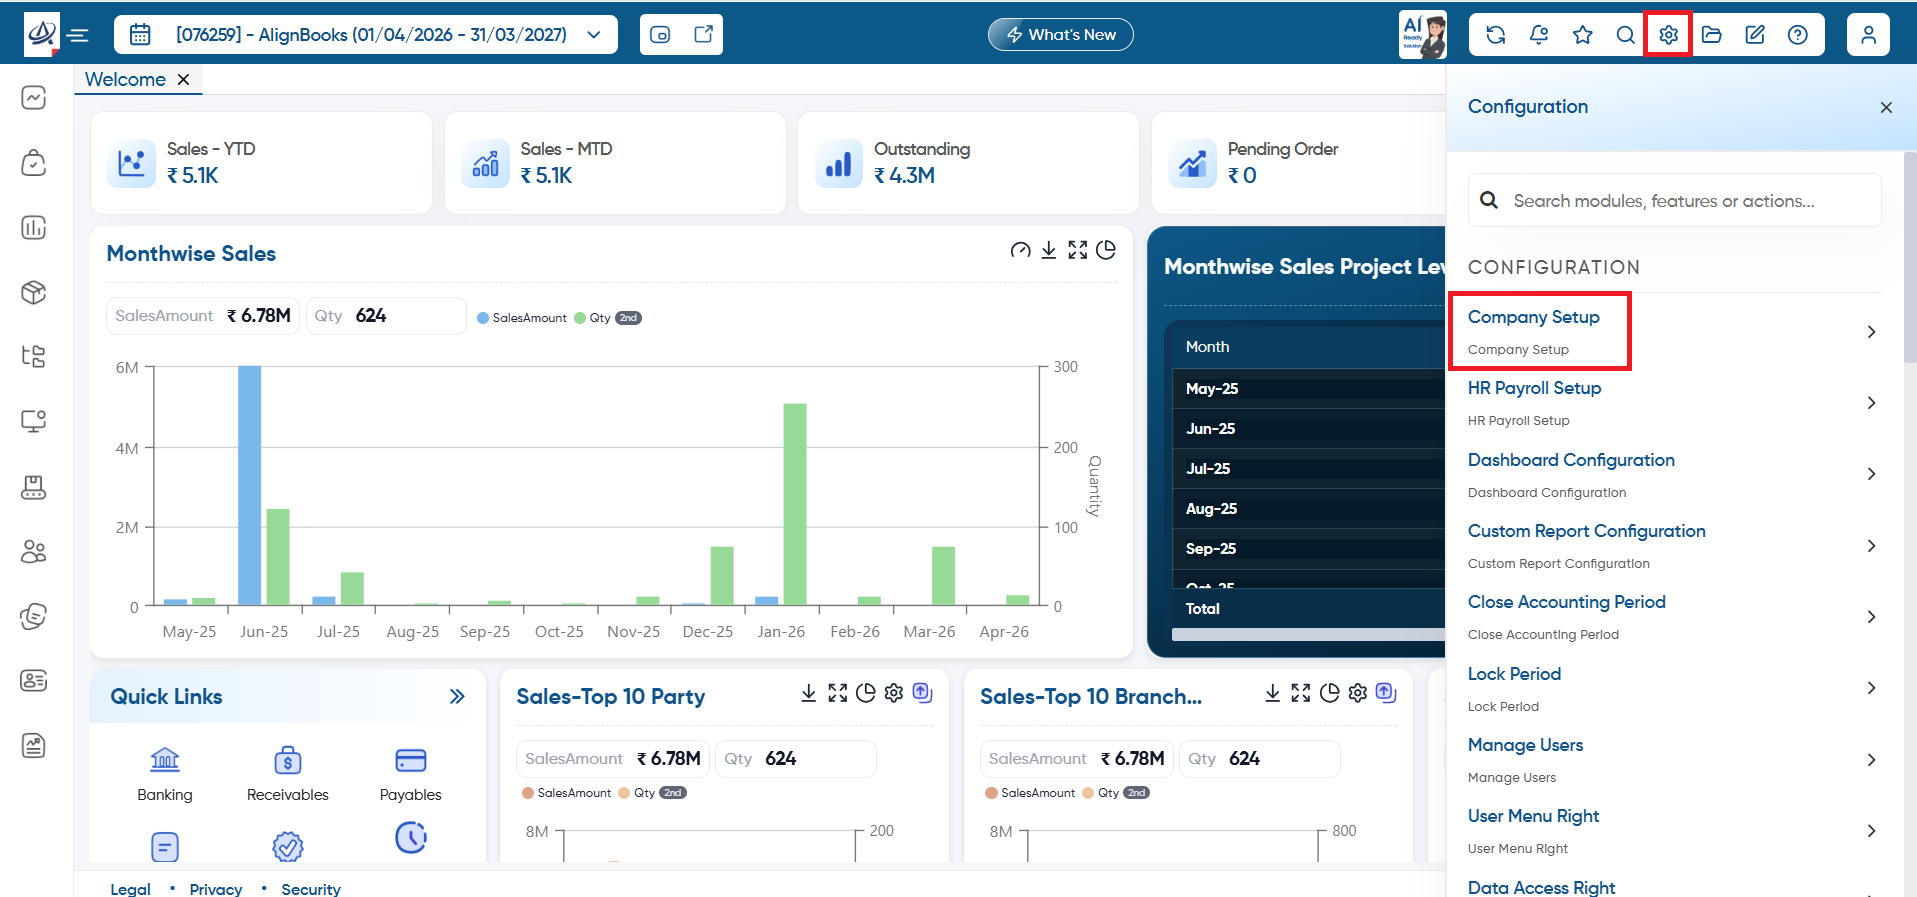
Click on 'Configuration' Icon and select 'Company Setup' option.
-
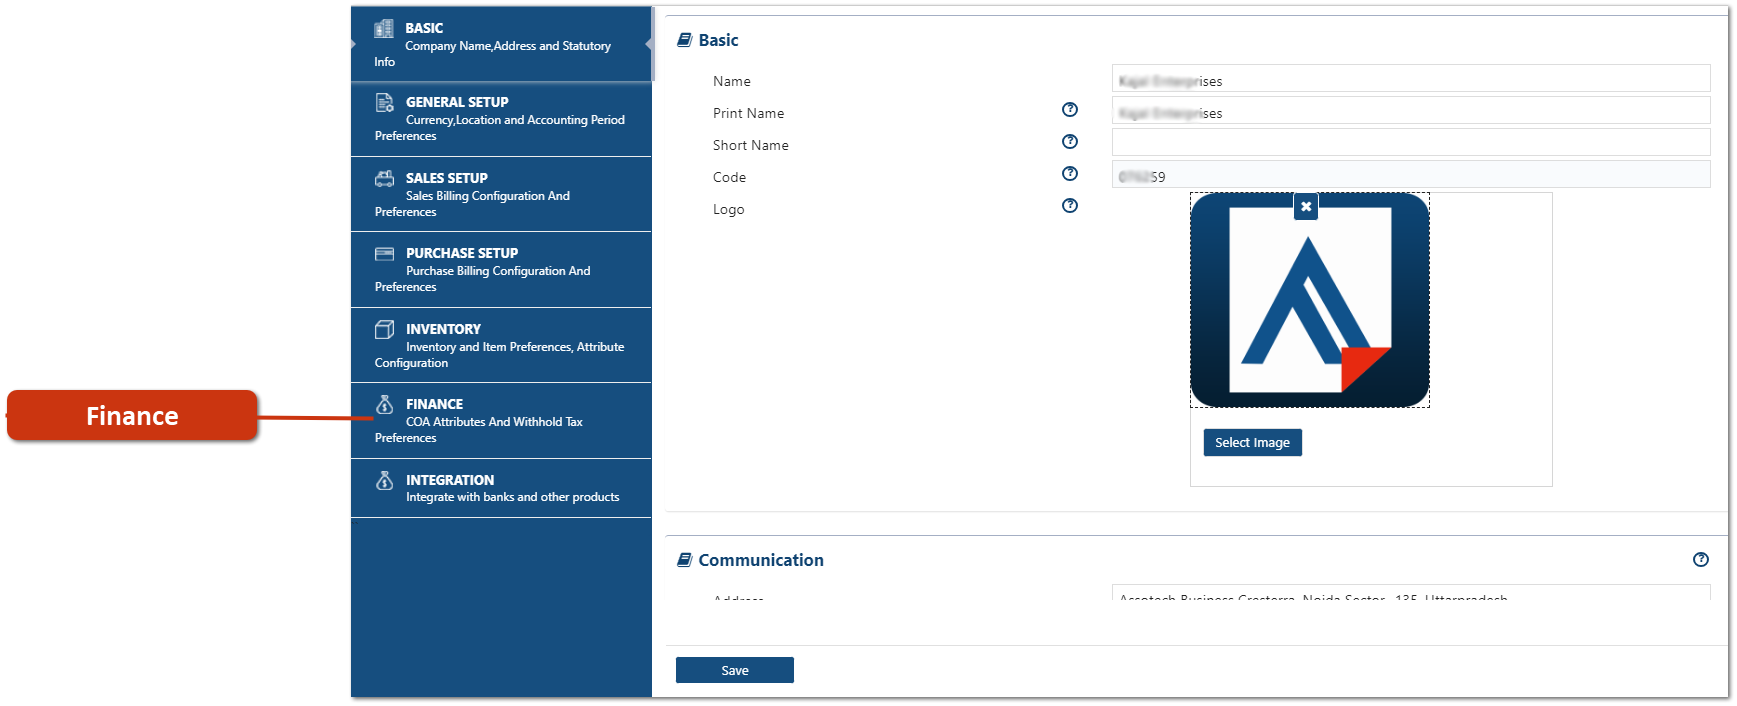
Click on 'Finance'.
Basic:
-
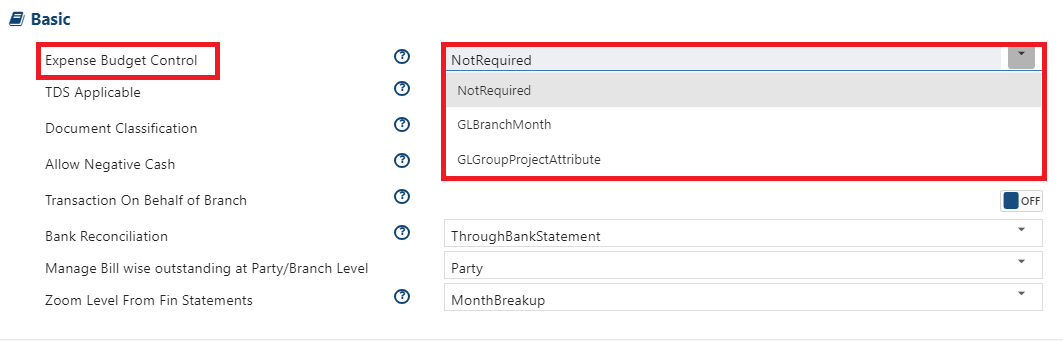
Expense Budget Control: Select this option, to enable Budget Control. With the help of this option, you can set Budget for Expenses, thereafter the software will give an alert or stop the transaction if budget exceed.
-
GLBranchMonth: Select this option, to set Budget Branch/Location wise.
-
GLGroupProjectAttribute: Select this option, if your business Trade is project Management and want to set budget for any particular project.
-
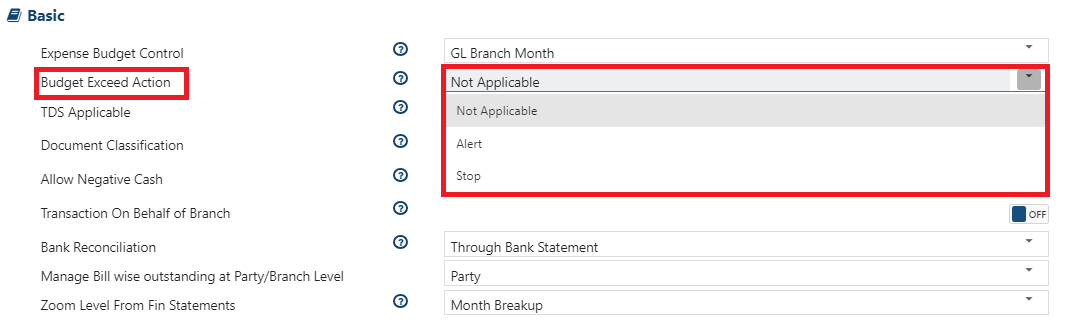
Budget Exceed Action: When you select 'GLBranchMonth' or 'GLGroupProjectAttribute,' this field will show up automatically. You can decide if the software should give you a warning ('Alert') and let you keep working when the budget goes over the limit, or stop you completely ('Stop') from continuing.
-
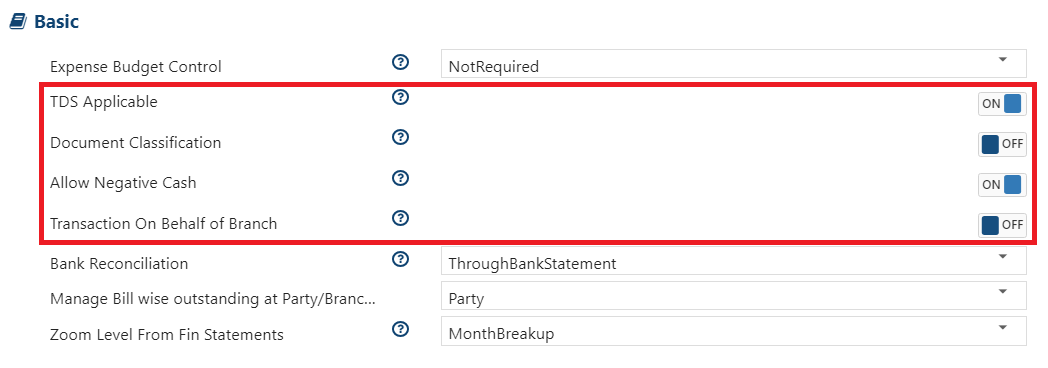
TDS Applicable: TDS or Tax Deducted at Source is an income tax that is collected from certain payments like rent, salary, commission, interest, professional fees, etc. In many scenarios TDS must be deducted before making payments or recording certain bills, even if unpaid. Similarly, customers may deduct TDS on payments to you. Delayed journal entries for TDS can cause errors or omissions. Therefore, turn this option 'ON' to apply TDS as needed.
-
Document Classification: Turn 'ON' this option, if the user needs to classify the financial documents on different criteria like Cash Vouchers, Journals etc and report can also be filtered based on these criteria.
-
Allow Negative Cash: Turn on this option 'ON', if you want to allow payments even when there isn’t enough cash in the cash ledger. This means the software will let you record payments, creating a negative cash balance.
-
Transaction On Behalf of Branch: If you want to maintain or create financial entries based on Location/Branch, then turn 'ON' this option as needed.
-
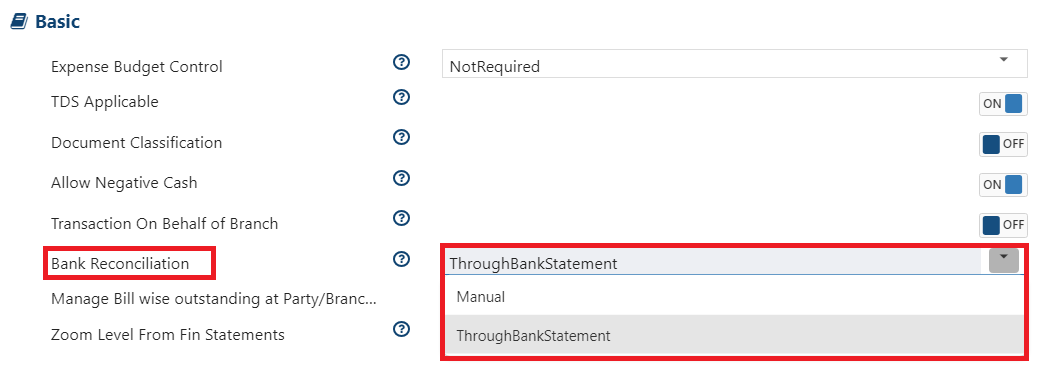
Bank Reconciliation: Bank reconciliation is an accounting process that compares a company's financial records with its bank statements to ensure that the two balances match.
Manual: Select this option, to reconcile using Old Accounting method to mark clearing date against each entry manually.
Through Bank Statement: Select this option, to Auto Reconcile Entries. With the help of this option you can Download bank Statement either directly from Integration or Excel import to Auto-Reconcile the entries.
-
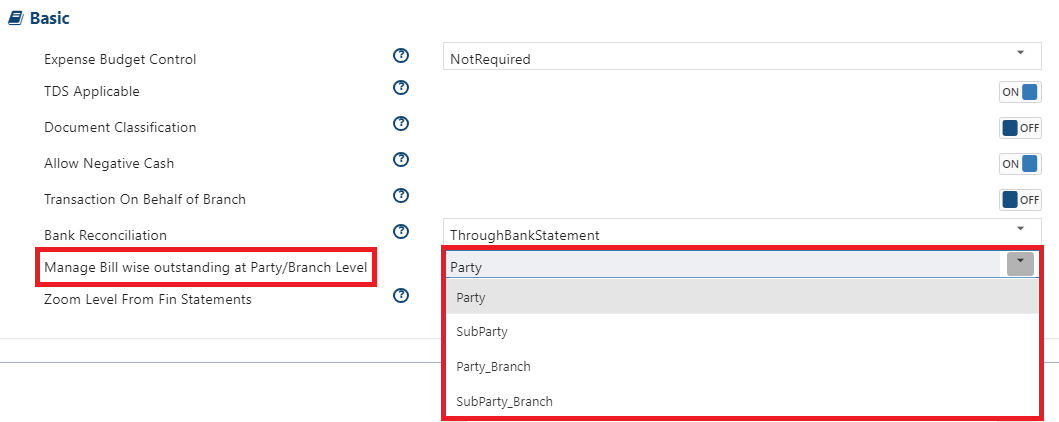
Manage Bill wise outstanding at Party/Branch Level: Select this option to manage outstanding bills based on various criteria. This allows you to organize and track pending payments for each bill individually, making it easier to monitor and settle dues according to parties, branch wise or party-branch wise etc.
Party: Select this option, to manage Outstanding Party wise.
SubParty: Select this option, to manage Outstanding Sub Party wise.
Party_Branch: Select this option, to manage Outstanding Party wise then further Branch/Location wise. In this option you can filter the payment first on party basis then you can filter branch wise also.
SubParty_Branch: Select this option, to manage Outstanding Sub Party wise then further Branch/Location wise.
-
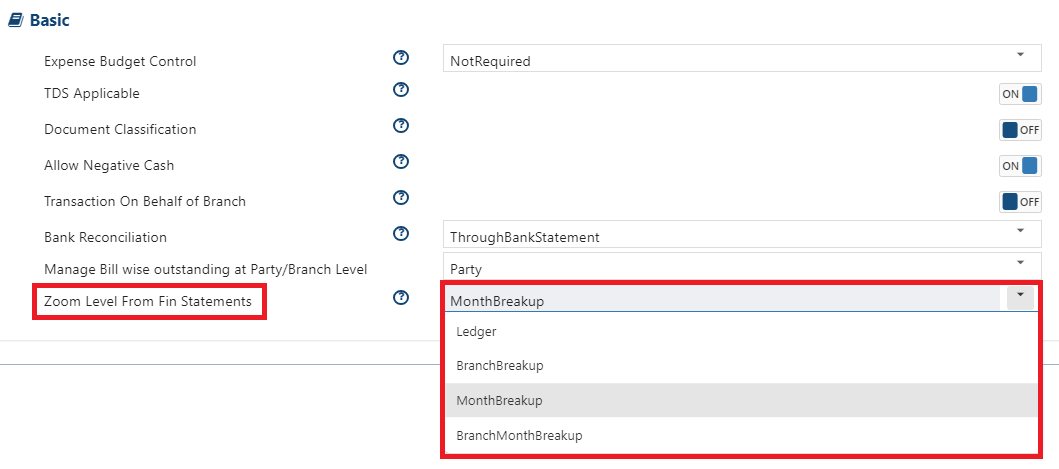
Zoom Level Fin Statements: Select the option, to view the report based on different criteria.
Ledger: Select this option, to view the reports on the basis of ledgers.
BranchBreakup: Select this option, to view the reports on the basis of Branch/Location wise (In case of Multi-Branch/Location).
MonthBreakup: Select this option, to view the reports Month wise.
BranchMonthBreakup: Select this option, to view report Branch/Location wise then further display data Month-wise.
-
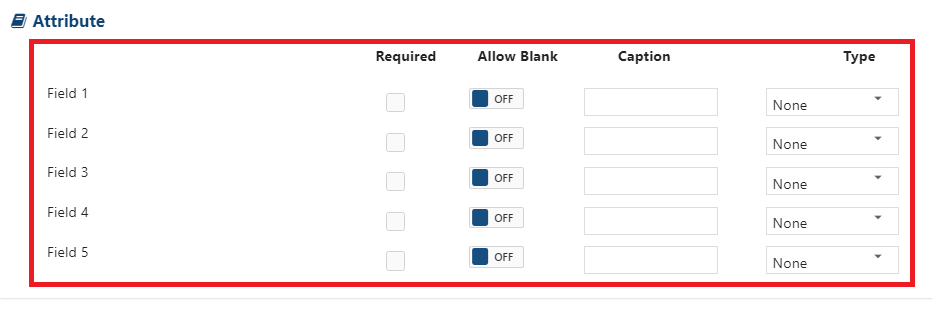
Through Attributes, you can Add extra fields in Payment and Receipts as needed. You can enable upto 5 fields.
Required: To enable the field tick the checkbox.
Allow Blank: Set this option to 'OFF' if you want the additional field to be mandatory for documents and prevent it from being left blank. The software will not allow you to save the document unless the field is selected. Set this option to 'ON' if you want to allow the field to be left blank.
Caption: Specify the field that you want to display in the vouchers as per the requirement.
Type: Select the type of field whether it's required as String/Numeric/Currency/Date. If you want the extra field to be Alpha numeric then select 'String'. To mention only numbers in the Extra field select 'Numeric'. Similarly if you are enabling the field for currency, then select 'Currency', or for Date format, select 'Date'.
Basic Default Ledger
-
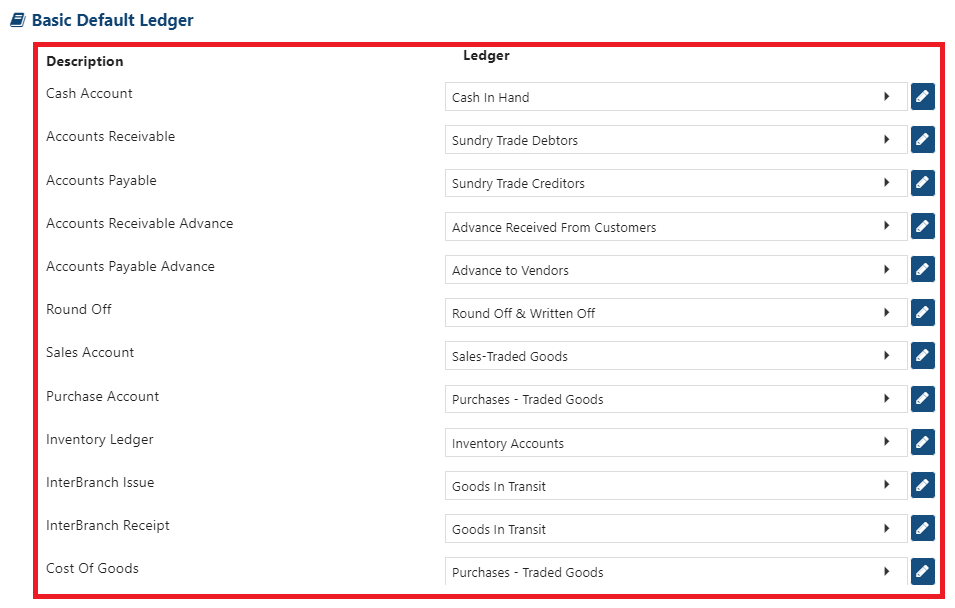
In Basic default ledger, AlignBooks has already set the default groups for all ledgers as per the accounting.
You can change the group of any default ledgers as per the requirements.
|
Default GST Ledger
-
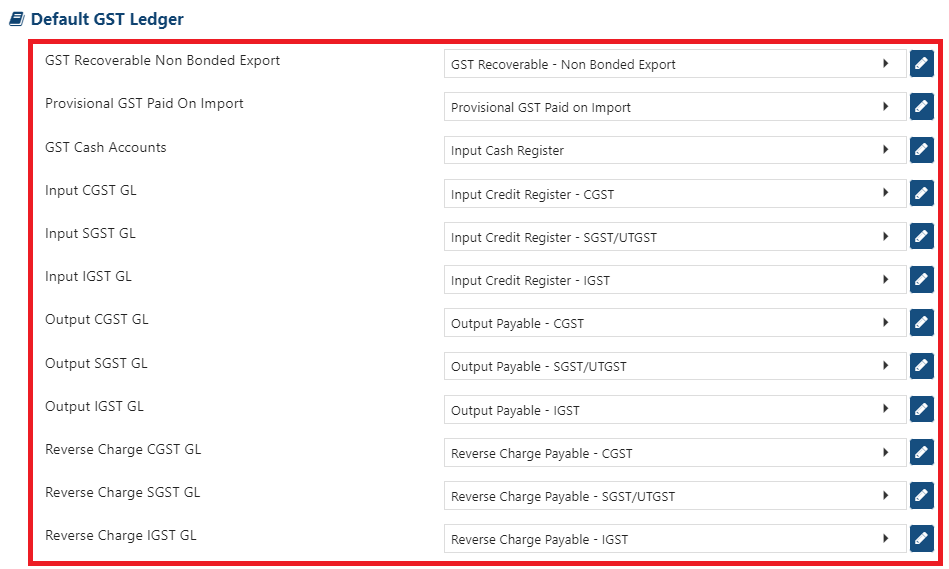
In Default GST Ledger, AlignBooks has already set the default groups for all GST ledgers as per the accounting.
Default Employee Ledger
-
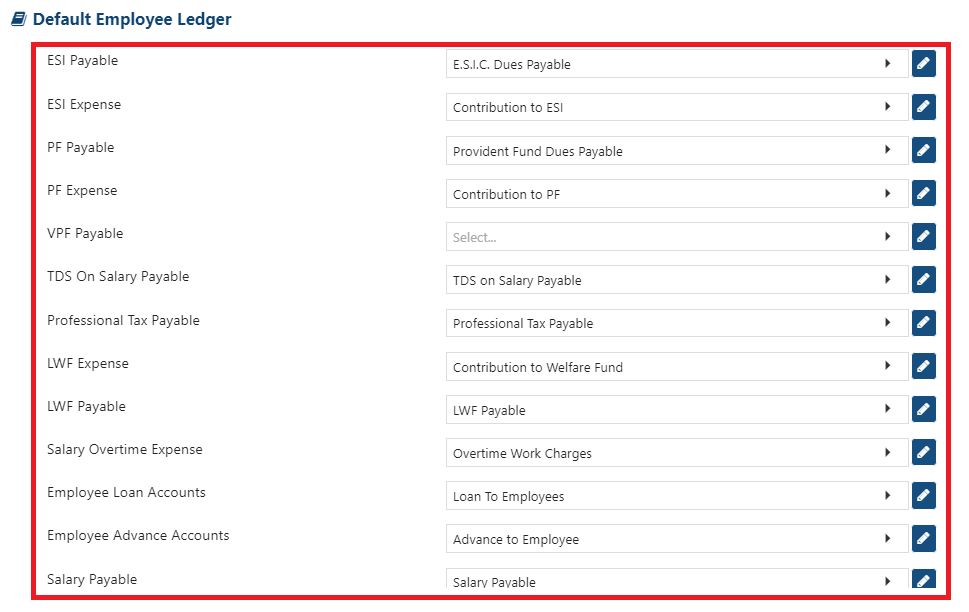
In Default Employee Ledger, AlignBooks has already set the default groups for all Employee ledgers as per the accounting.
Depreciation Rate
-
Through Depreciation Rate, you can set different rules for calculating depreciation as per the Income Tax Act or Company Act for Straight Line Method/Written Down Value Method.
-
Select the Asset Ledger, mention the Rate as per IT or Company.
 Click on the Add icon to Add Row.
 Click on the cross icon to Remove the Row.
-
Click on 'Save' button.
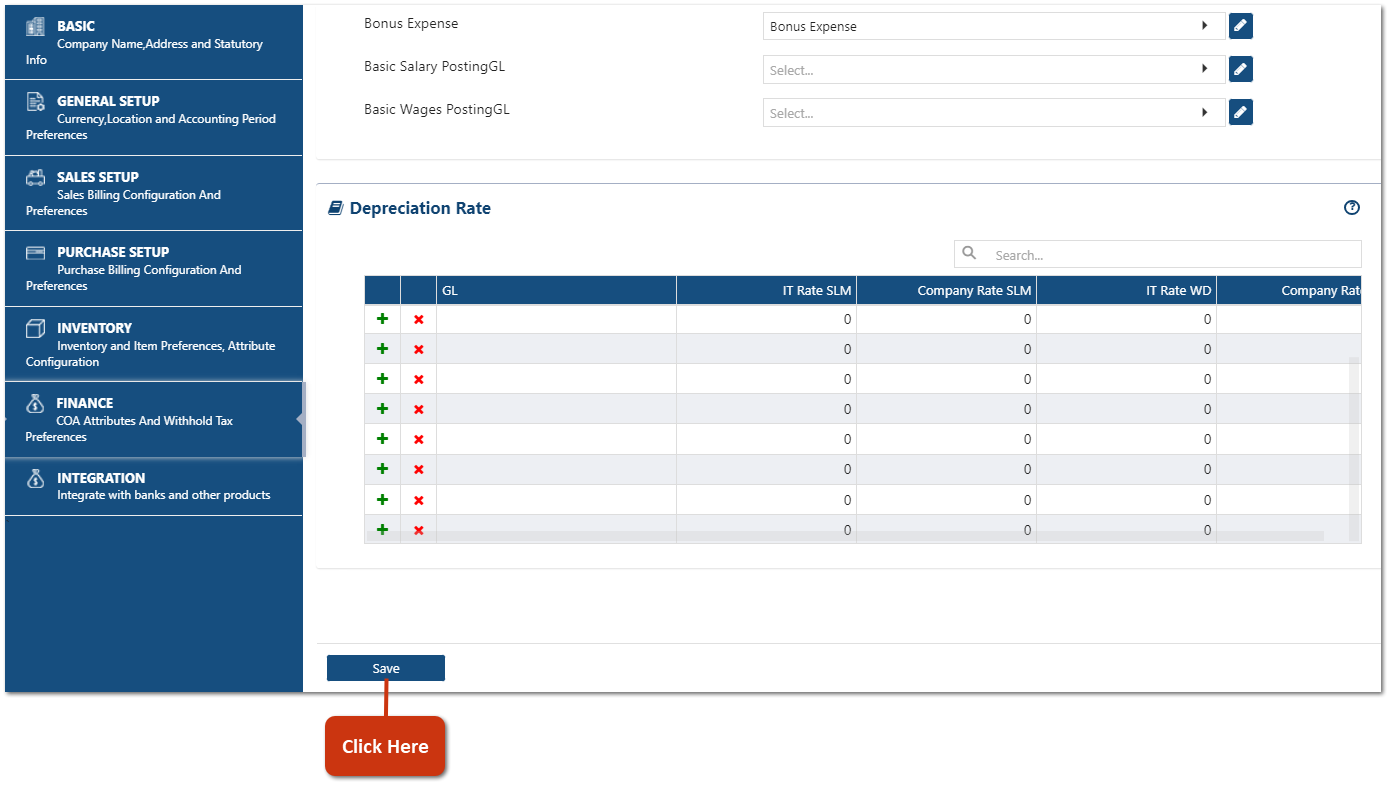
This process completes the Finance Setup of the Company in AlignBooks.