
G-Mail Configuration
AlignBooks offers a convenient feature that allows you to send important documents like invoices, vouchers, account statements, and more directly to their customers via G-Mail. AlignBooks simplifies this process by seamlessly integrating your Gmail account with just a few easy steps.
Benefits for Customers:
-
Faster Communication: Customers receive their invoices, vouchers, or statements instantly via email, making transactions quicker and more efficient.
-
Convenient Access: Customers can easily access important documents in their inbox, eliminating the need to manually search or request them.
-
Error-Free Sending: By automating the process, AlignBooks reduces the chances of sending incorrect or incomplete documents, ensuring accuracy.
-
Professional Appearance: Sending documents directly from your Gmail gives a professional touch and builds trust with your customers.
-
Save Time and Effort: This feature automates the process, saving time and reducing manual work for you, which means more time to focus on other important tasks.
Watch a Video
-
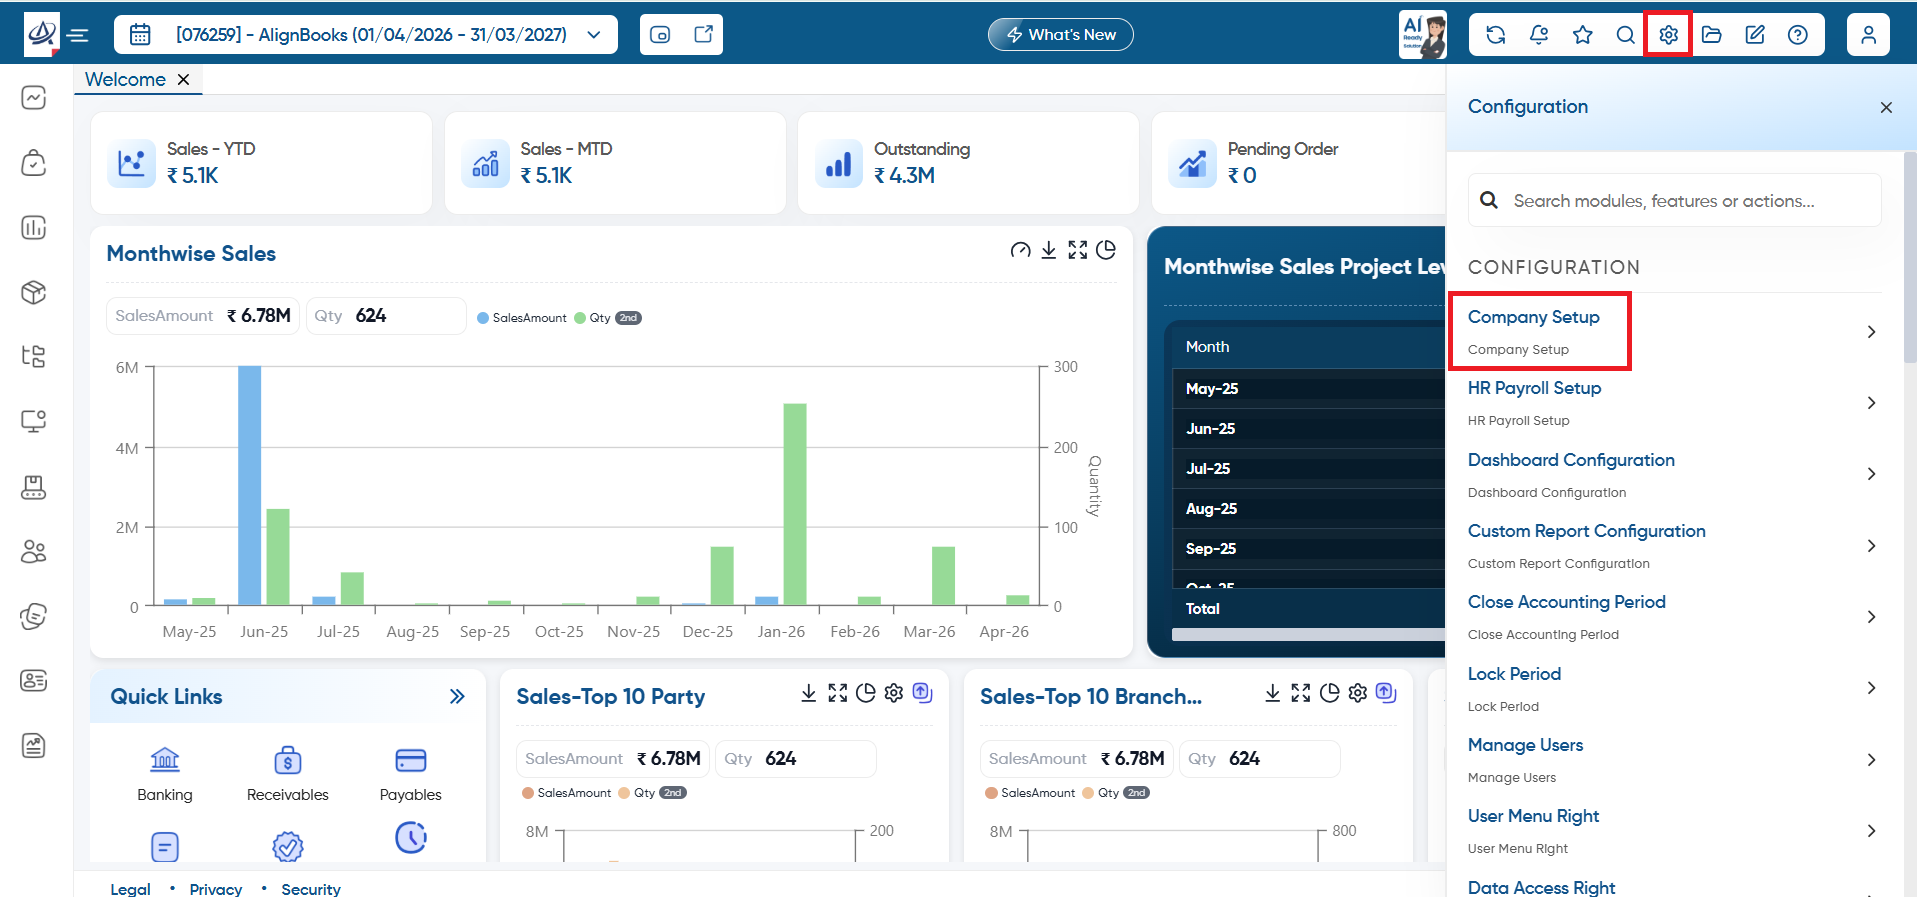
Click on the 'Configuration' icon and select 'Company Setup' option.
-
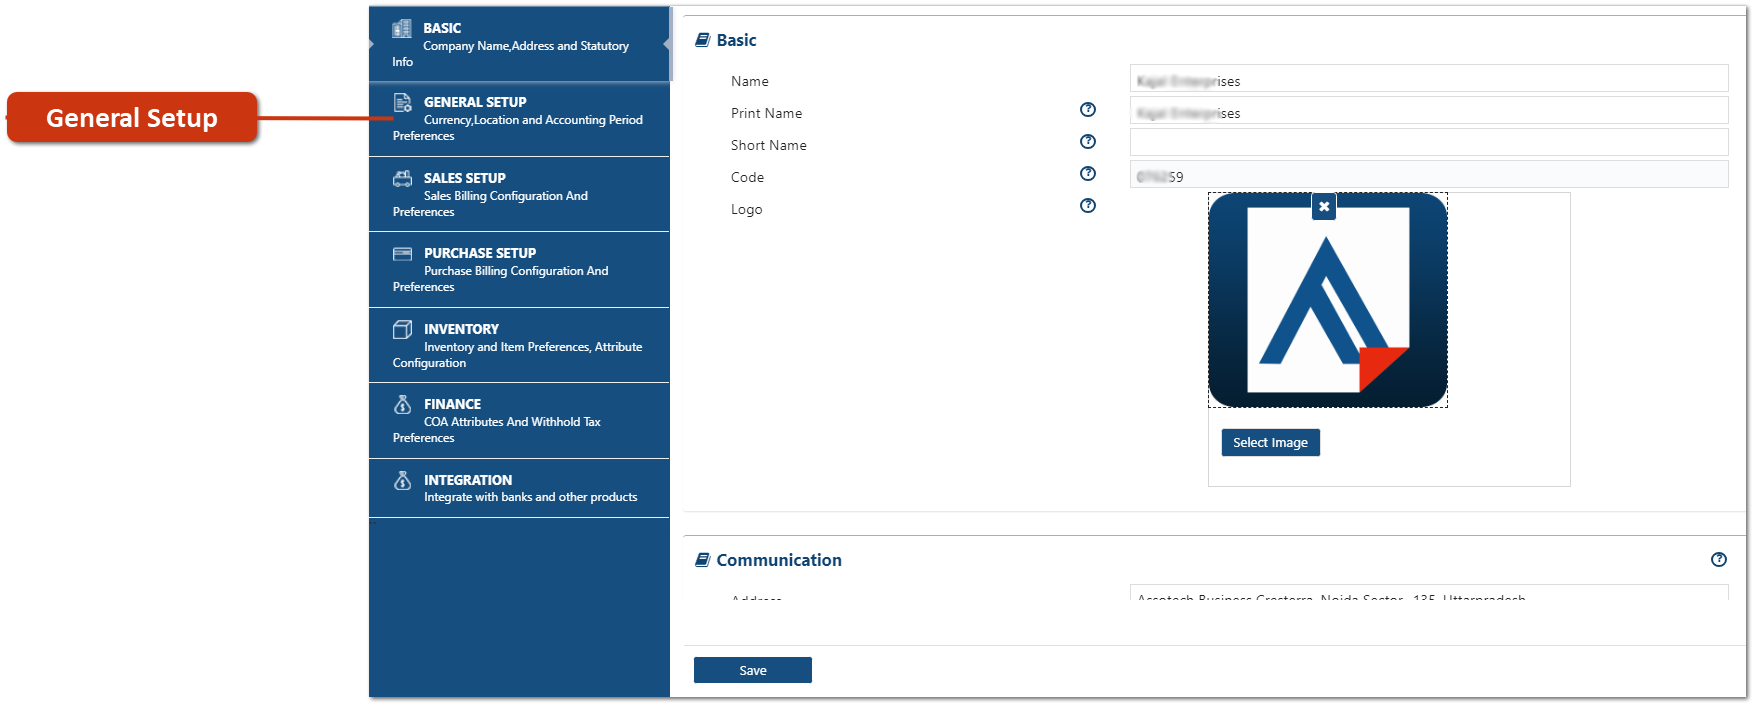
Click on 'General Setup'.
-
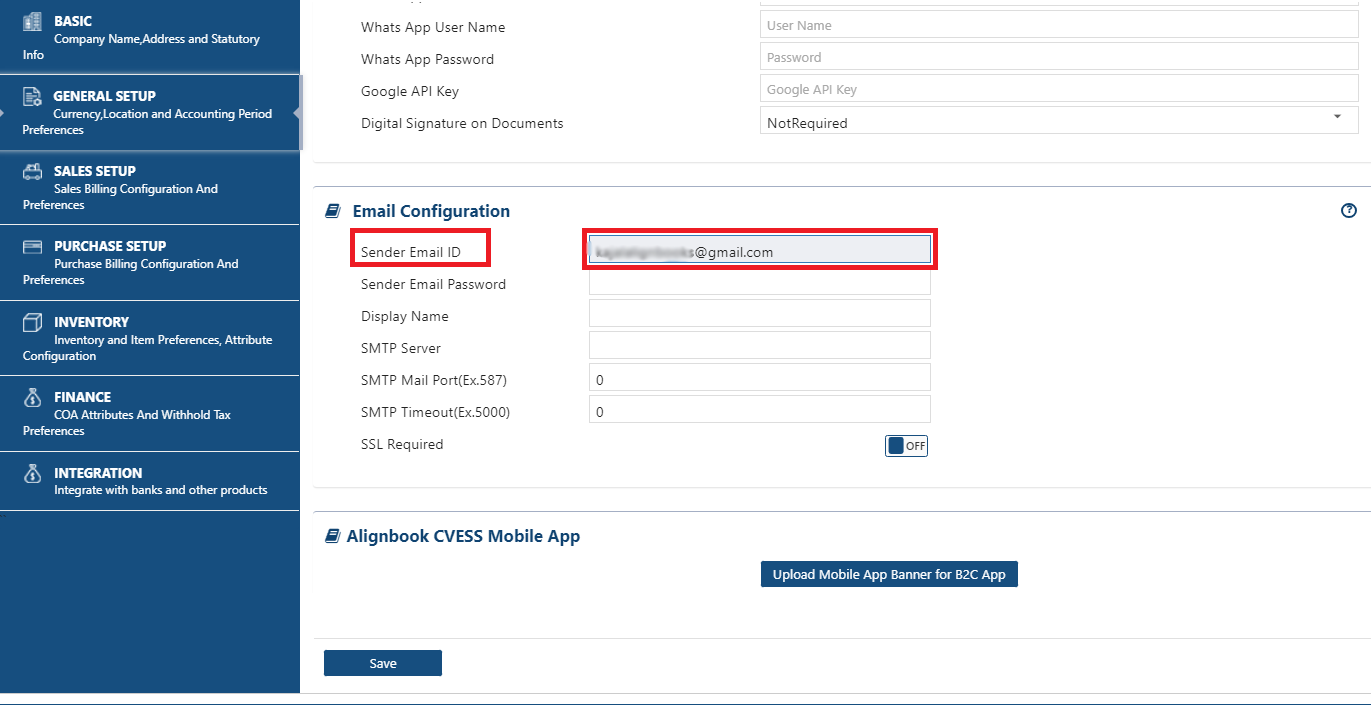
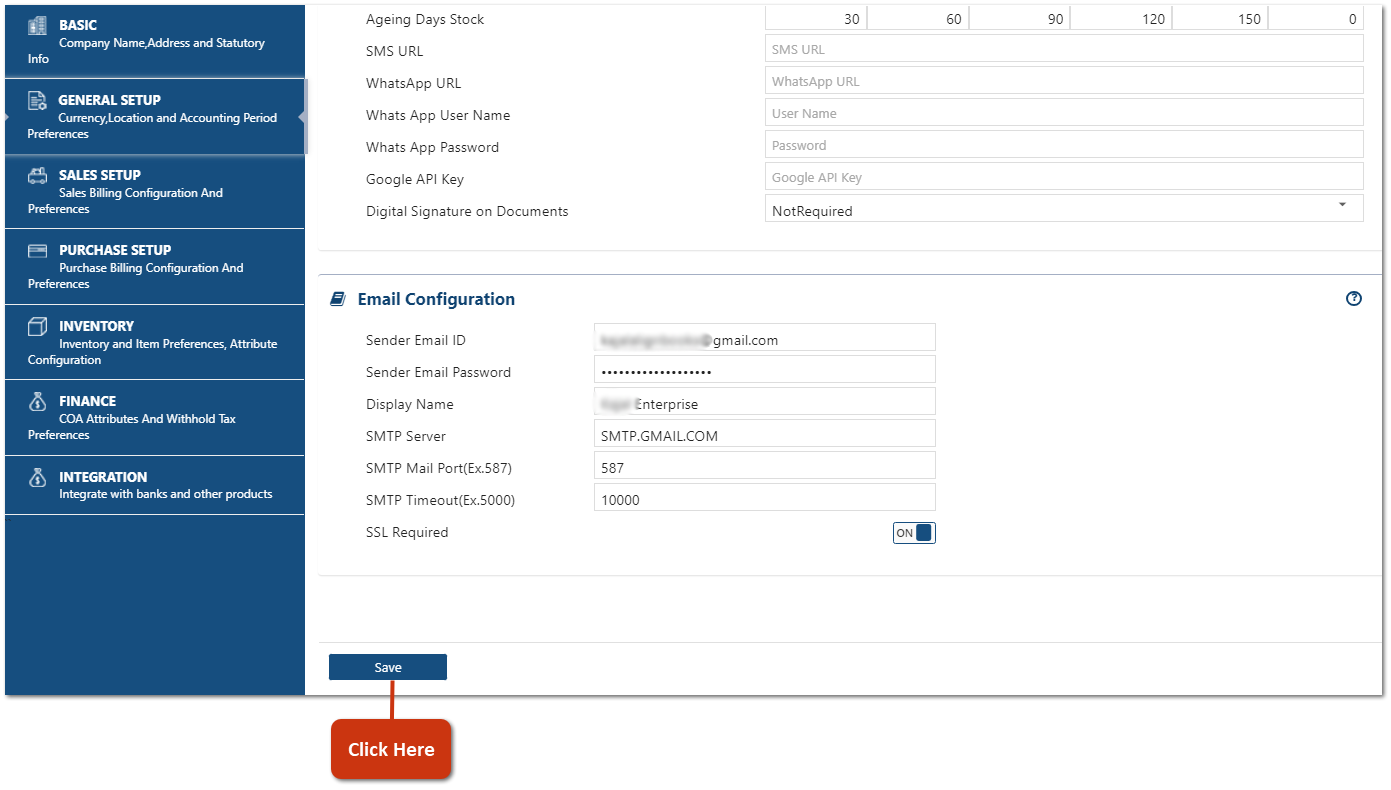
Scroll down the page and you can view the 'Email Configuration'.
-
In 'Sender Email ID', option mention the G-Mail ID via which the Invoices, vouchers you want to send to the customers.
-
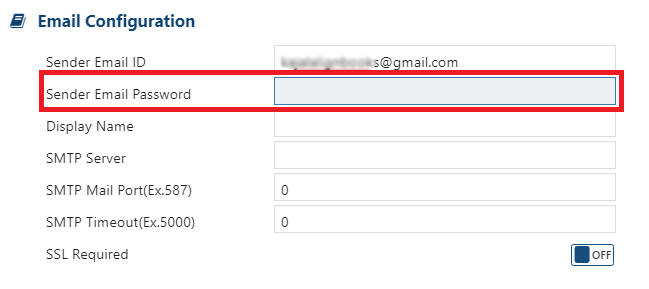
In 'Sender Email Password' option, you need to generate an App password on the Gmail Account instead of mentioning the original password of the Gmail ID.
-
To generate an App password, login to your Gmail account and click on 'Settings' icon.
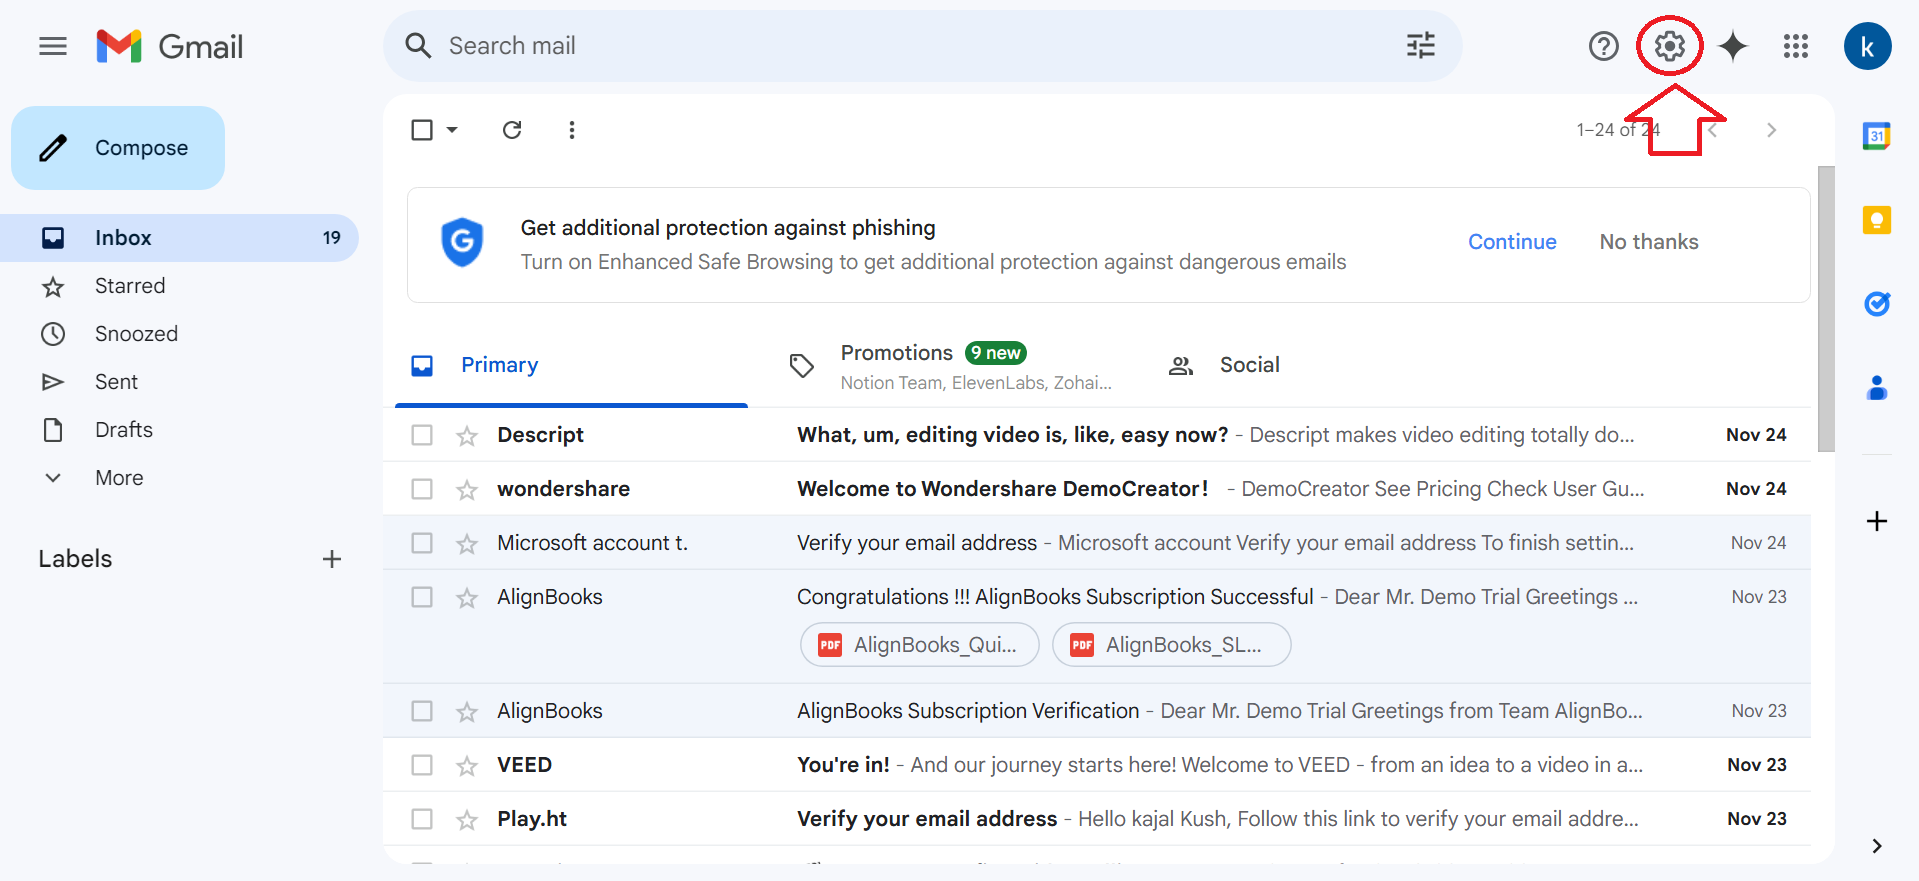
-
Now, click on 'See all Settings' button.
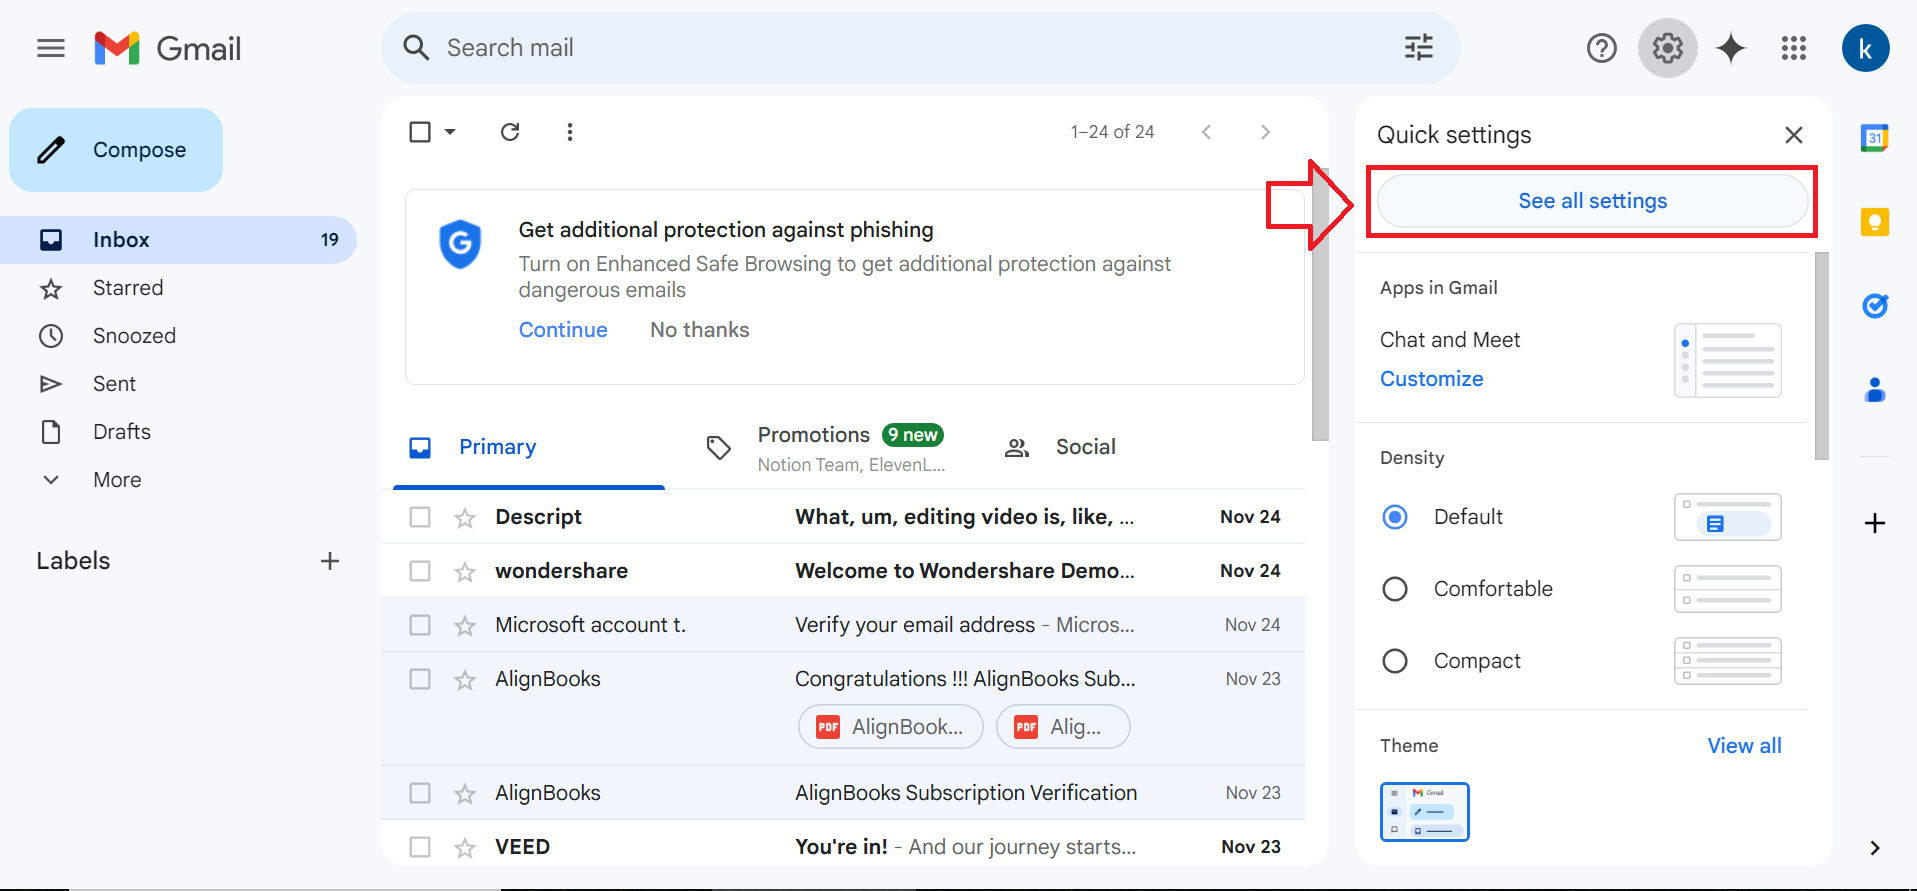
-
Gmail Settings will get display, click on 'Accounts and Import' tab.
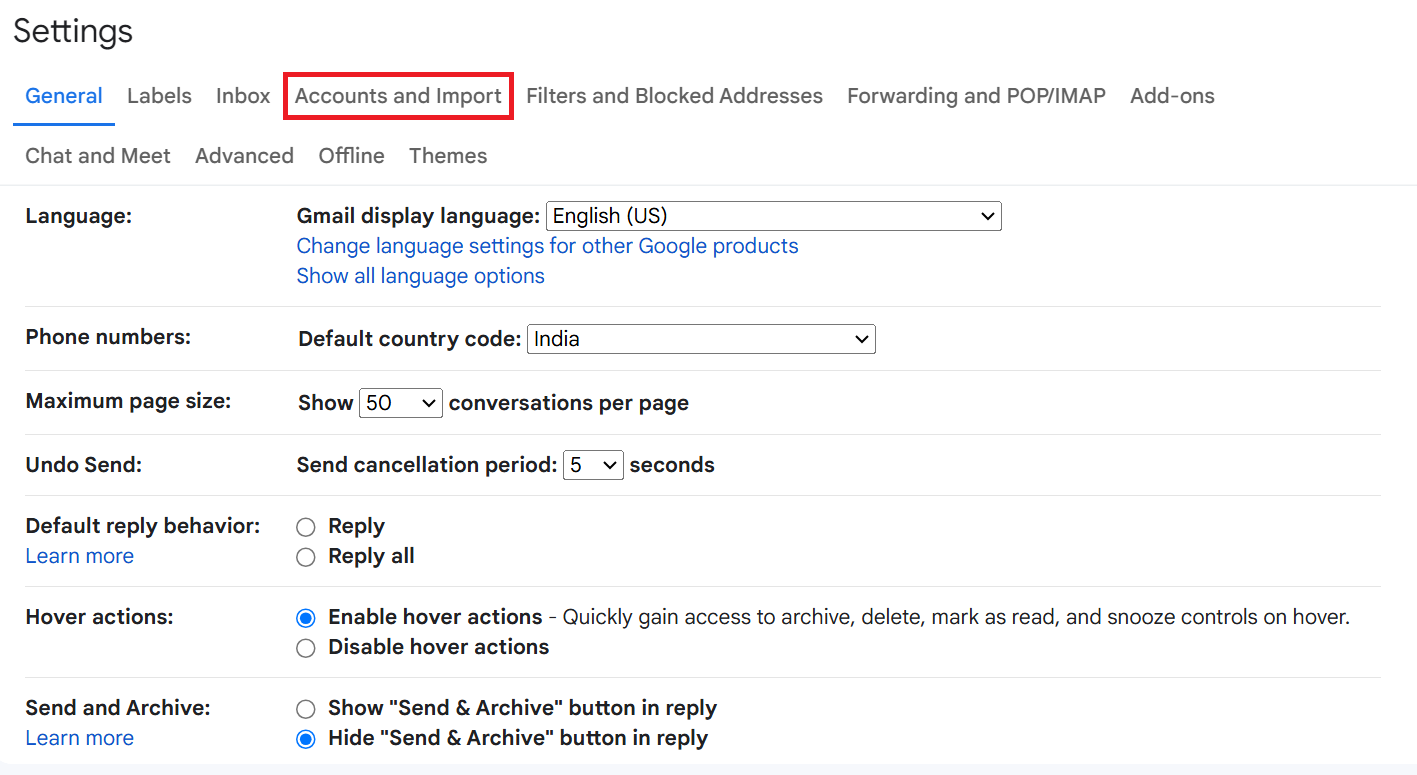
-
In 'Change account Settings', option click on 'Other Google Account Settings'.
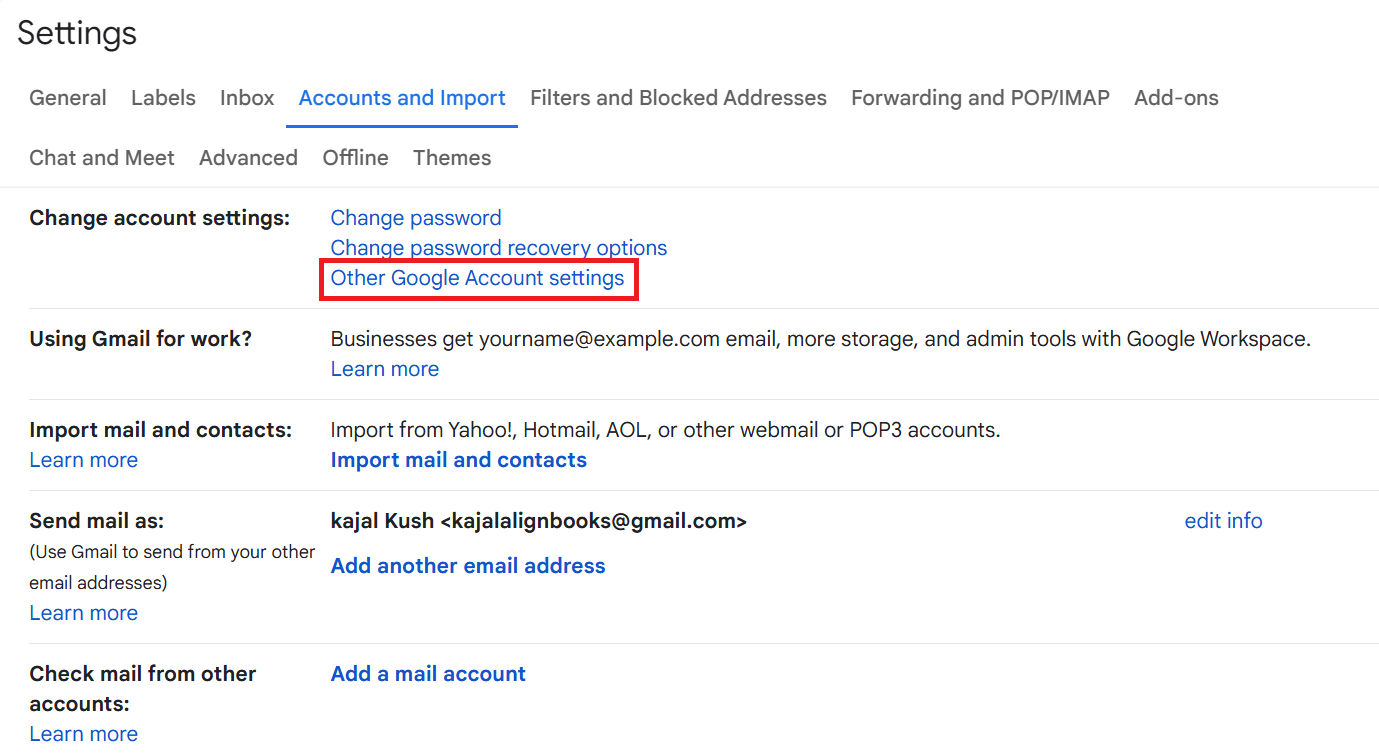
-
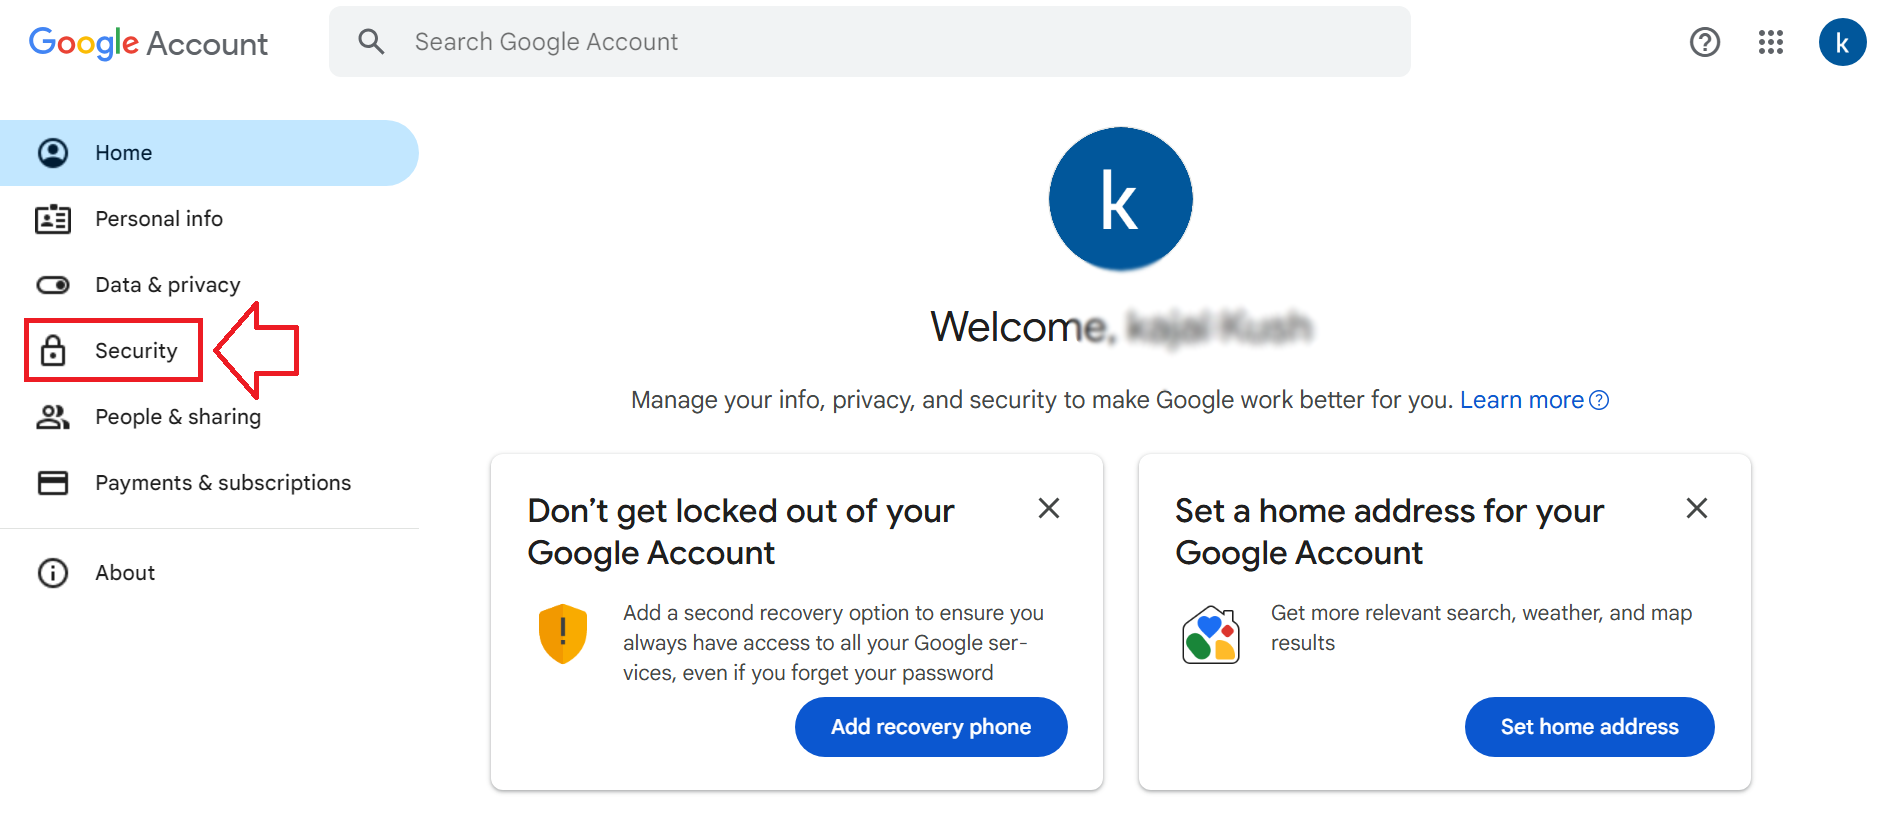
Click on 'Security' Menu.
-
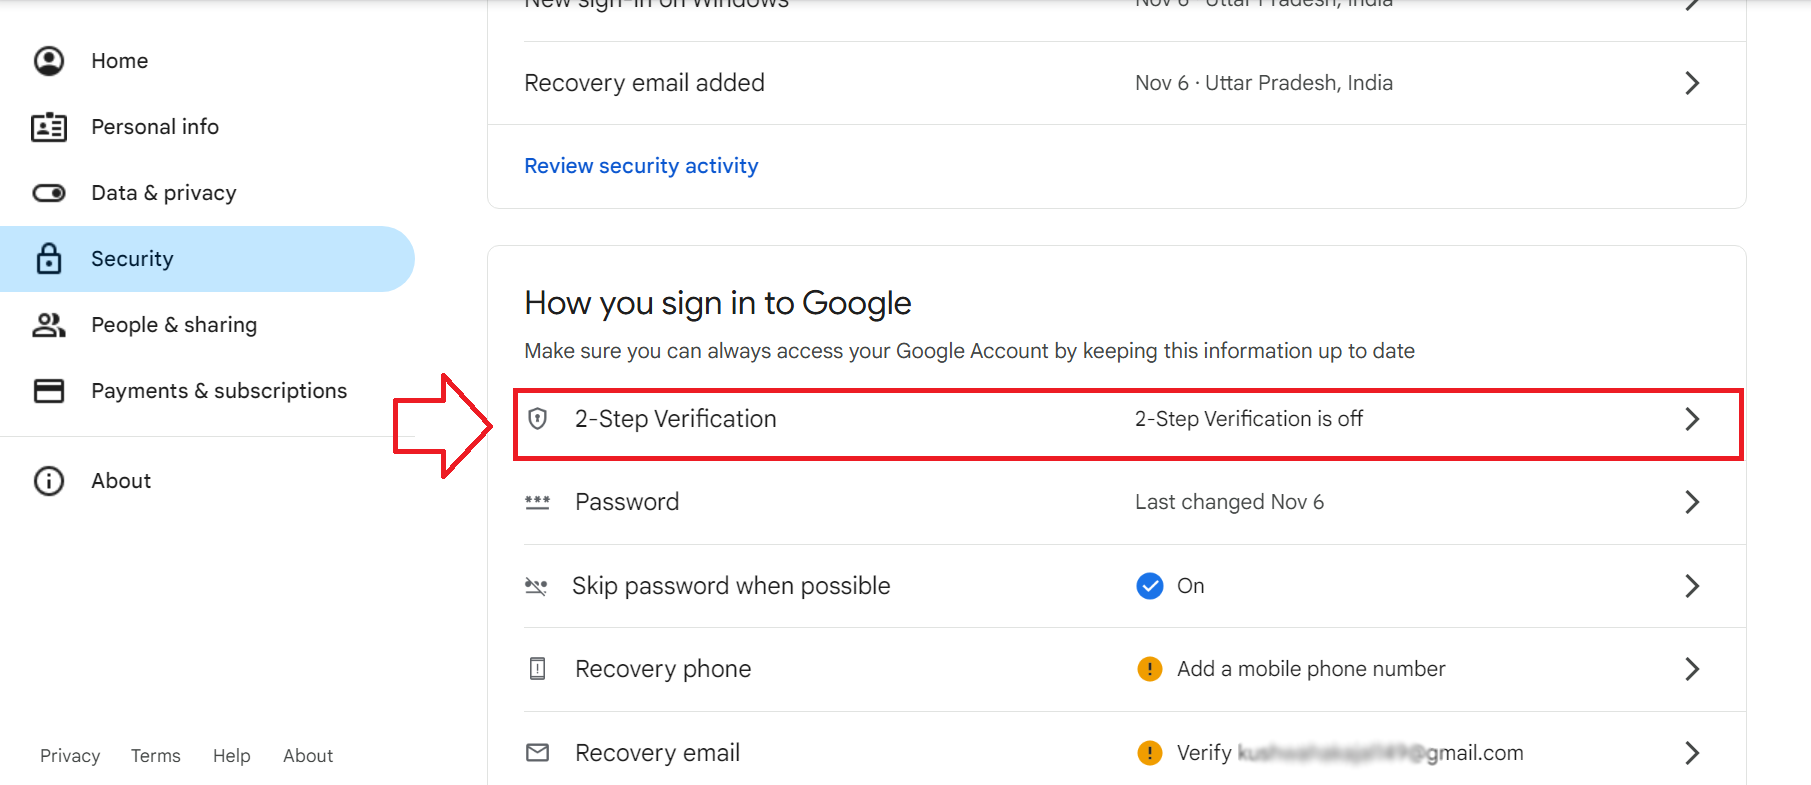
Scroll down the page, first you need to check whether the 2-Step Verification is 'ON' or 'OFF' before generating App Password.
-
As you can view 2-Step Verification is 'OFF', therefore to Turn it 'ON' click on it.
-
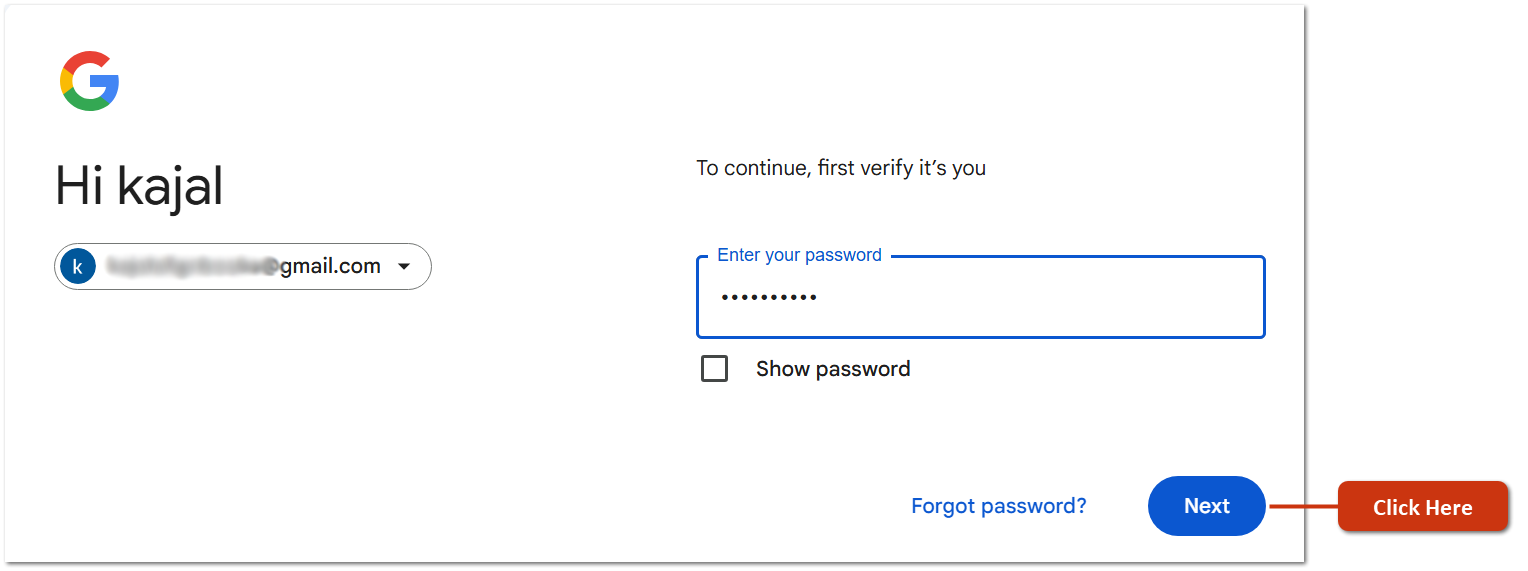
Mention your Password of the Mail ID and click on 'Next' button.
-
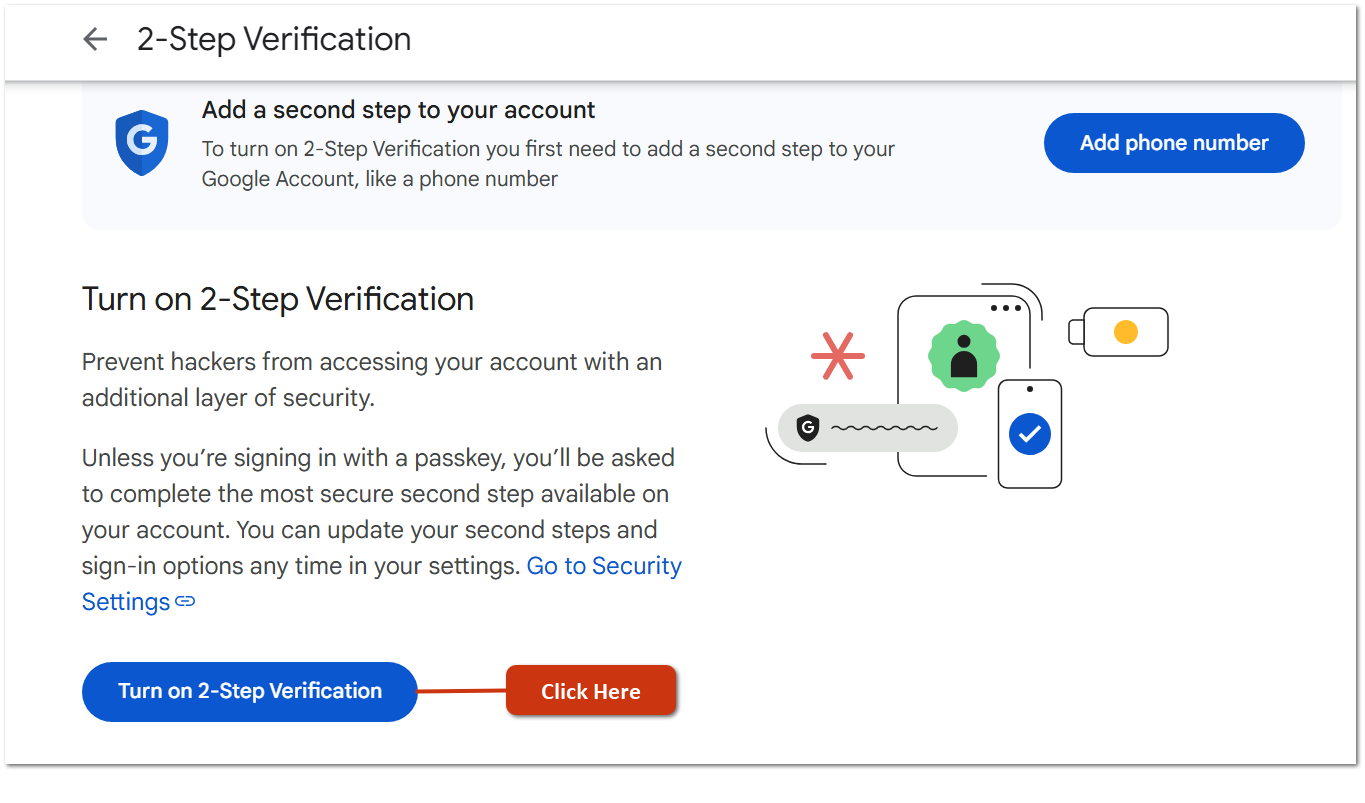
Now you need to click on 'Turn on 2-Step Verification' button.
-
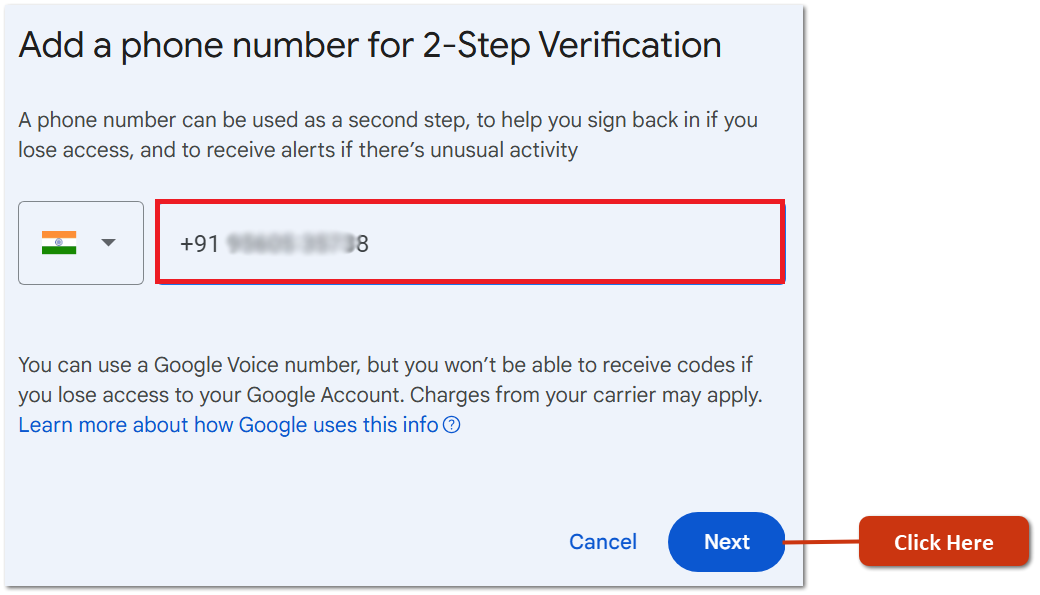
Here, you have to select the country (Mobile code) and mention the 'Mobile Number' that needs to be connect for the Gmail security.
-
Click on 'Next' button.
-
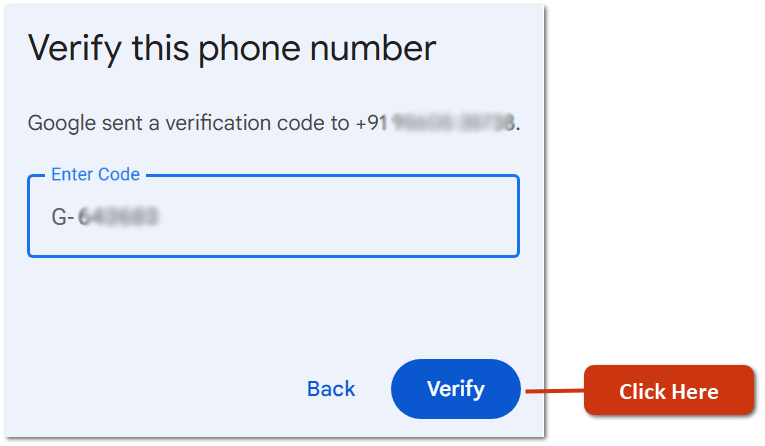
Now you will receive a Verification Code on the mentioned Mobile Number, type the code here and click on 'Verify' button.
-
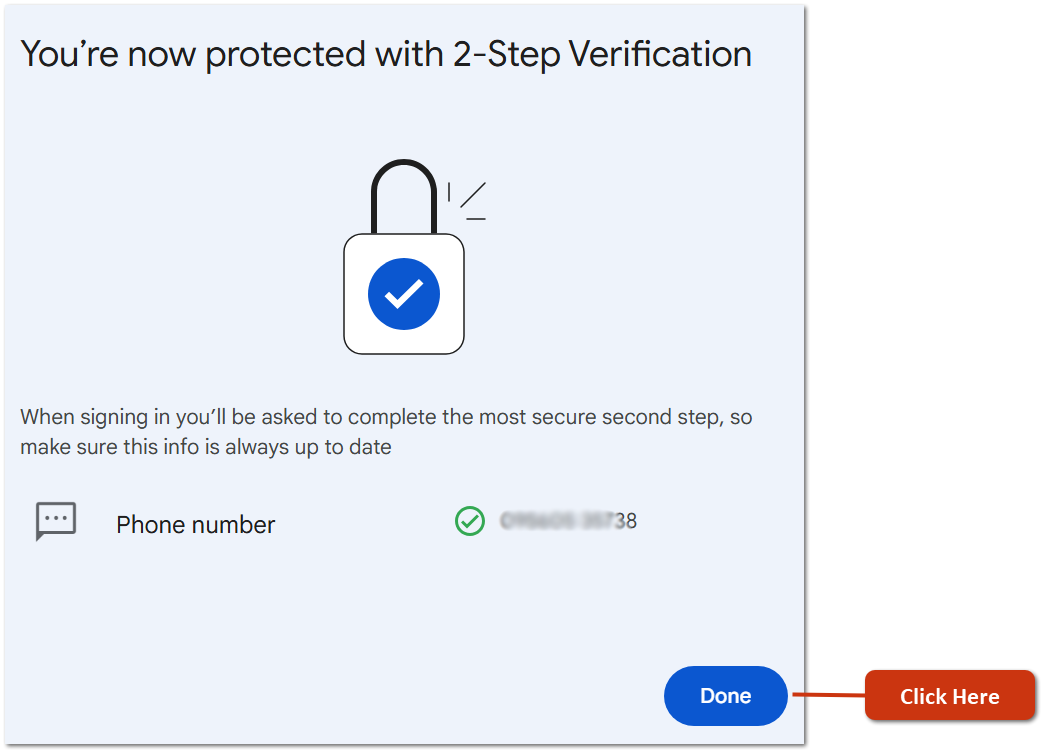
The 2-Step Verification will get completed, click on 'Done'.
-
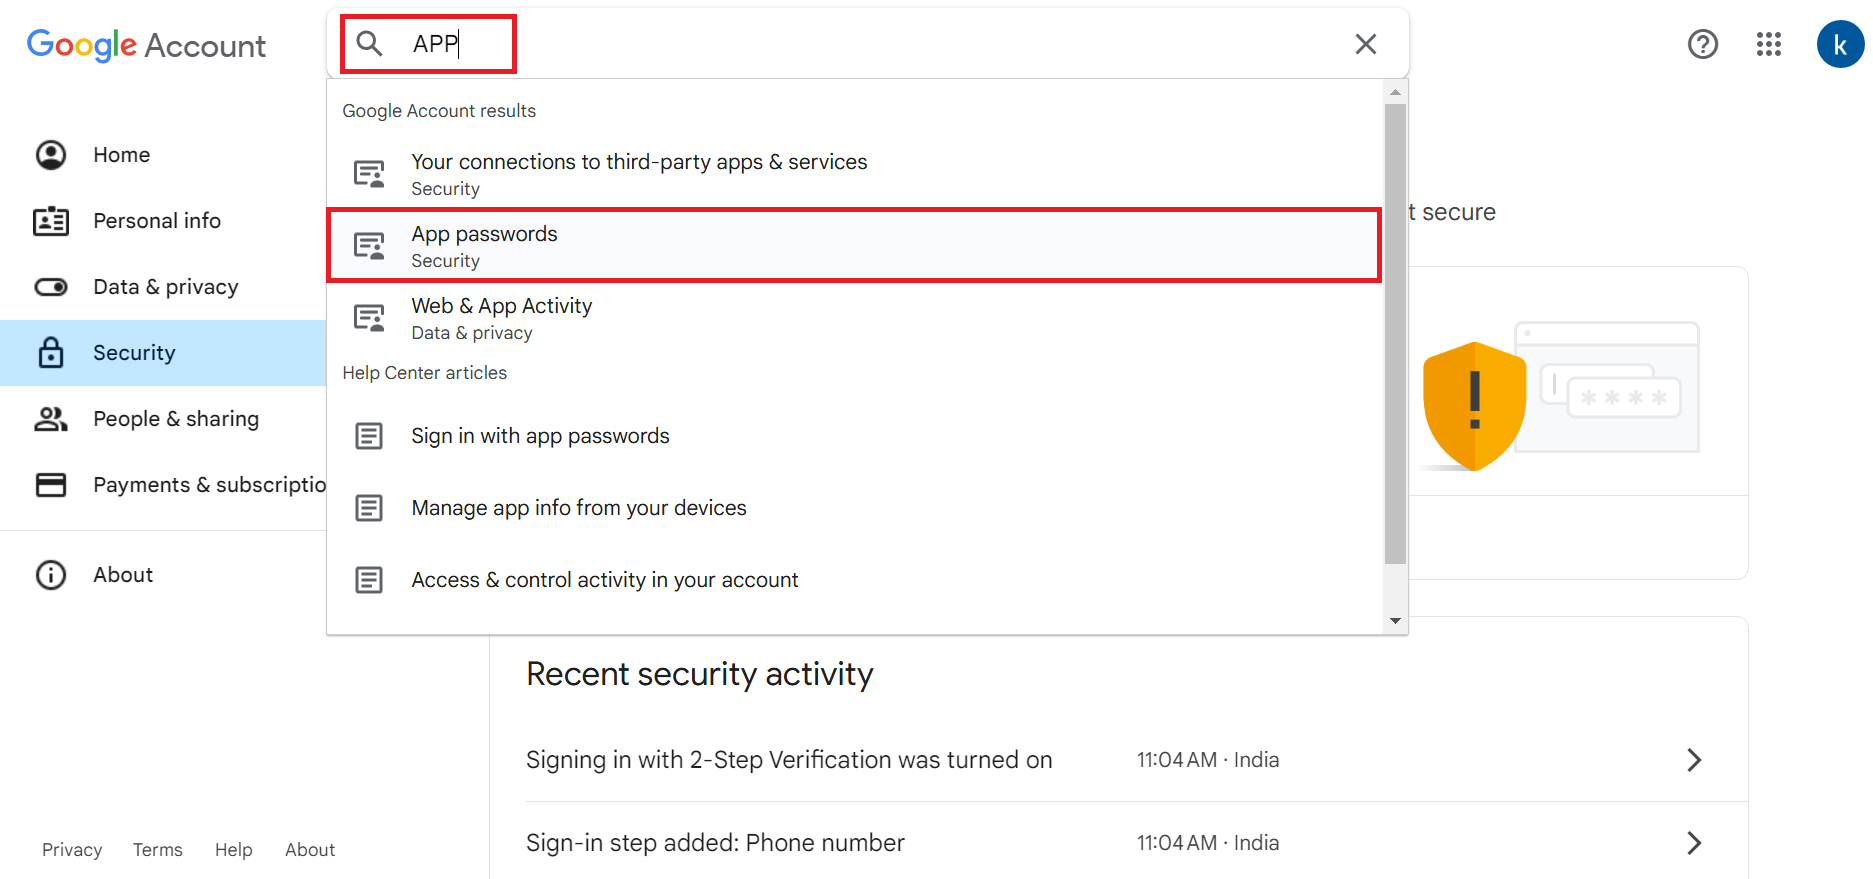
Now again go in 'Security' menu, in search bar you need to search 'App' and click on 'App Passwords' option.
-
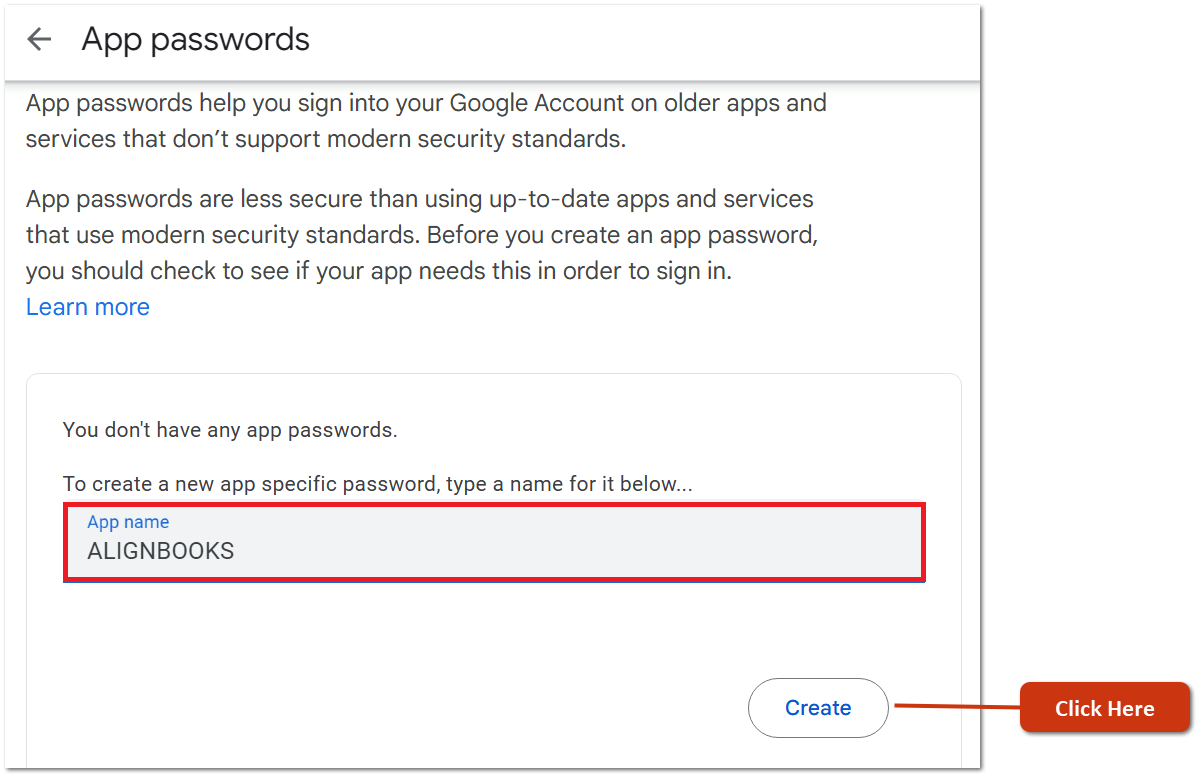
Now you need to mention the software name for which you want to generate the App Password. Therefore, In 'App Name' option, mention 'ALIGNBOOKS' and click on 'Create' button.
-
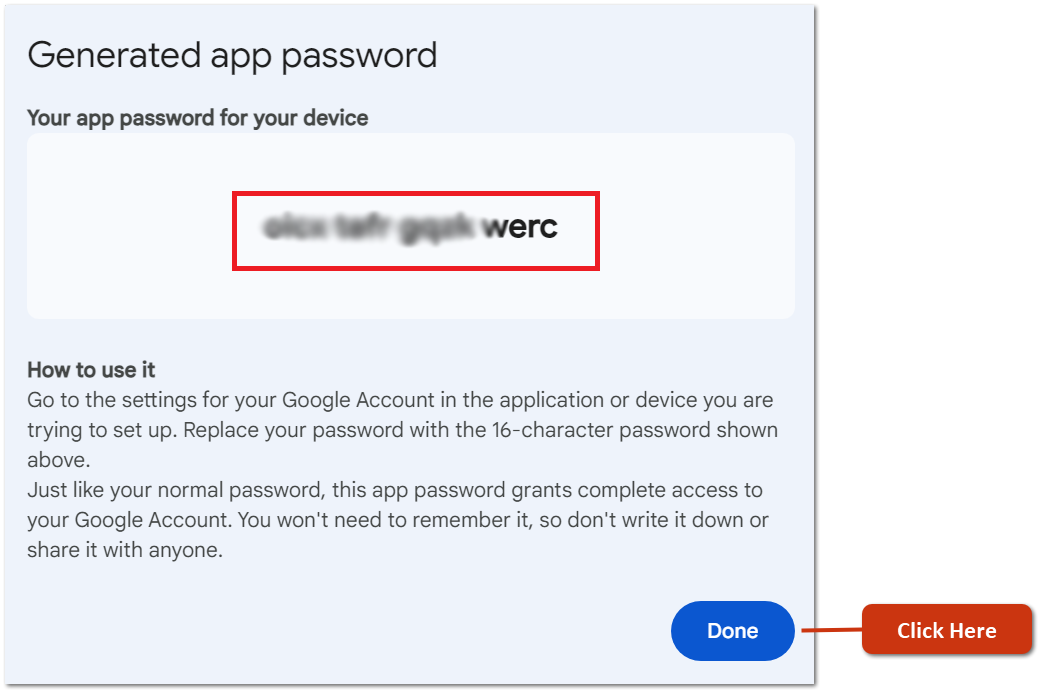
Thereafter, AN app password will get generated, copy the password and click on 'Done' button.
Make sure to copy the password for future reference, as this password only appear once.
|
-
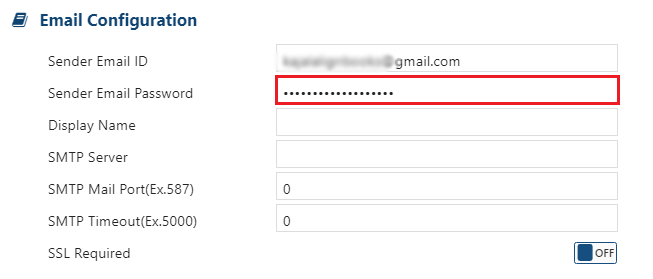
Now again come back to the Software window and paste the copied password here.
-
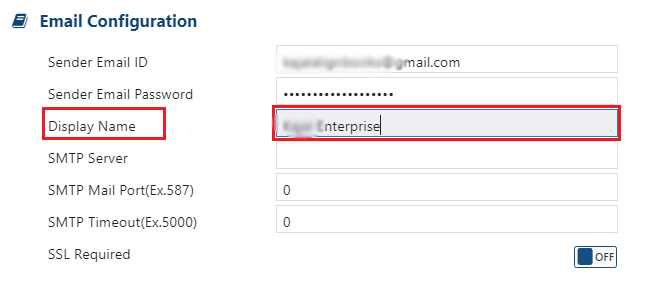
In 'Display Name', mention the name of the company that you want to display on the customer’s side when they receive the Mail.
-
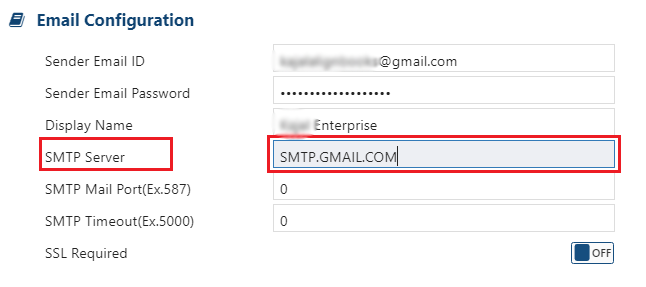
In 'SMTP SERVER' option, mention 'SMTP.GMAIL.COM'.
-
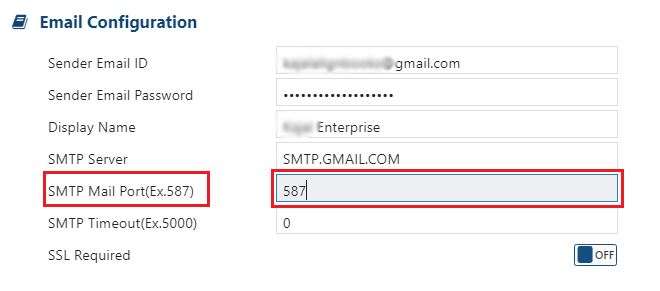
In 'SMTP Mail Port(Ex.587)' option, mention '587'.
For G-Mail, there are 3 ports, that can be mentioned, 587/25/487.
|
-
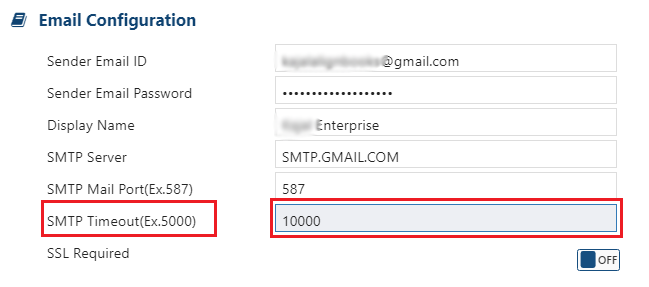
In the 'SMTP Timeout (e.g., 5000)' option, you need to specify the duration for which the system will wait for a response from the SMTP server or for the email operation to complete. If the SMTP server does not respond within this time, the system will mark the email as failed.
-
Usually you should mention '10000' milliseconds [10 Seconds] here.
-
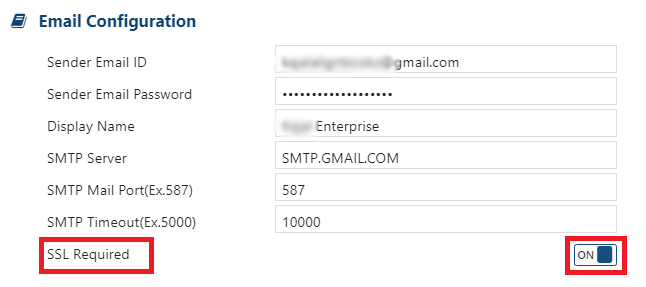
In 'SSL Required' option, Turn it 'ON'.
-
Now click on 'Save' button to save the changes.
-
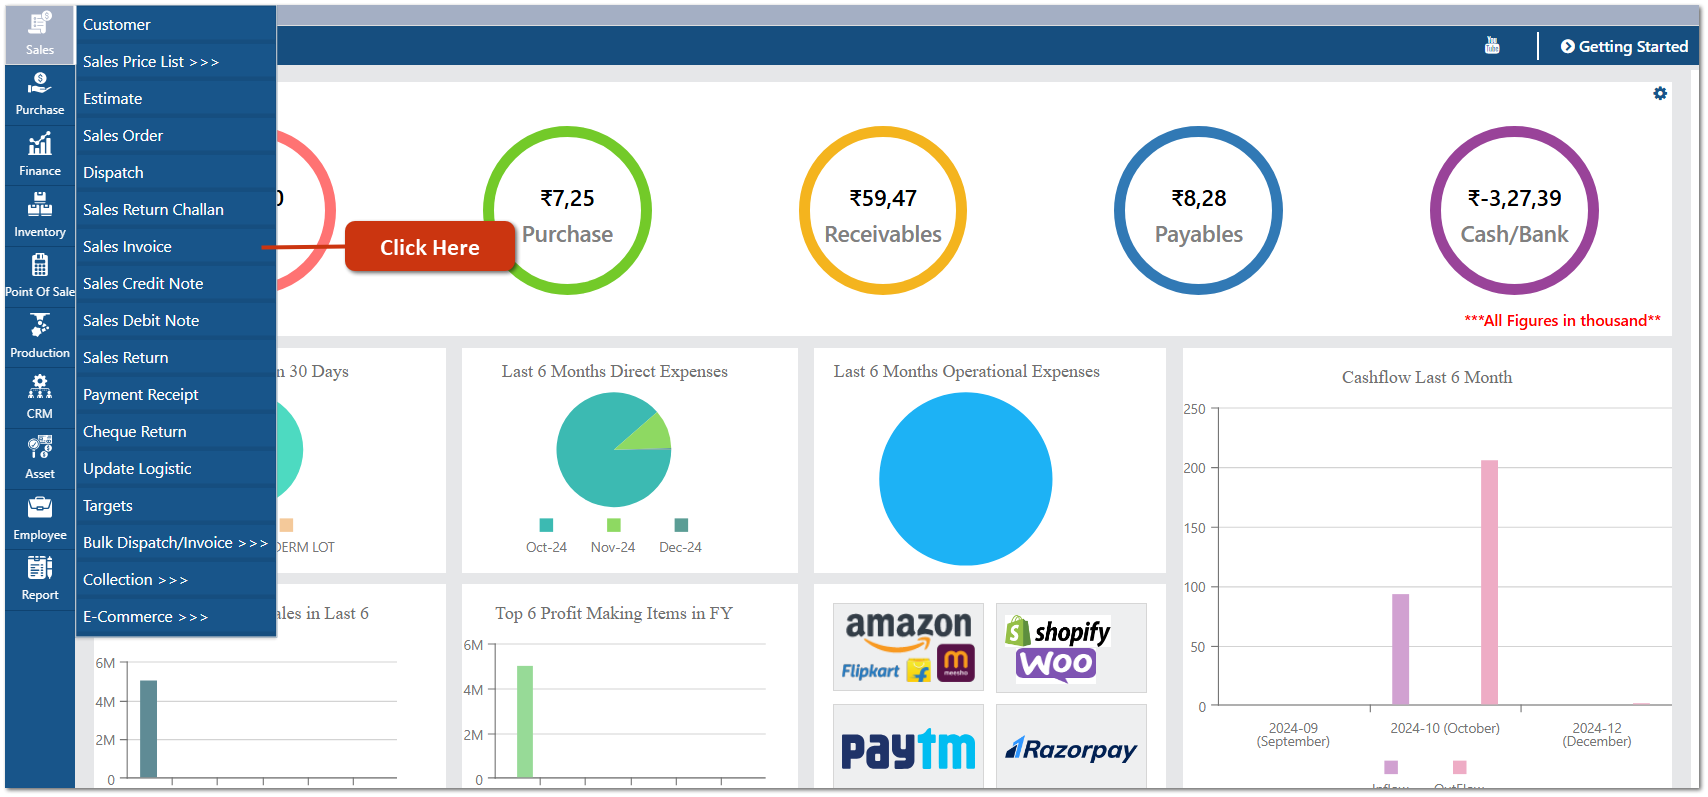
Suppose, you want to send Sale Invoices to the customers. Therefore go to Sale > Sale Invoice.
-
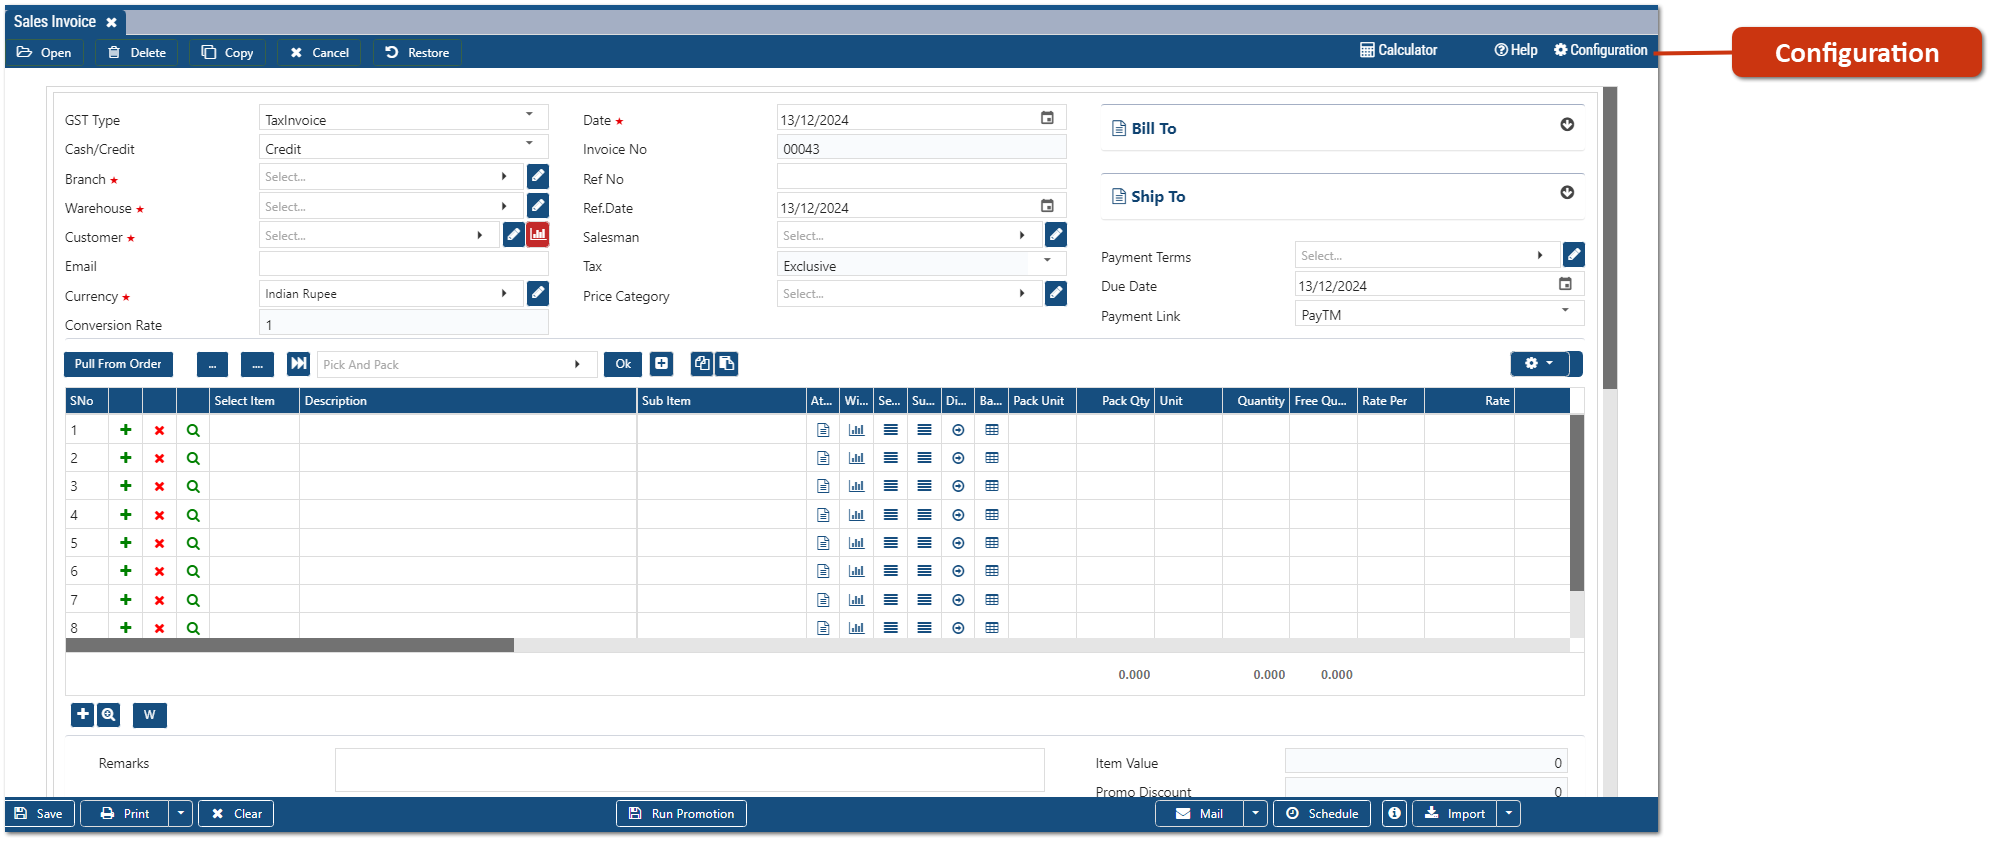
Click on 'Configuration' option.
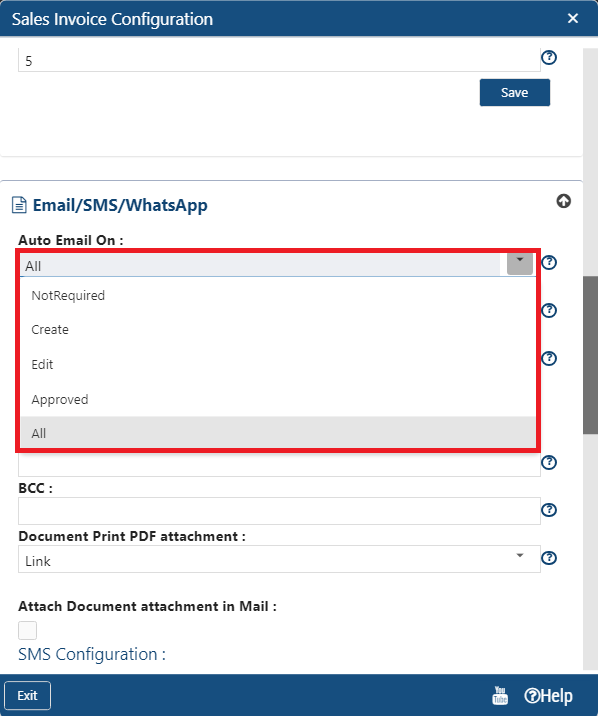
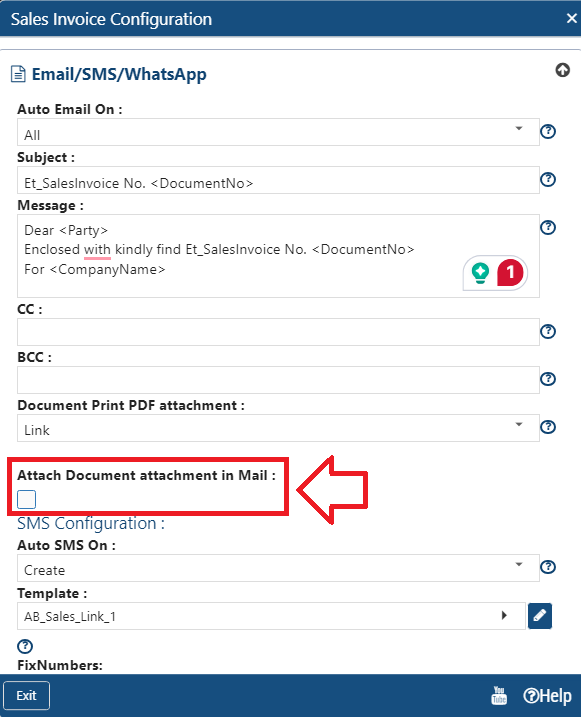
In 'Auto Email On' option, you need to select the option as per the requirement.
-
Create: Select this option, if you need to send the mail after the new creation of the invoice.
-
Edit: Select this option, if needs to send the mail after any modification in the invoice.
-
Approved: In many scenarios, after the invoice creation Manager approves the invoice for further process or payments. If you want to send the invoice on email only after the approval then select this option.
-
All: Select this option, if needs to send the mail at each level of the invoice whether Creation, Modification, and Approval.
Suppose select 'All'.
-
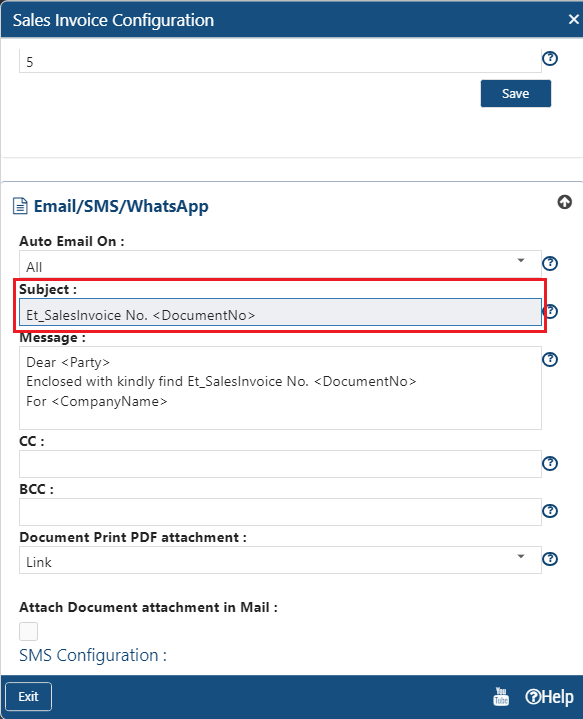
In 'Subject' option, email subject is already mentioned here but if you want to change it you can do so.
-
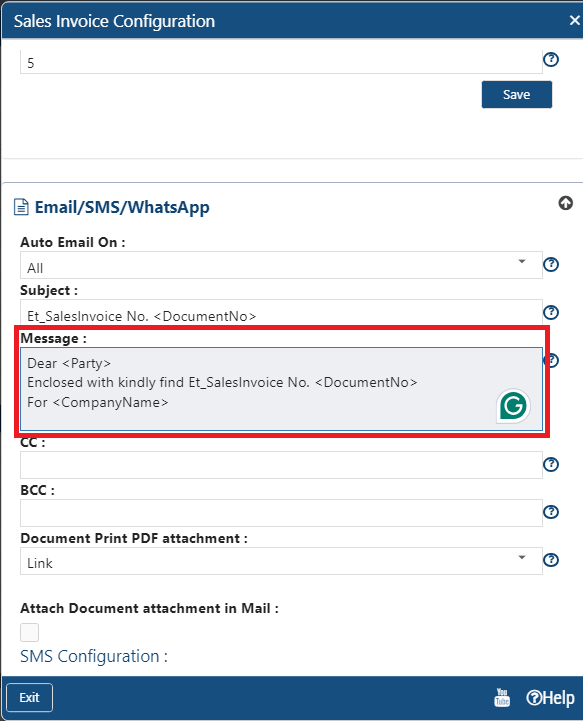
Similarly, in 'Message' option, AlignBooks has already provided a pre-configured format of message. You can change it as per your requirement.
-
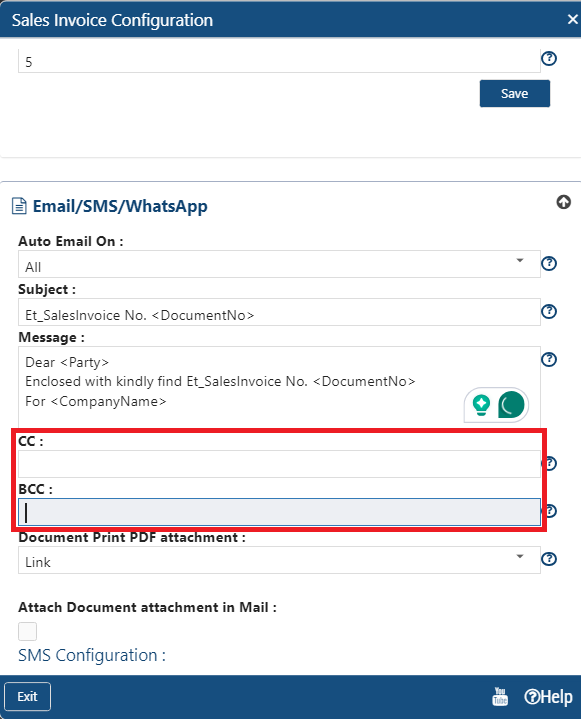
If you want the invoices sharing on email also needs to be shared with any other person or owner then you can Add the Emails on 'CC' or 'BCC' as required.
-
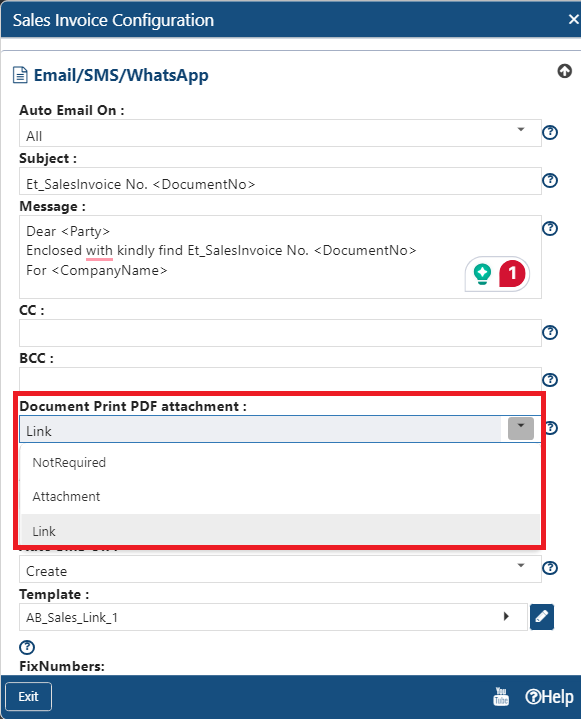
In 'Document Print PDF Attachment' option, you can select whether the PDF of document print needs to be send as an attachment or Link.
-
Suppose select 'Link'.
-
If while creating the document, you have added any attachment in the invoice and the same you wants to send via mail, then tick the check box.
-
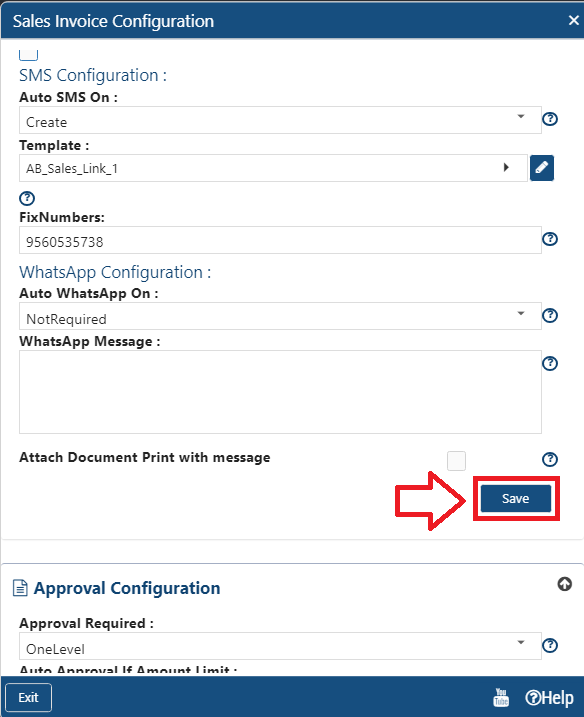
Now, click on 'Save' button to save the changes.
-
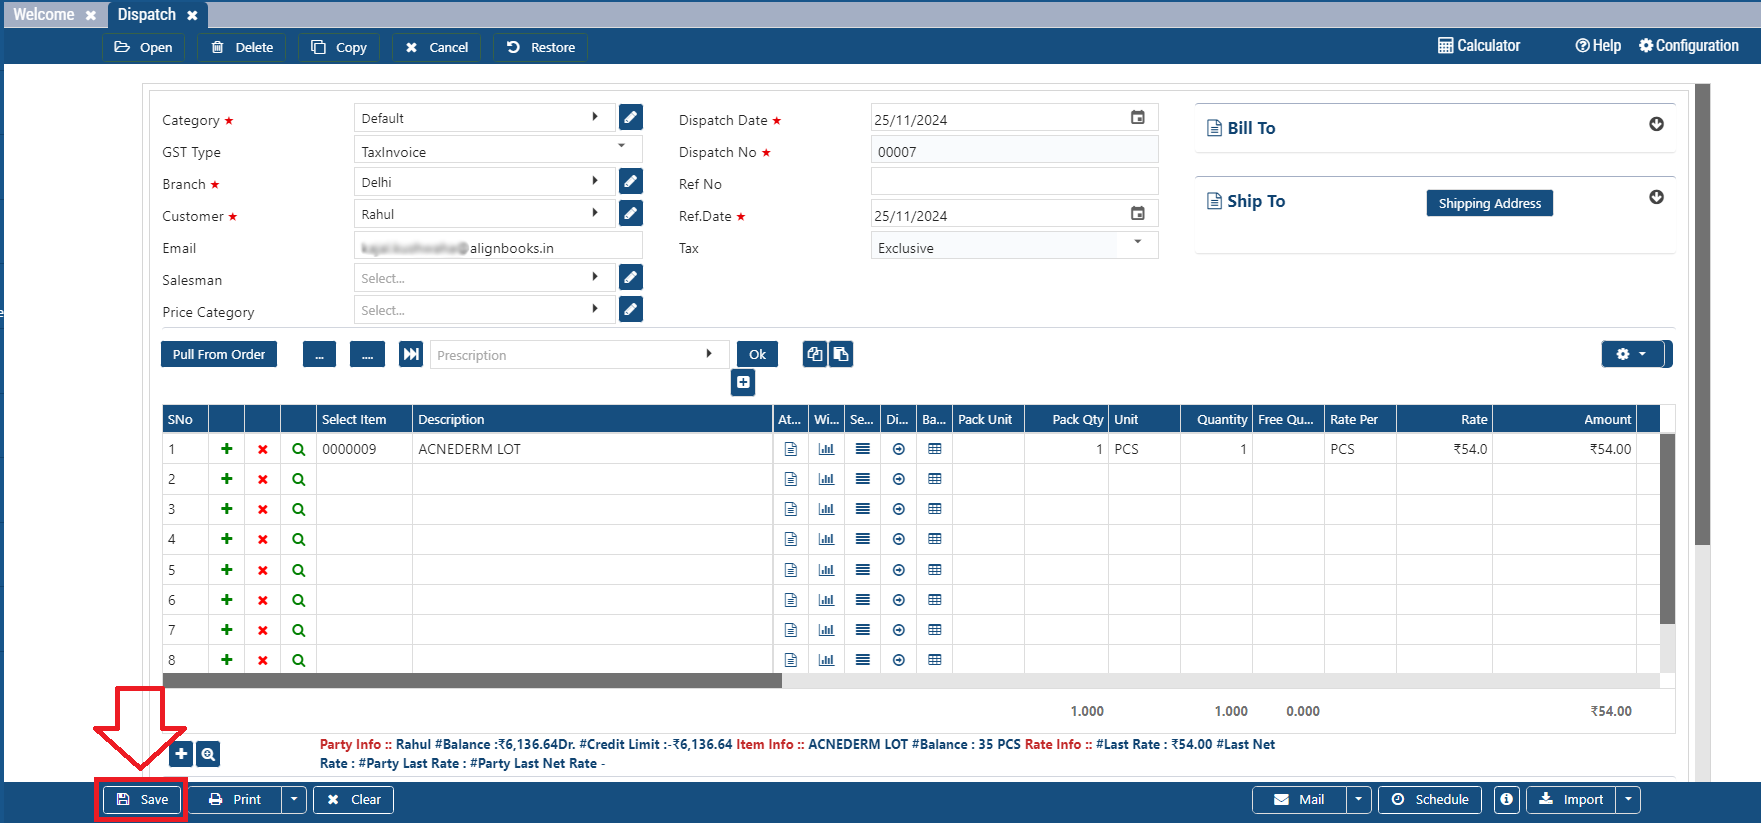
Now, suppose you create a Sale Invoice and click on 'Save' button.
-
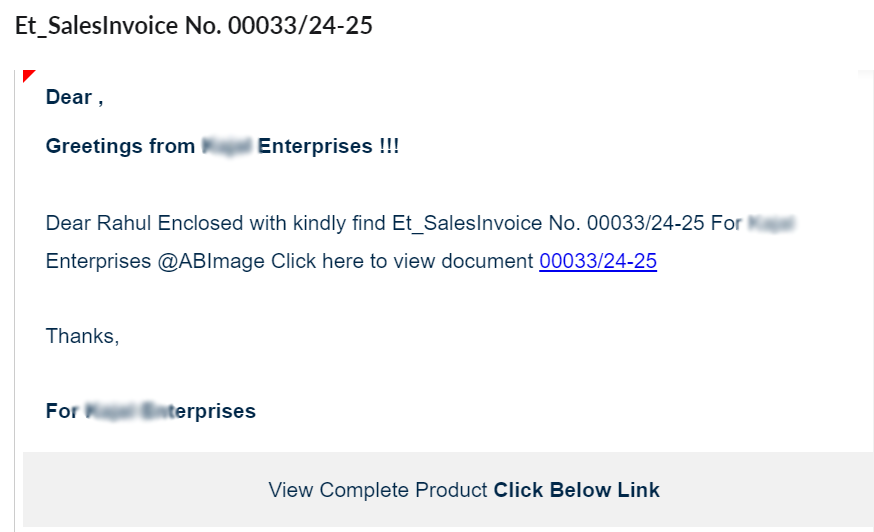
Thereafter, the invoice will get send to the customer, and your customer will receive the email as shown below.
In this way, you can Configure the G-Mail Setup in AlignBooks.