
Customer
The Customer Master is a database that holds all important details about your customers. This includes basic information like their name, address, and contact details, as well as their statutory details (such as tax information) and bank account information.
In AlignBooks, you can easily create a separate profile for each customer, ensuring that all their information is organized in one place. Plus, if you have a large number of customers, AlignBooks also gives you the option to import this information in bulk, making the process quicker and more efficient. This helps you manage your customer data more easily and ensures that you have everything you need for invoicing, payments, and other transactions.
-
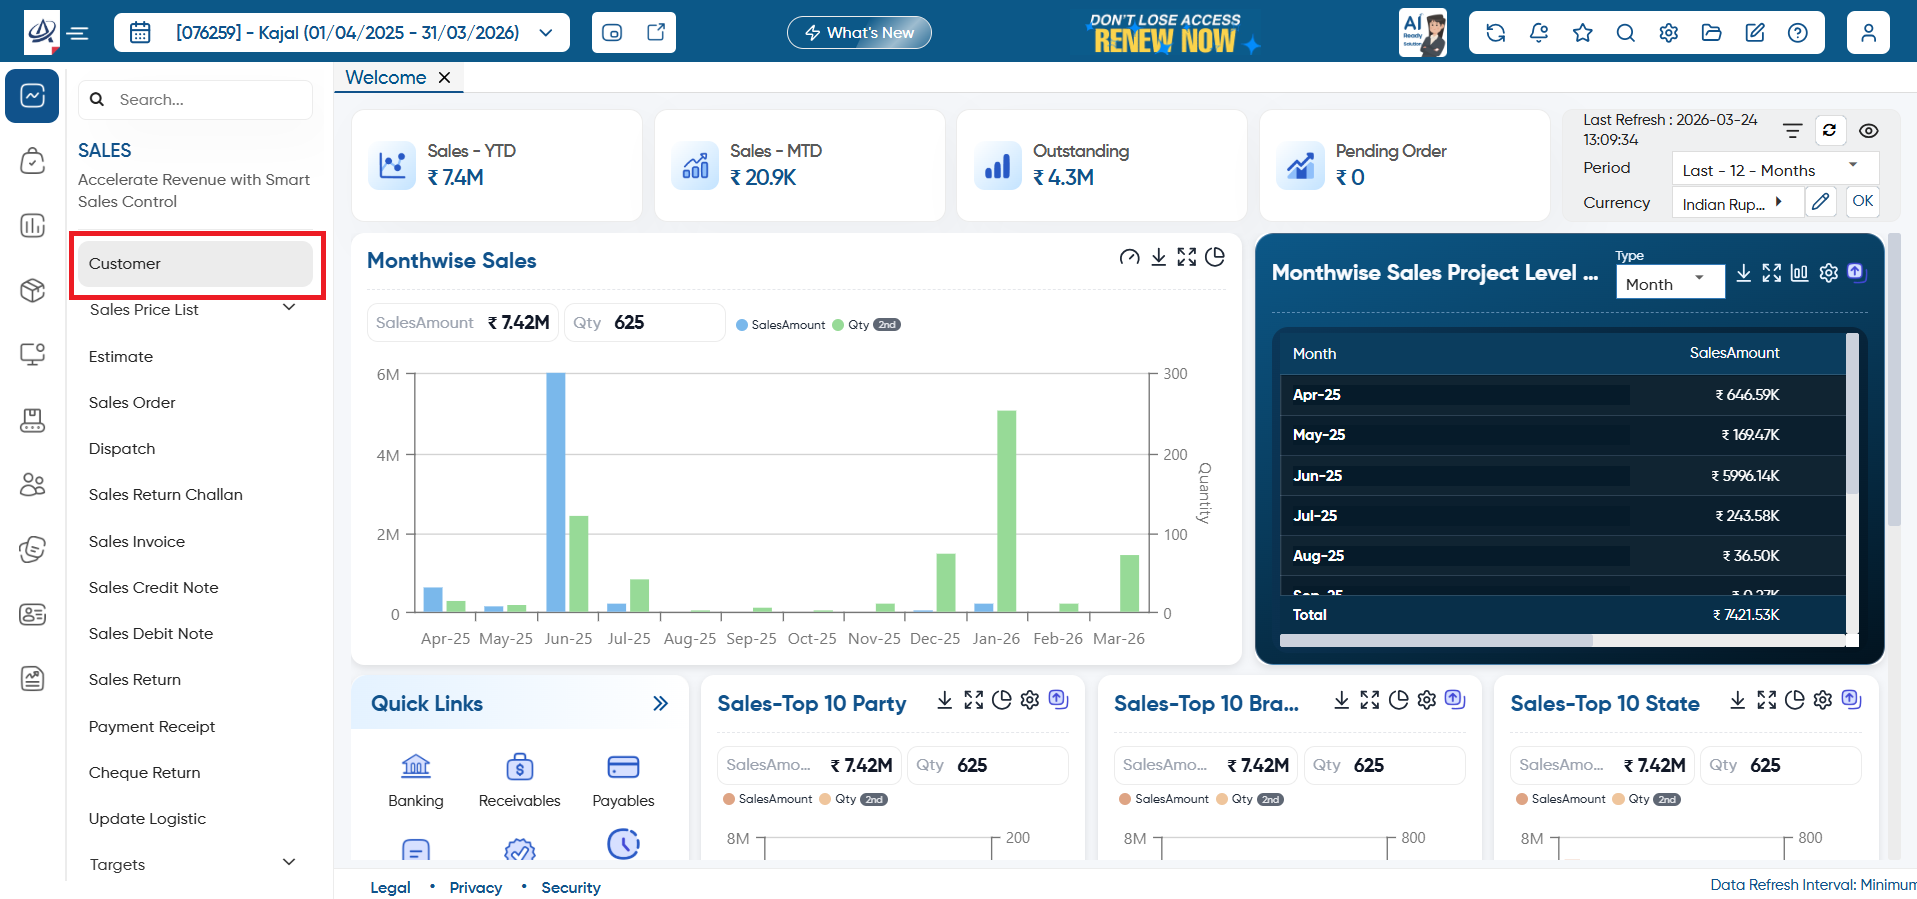
Go to Sales > Customer.
-
Create New Customer: Click on this button to create or add new customer details.
-
Bulk Delete: To delete the multiple masters at once select them (checkbox provided next to the master's name) then click on this button. (Make sure the masters don't have any transaction or data, only then the software will allow you for bulk deletion).
-
Print: To print the master details click on this button.
-
Refresh: After making changes to the master if changes doesn't appear you can refresh the screen. This will display the latest changes on the screen.
-
Help: Click on the help icon to access the step by step guide of the Process.
-
Configuration: Click on the 'Configuration' icon, to fix notifications and approval process for the customer master.
-
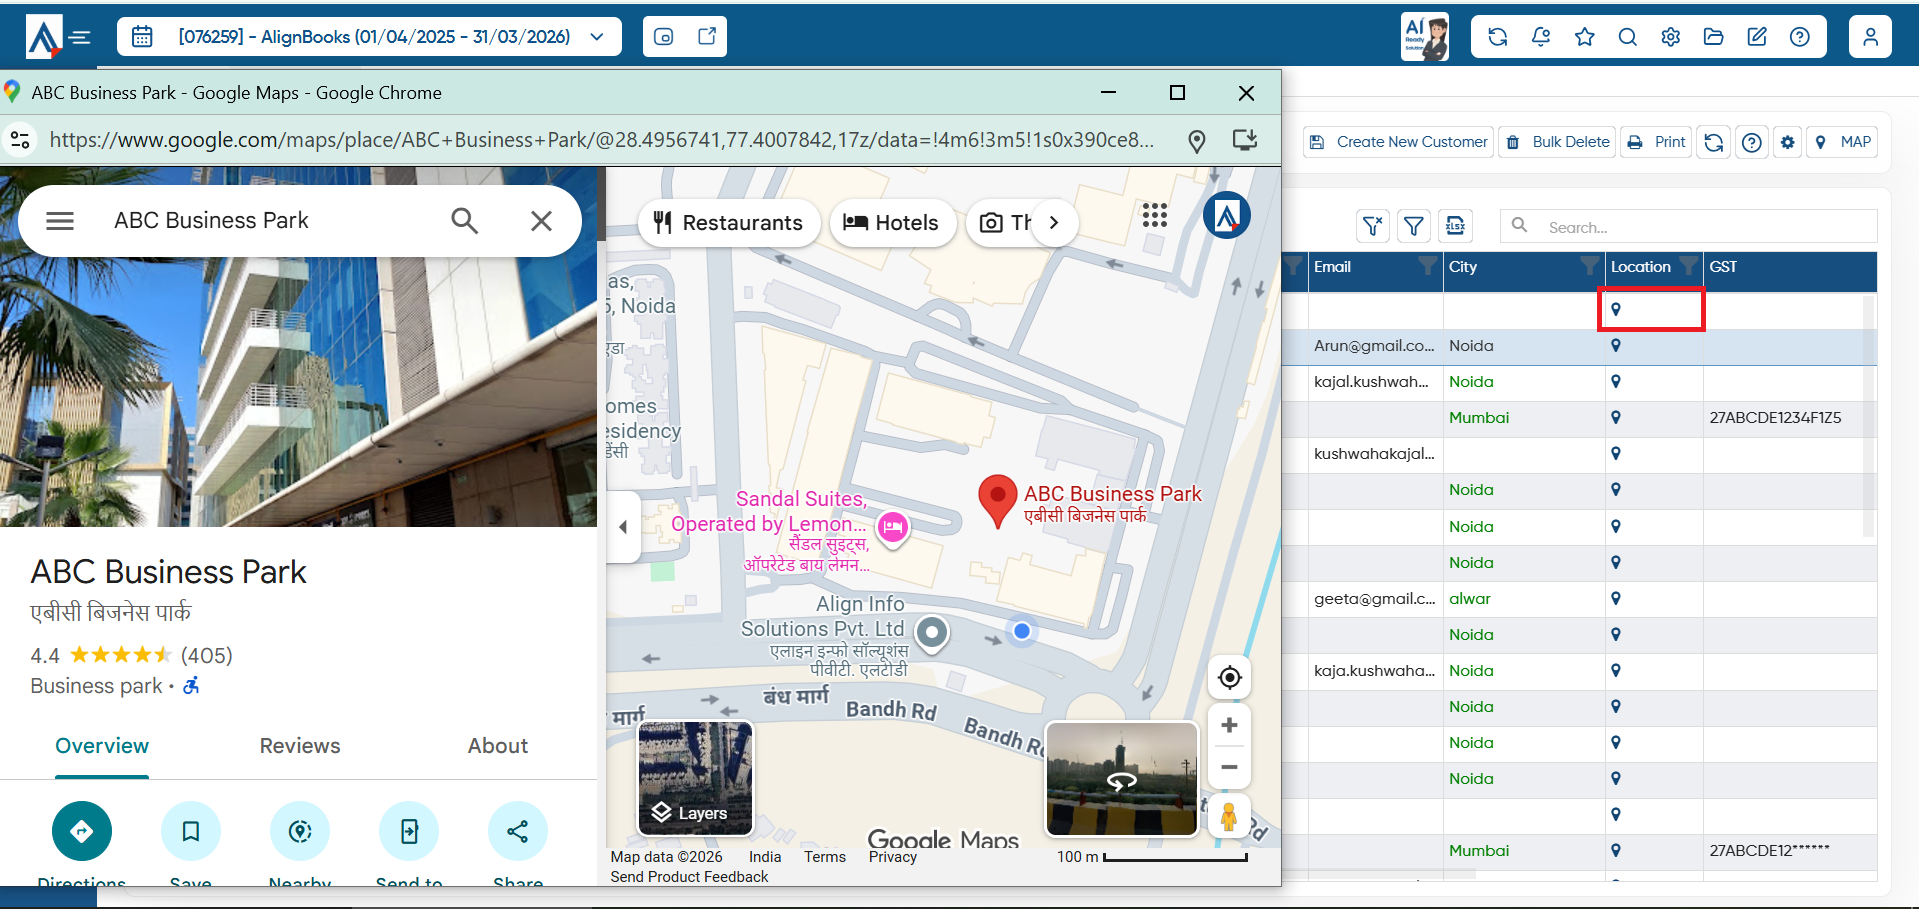
Map: Click on this icon to view the master's location on Google Map. (Latitude and Longitude should be mentioned in the master.)
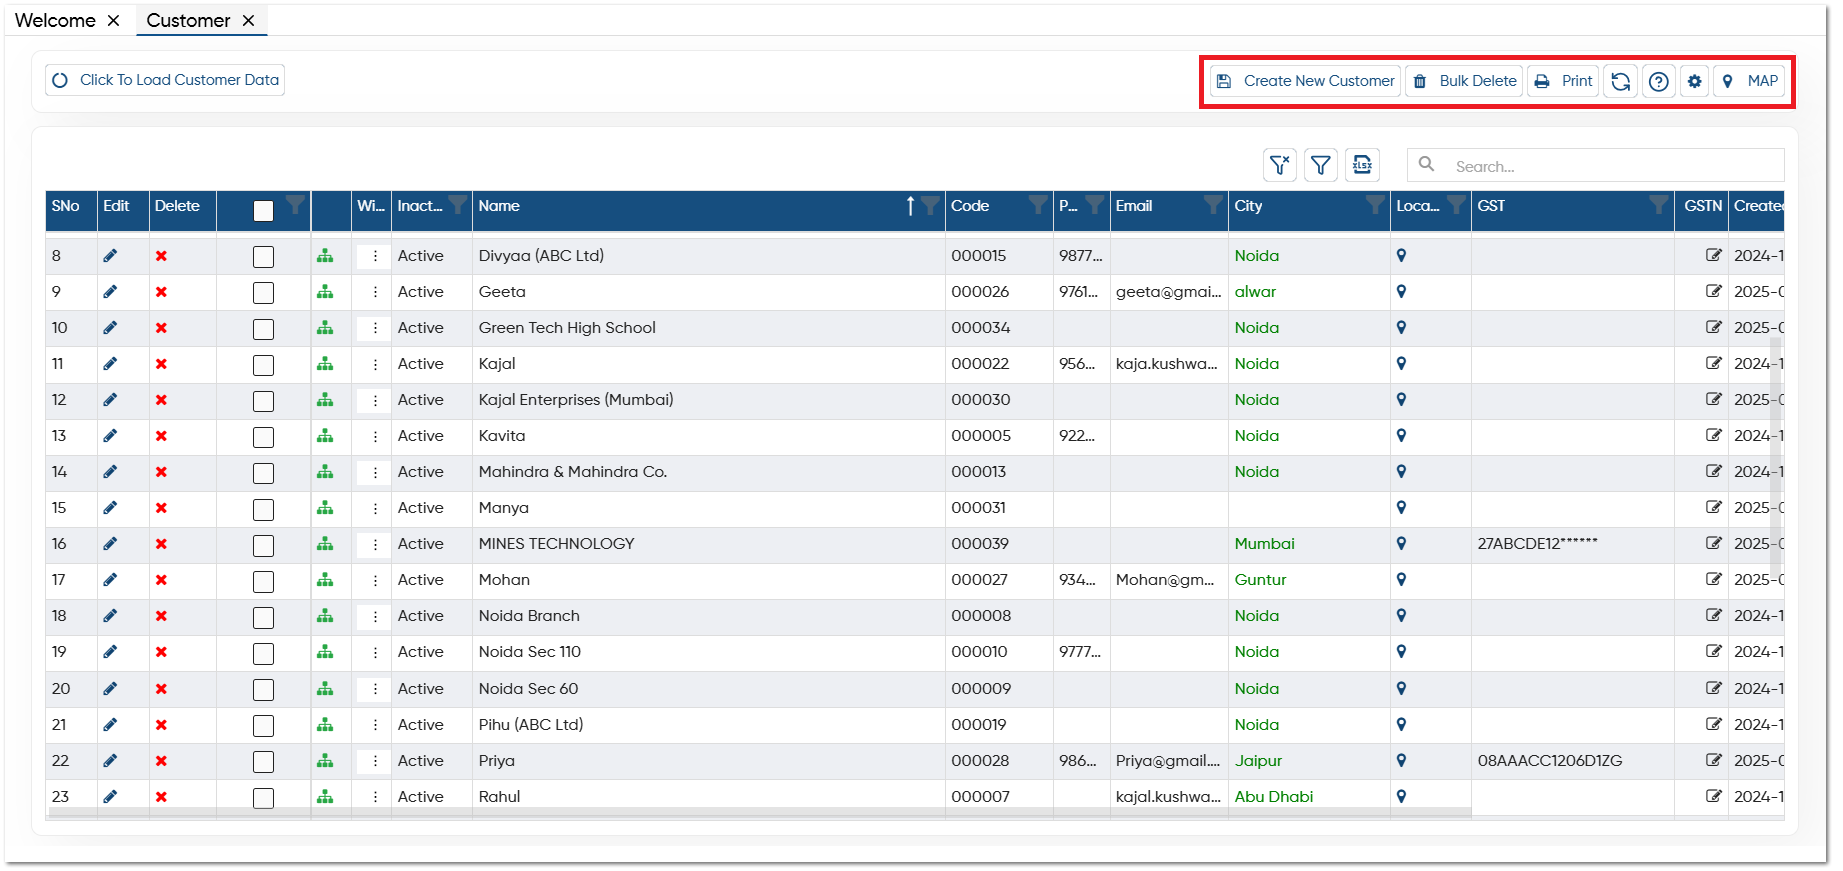
While creating new customer master, you have to mention the following details.
BASIC
-
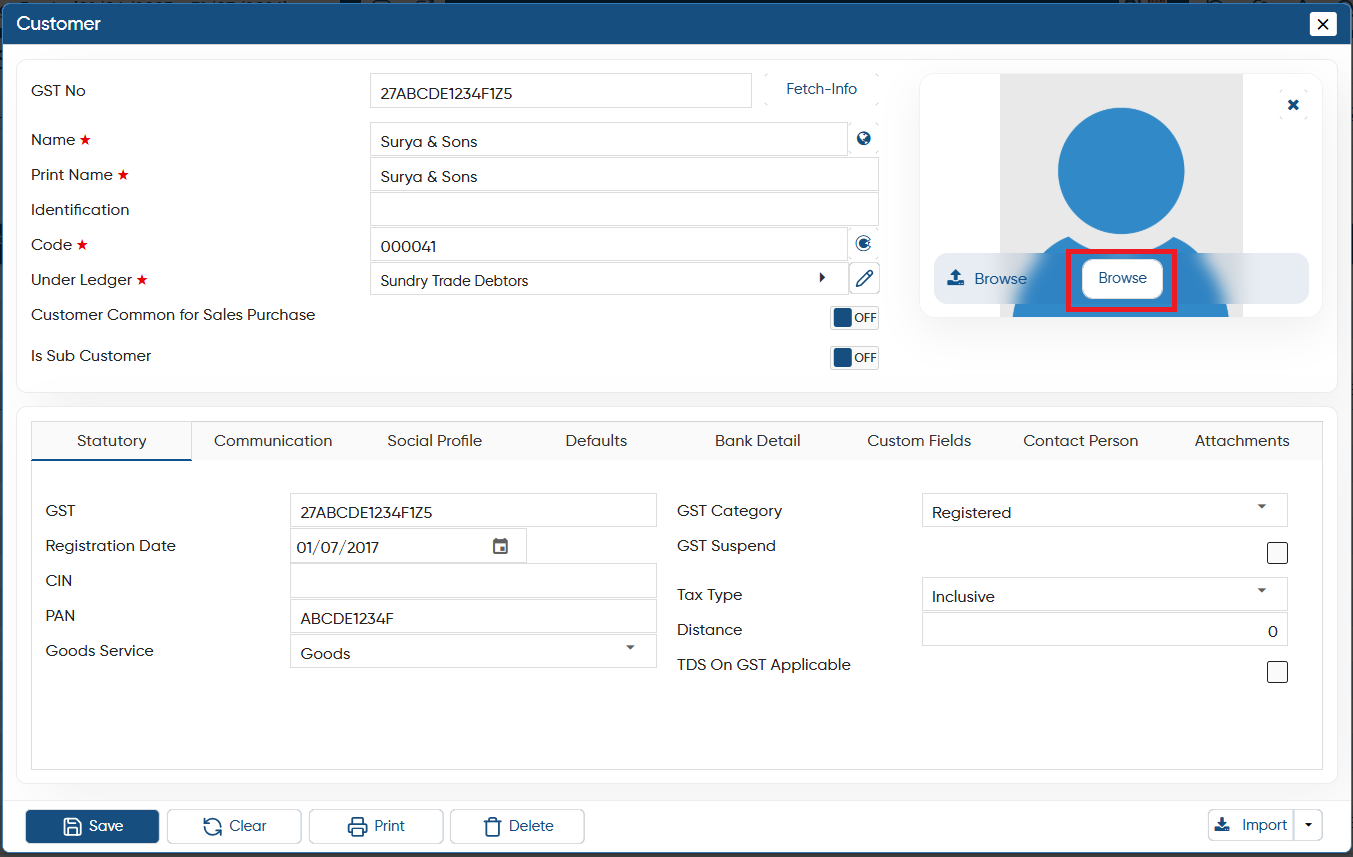
If your party is registered under GST, you can enter the party's GST Number in the provided field and click the 'Fetch Info' button.
-
This option will automatically retrieve all party details, such as Party Name, Address, PAN, etc., from the GST Portal and auto fill them in the Customer Master.
'Fetch-Info' option will only display while creating a New Customer.
|
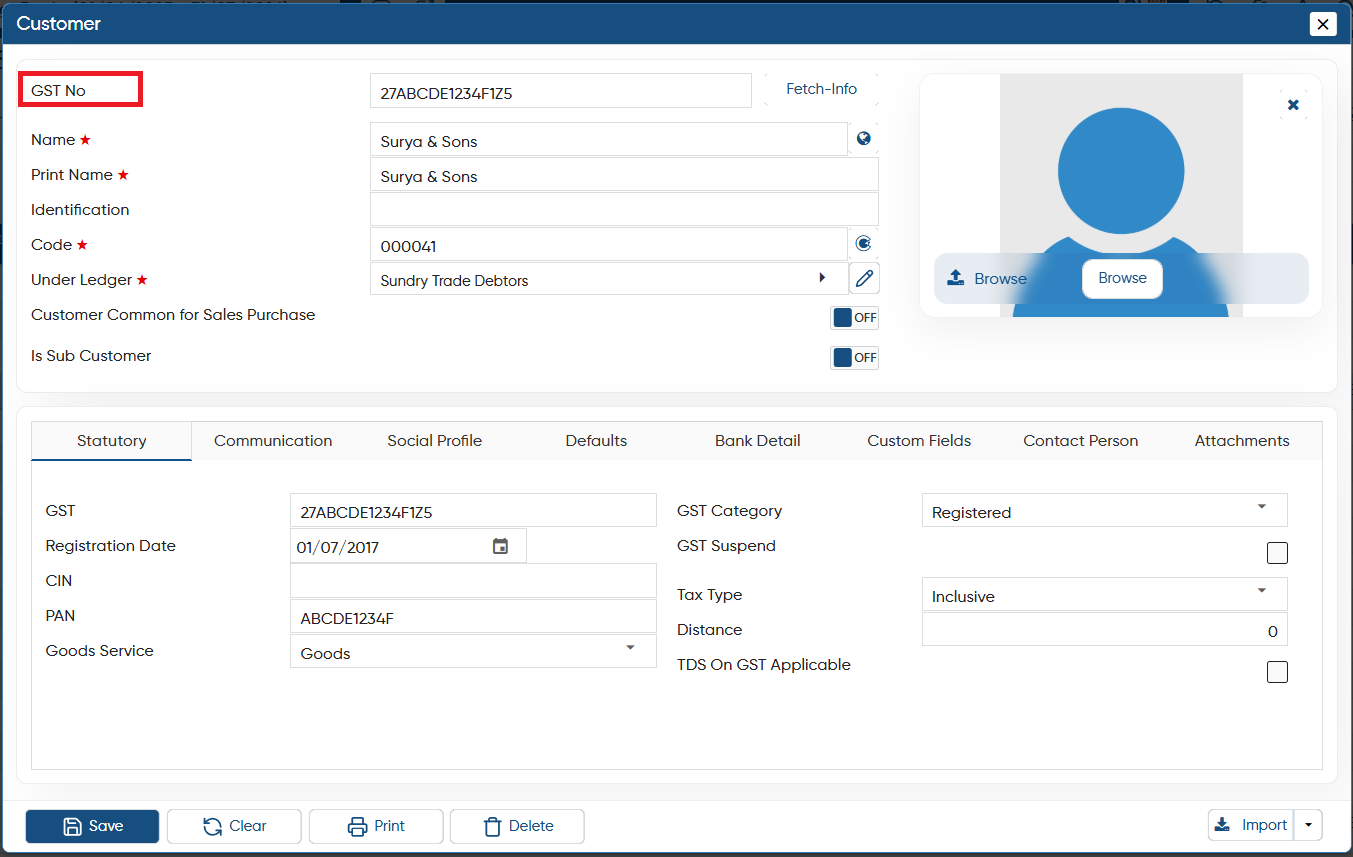
In case your party is not registered under GST, you have to mention the details manually.
-
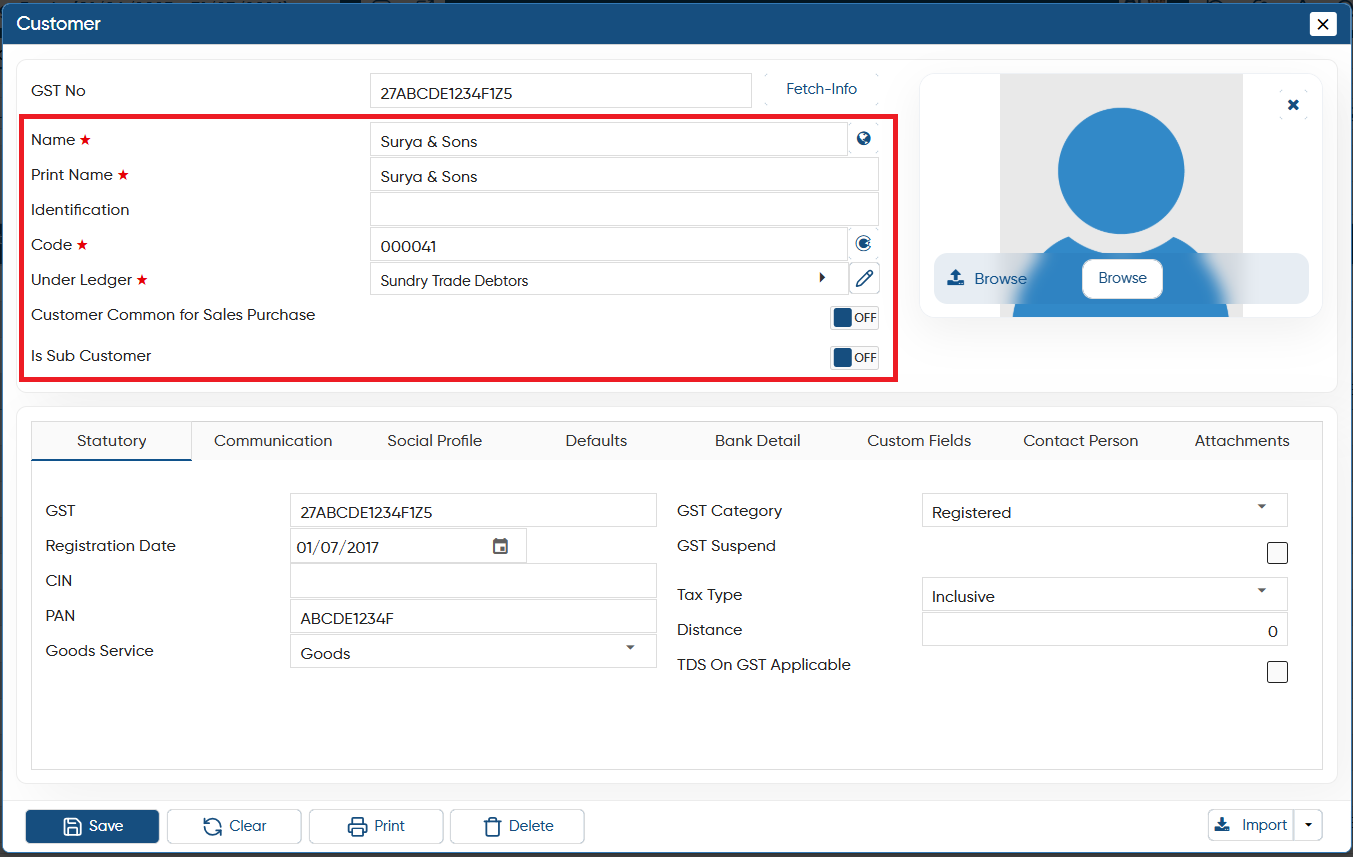
Name: Specify the customer or party name under which you want to maintain their ledger master. This name will be displayed in billing and reports.
-
Print Name: If you prefer to maintain your records under a different name for the party and want a different name to appear on printed documents, you can specify the desired name here for display on the print.
-
Identification: If you want to mention any details for identifying the customer/ party, then you can mention it here.
-
Code: This is a system-generated code. When creating a new customer, the software automatically assigns a unique code series to each customer. You can use this code to search for the customer or party during billing or in reports. You can also mention the code as per your requirement.
-
Under Ledger: Select the accounting group under which you need to group the customer or party. If required Group is not available you can also create it by click on '+' icon.
-
Customer Common for Sales Purchase: Sometimes, the party you are dealing with can act as both a customer and a supplier, meaning you engage in both sales and purchases with them. If this is the case, turn 'ON' this option.
-
Is Sub Customer: If you want to link your customer with an existing customer, turn 'ON' this option. This allows you to group multiple customers under a single group.
-
Browse: If you have any Image/ LOGO of the vendor/ supplier, you can upload the it for identification. The Image/ LOGO should be in JPEG/ JPG/ PNG and file should not be exceed 50KB.
Statutory
-
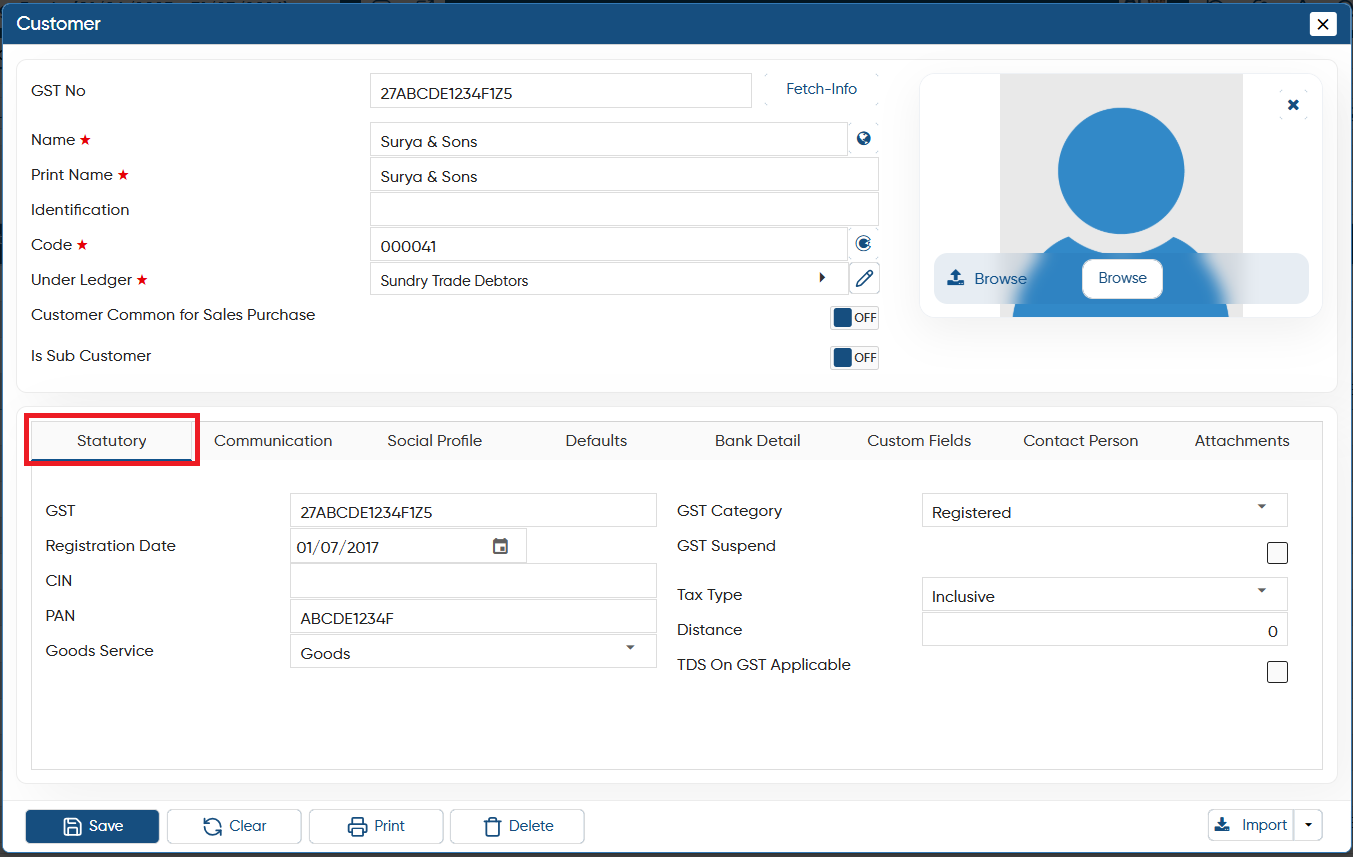
GST: Mention the party GST No. if you have already mention the GST No. and fetch the details, here GST No will auto be filled.
-
GST Category: Here, select the relevant option according to registration category of the customer such as Register, Un-register, Composition etc. This GST category is used in entry for GST related actions and Reports purpose.
-
Registration Date: Registration data will auto be auto picked by the software from the GST Portal when you fetch the details.
-
GST Suspend: If the Customer GST Number has been suspended tick on the checkbox. Thereafter, tax will not be charged on that specific customer invoices.
-
CIN: Corporate Identification Number (CIN) is a unique 21-digit alphanumeric code assigned to companies registered in India by the Registrar of Companies (RoC) under the Ministry of Corporate Affairs (MCA). It is used to identify and track all legally registered companies in India.
-
Tax Type: Here, you can select the calculation Inclusive or Exclusive you required while invoicing for this specific party.
-
PAN: Software will auto pick the PAN Number from your GST Number also.
-
Distance: Specify the approximate distance between the customer's location and your company's address. This distance will be used for generating the e-Way bill.
-
Goods Service: Select whether you are dealing in Good or Services with the Customer or Party.
-
TDS On GST Applicable: TDS on GST refers to the tax deducted at source under GST law. Under this a person who makes a payment to a supplier is required to deduct a portion of the payment as tax. This is applicable when the recipient of the payment is a registered person under GST.
-
TDS Applicable: TDS is a tax collection method where a certain percentage of tax is deducted from the income or payment made to an individual or entity. Turn 'ON' this option to apply TDS.
Communication
Billing Information/ Shipping Information:
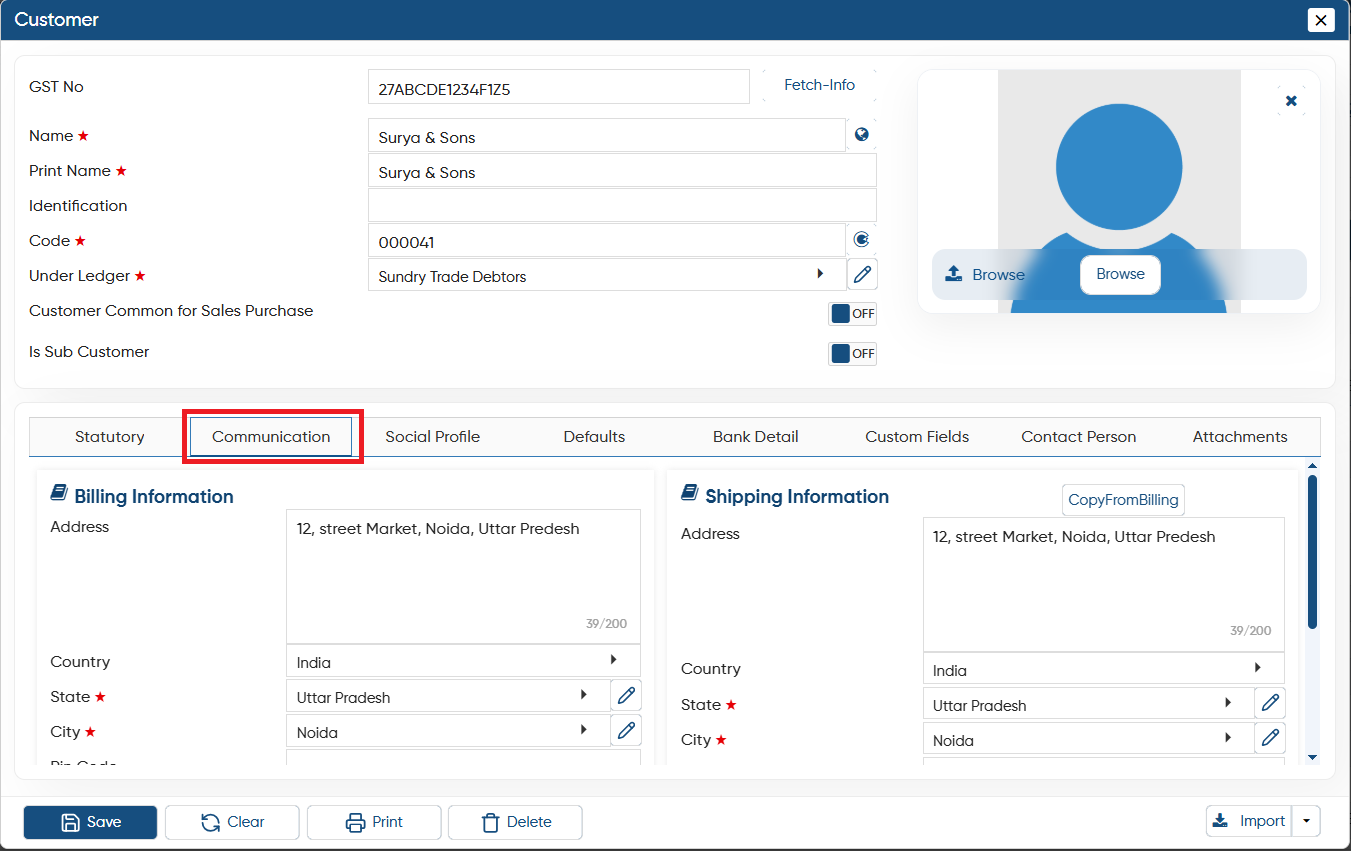
1. Billing Address: A billing address is the address associated with the individual or entity responsible for the transaction and where the invoice will be issued. For customers with multiple branches, the billing address typically corresponds to the head office or the location overseeing the purchase, even if the goods are being delivered to a different branch.
2. Shipping Information: A shipping address refers to the specific location where goods or products are sent for delivery. It is the final destination where the recipient expects to receive the items ordered. This address can differ from the billing address, especially in cases where the purchaser arranges for the goods to be delivered to a different location, such as a branch office, warehouse, or a third party. The shipping address ensures that the goods are routed correctly and arrive at the intended recipient’s desired location.
Billing and Shipping Information will be auto picked by the software if you have Fetch the details with vendor/ supplier GST No.
|
-
Address: If you have mentioned the GST Number of the customer software will auto pick the Billing or Shipping Address on the specified field. You can manually mention it as per your need.
-
Country: Country Name will also auto picked by the software in both Billing and Shipping Address. You can mention the country name as per you requirement. If your desired country is not in the list you can create it.
-
State: State Name will also auto picked by the software in both Billing and Shipping Address. You can mention the country name as per you requirement. If your desired state is not in the list you can create it. This field is mandatory to mention.
-
City: Mention the City in Billing and Shipping fields.
-
Pin Code: Mention the pin code of the customer in both Billing and Shipping field as needed.
-
Phone: Mention the customer phone number in billing and shipping field.
-
Email: Specify the Email Id of the customer in billing and shipping information as per your requirement.
-
Longitude: The term longitude refers to the geographic coordinate that specifies the east-west position of a point on Earth's surface. After mentioning the Pin Code of the customer software will auto pick the Longitude. This will help to view the location on the google map and reports based on location.
-
Latitude: Software will auto pick the Latitude based on the pin code of the customer you will mention above. This will help to view the location on the google map and reports based on location.
-
Route Map: Mention the route or area assigned to each customer. Using this route map, your sales team can easily identify and visit the customers located along a specific route during their collection trips.
If the customer's billing and shipping information are same, you can simply click on 'CopyFromBilling' to automatically duplicate the billing information into the shipping information field.
|
Social Profile
-
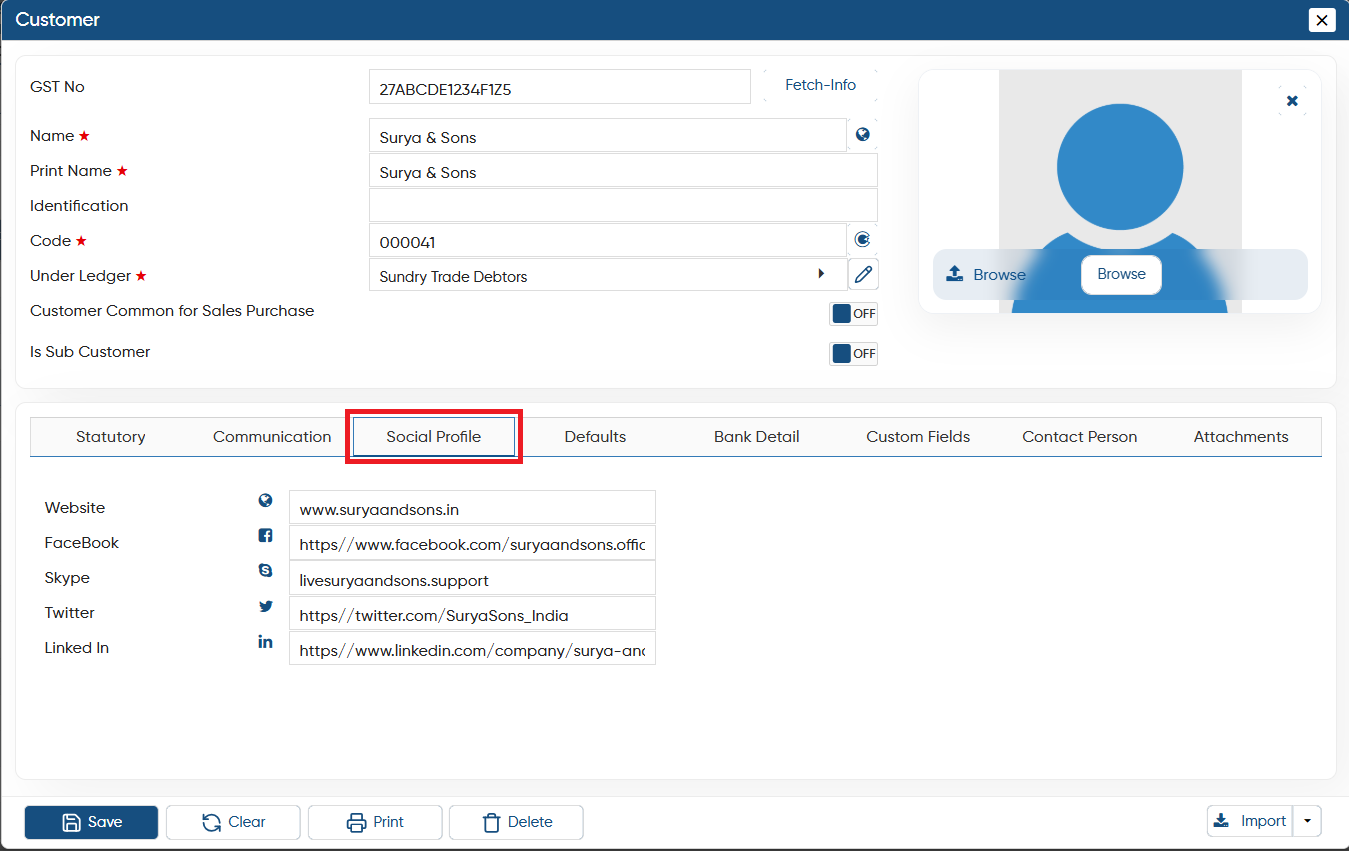
Here, you can input the social profiles of the customer or party. Adding relevant social profile information is highly beneficial, as it enables you to monitor their growth strategies and maintain better engagement.
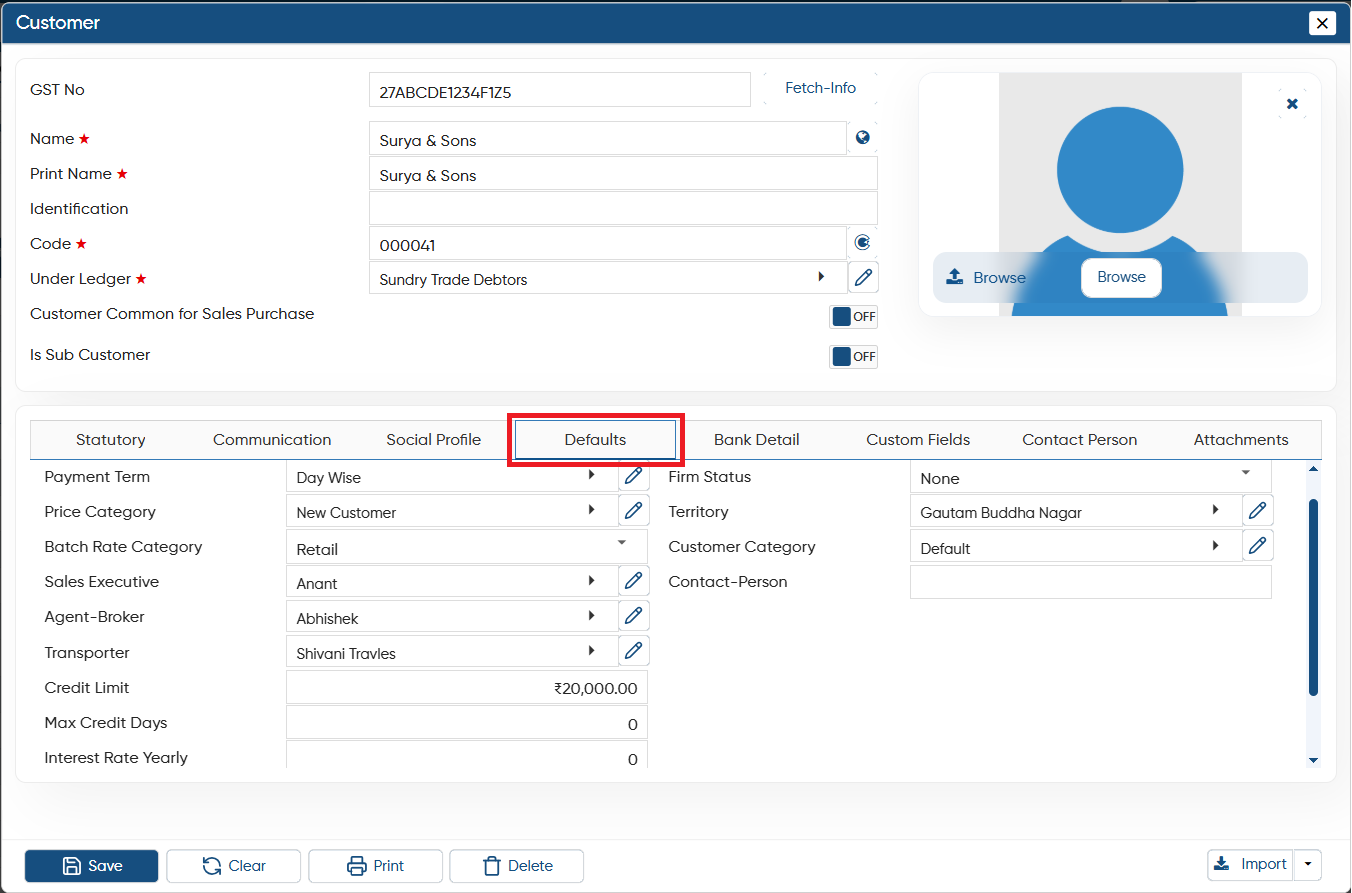
Defaults
-
Payment Term: Payment terms typically vary from customer to customer depending on their business credibility. Select the agreed-upon terms from the dropdown list. If the desired term is not available, you can create a new payment milestone. Based on the payment terms you fixed for the customer, software will auto pick the due date while generating invoices.
-
Price Category: In AlignBooks, you can create a price list to set different prices for each item. You can then link this price list to the customer details, so when you work with a customer, the correct prices will automatically be applied based on the price list chosen in their profile.
-
Batch Rate Category: Select the Rate Category for the batch which you want to fix for the customer.
-
Sales Executive: Select the sales person assigned to the customer. This field will only work when you have enabled the Salesman wise Billing in the setup.
-
Agent Broker: If there is any agent broker for this customer, you can select the name of that agent.
-
Transporter: Here, you can mention the transporter name who will be responsible to deliver the goods to the customer. You can create your desired transporter by clicking on '+' icon.
-
Credit Limit: Credit Limits are used to set a maximum amount of credit a customer can use to purchase goods. If Credit Control is enabled in the sales setup, the software will prevent you from creating an invoice once the credit limit is exceeded.
-
Max Credit Days: Here you can mention the credit days after which you want the software to calculate interest for delay in payments.
-
Interest Rate Yearly: You can mention the Interest Rate that you want to apply if there will be any delay in the payments. You can also view the Interest Rate reports in which you can view the amount of the interest. The interest amount will start calculating after the Max Credit Days, you will mention above.
-
Customer on Watch: If you want to keep this customer (using CVSS) on watch, tick the checkbox. The Customer will be added to your Dash Board and all its key figures will be visible to you on your Dash Board.
-
Firm Status: Select the type of firm, whether the customer is Individual, Proprietor, Partner, LLP etc.
-
Territory: You can mention the Territory of the customer also if you want to maintain so.
-
Customer Category: You can categories your customer as per your requirement.
-
Contact-Person: Mention the contact person of the customer or partner.
Bank Details
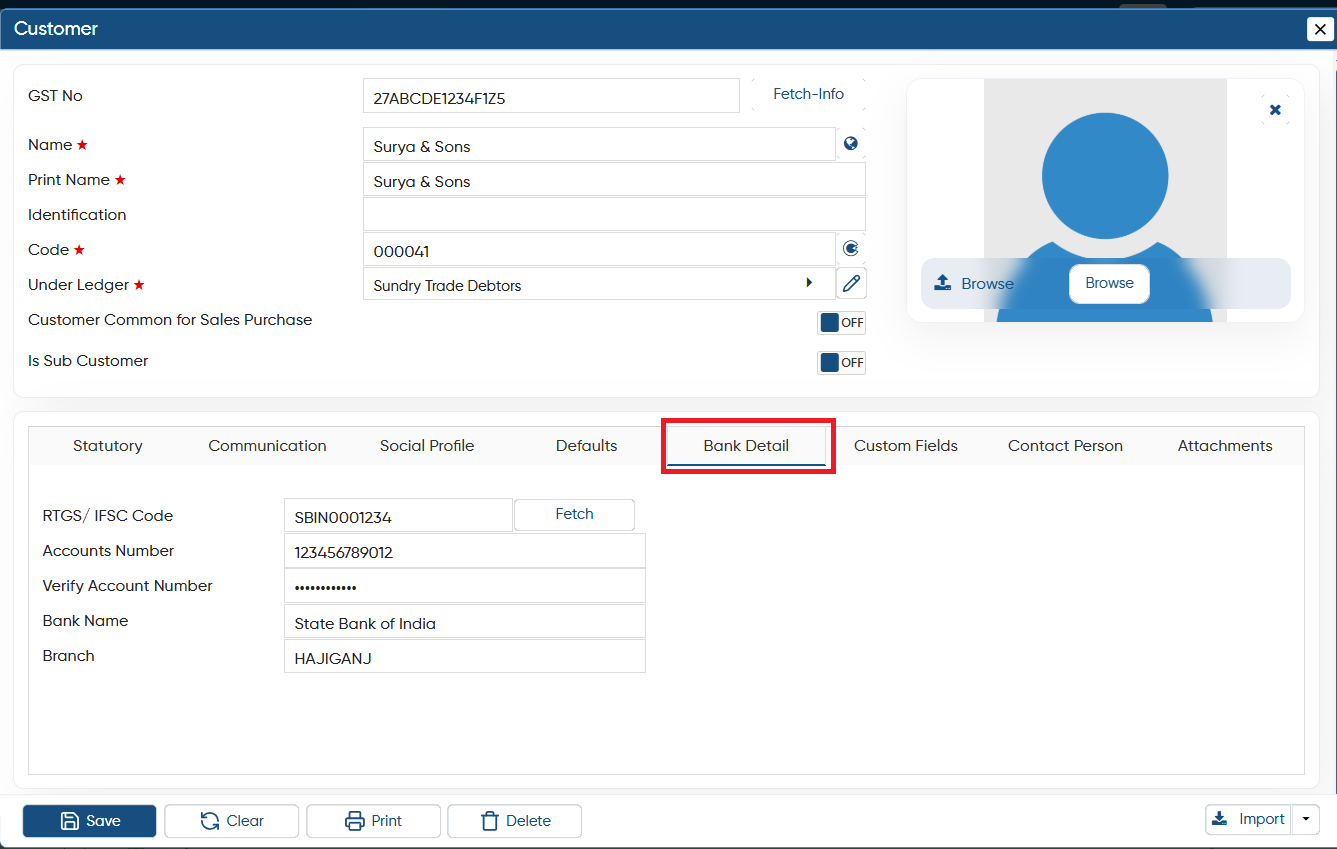
In Bank Details you can maintain the bank details of the customer.
-
RTGS/ IFSC Code: If you mention the RTGS/ IFSC code and click on 'Fetch' button, then software will auto pick the Bank Name and it's branch.
-
Accounts Number: Mention the Account Number of the customer.
-
Bank Name: After mentioning RTGS/ IFSC Code, software will auto pick the Bank Name, also you can manually mention it.
-
Branch: After mentioning RTGS/ IFSC Code, software will auto pick the Branch Name, also you can manually mention it.
Custom Fields
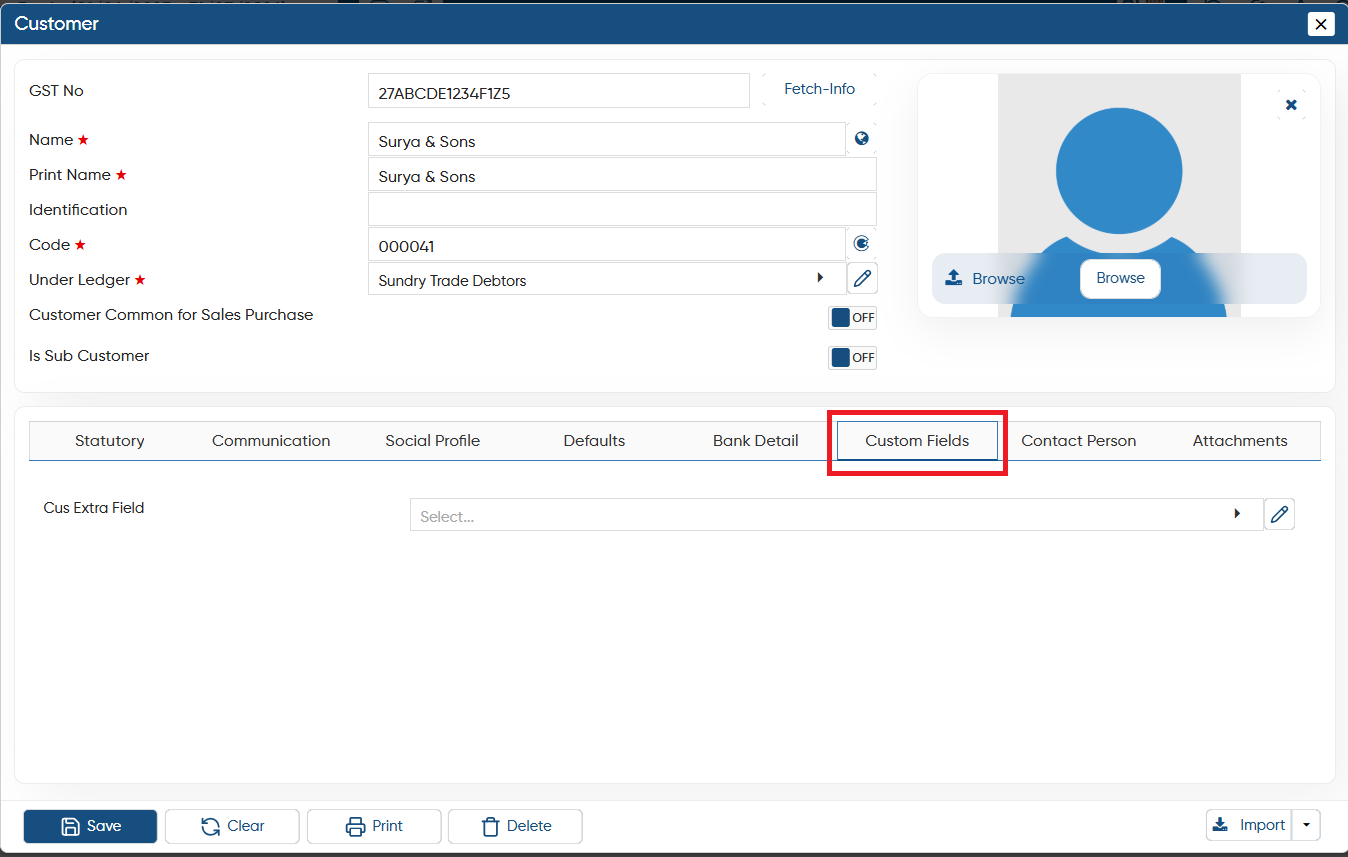
In AlignBooks, you can customize some extra fields to mention the customer details. You can enable these fields through the Sales setup.
Contact Person
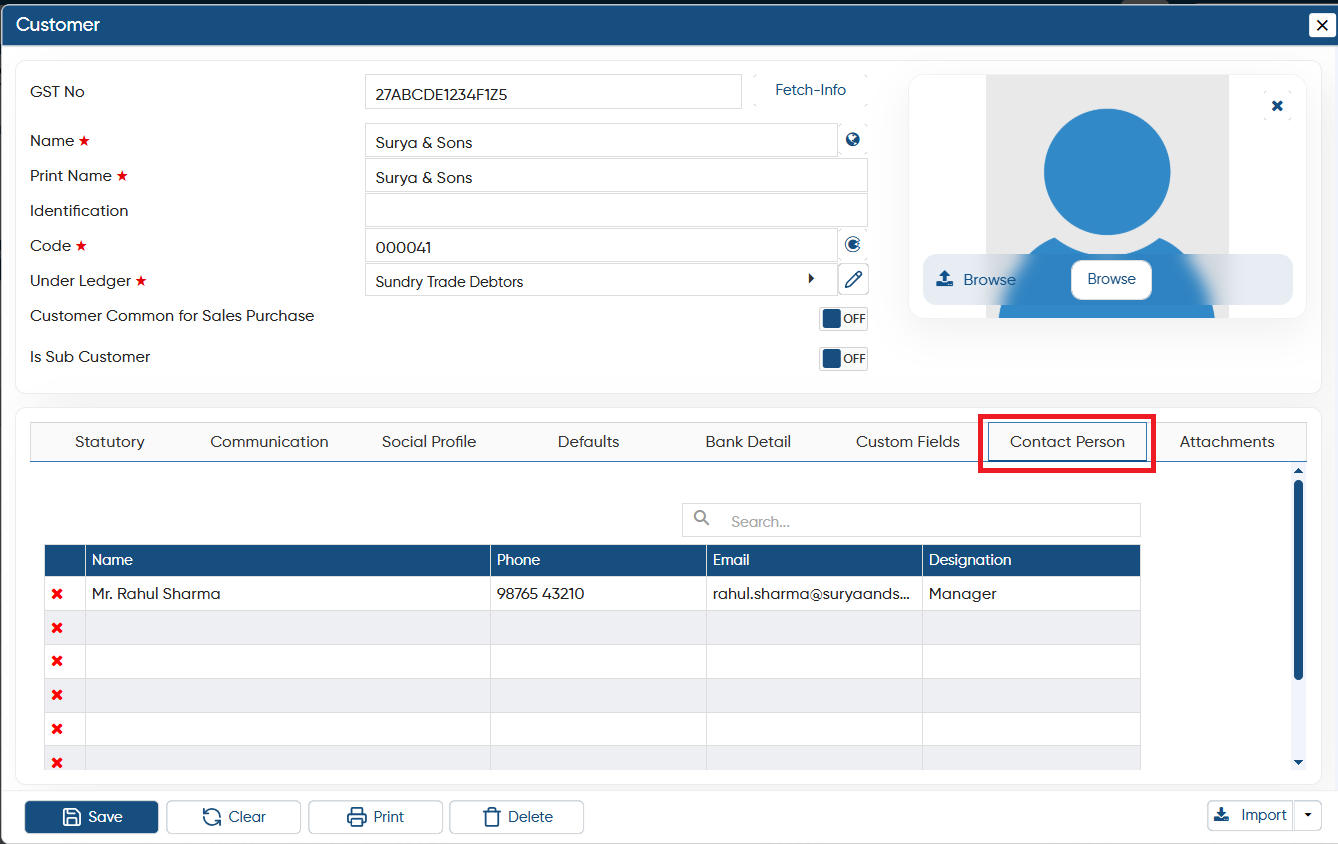
You can enter the contact person's details for this customer here. If the customer has shared the name of any employee or partner for coordination or clarification, you can record that information in this section.
Attachment
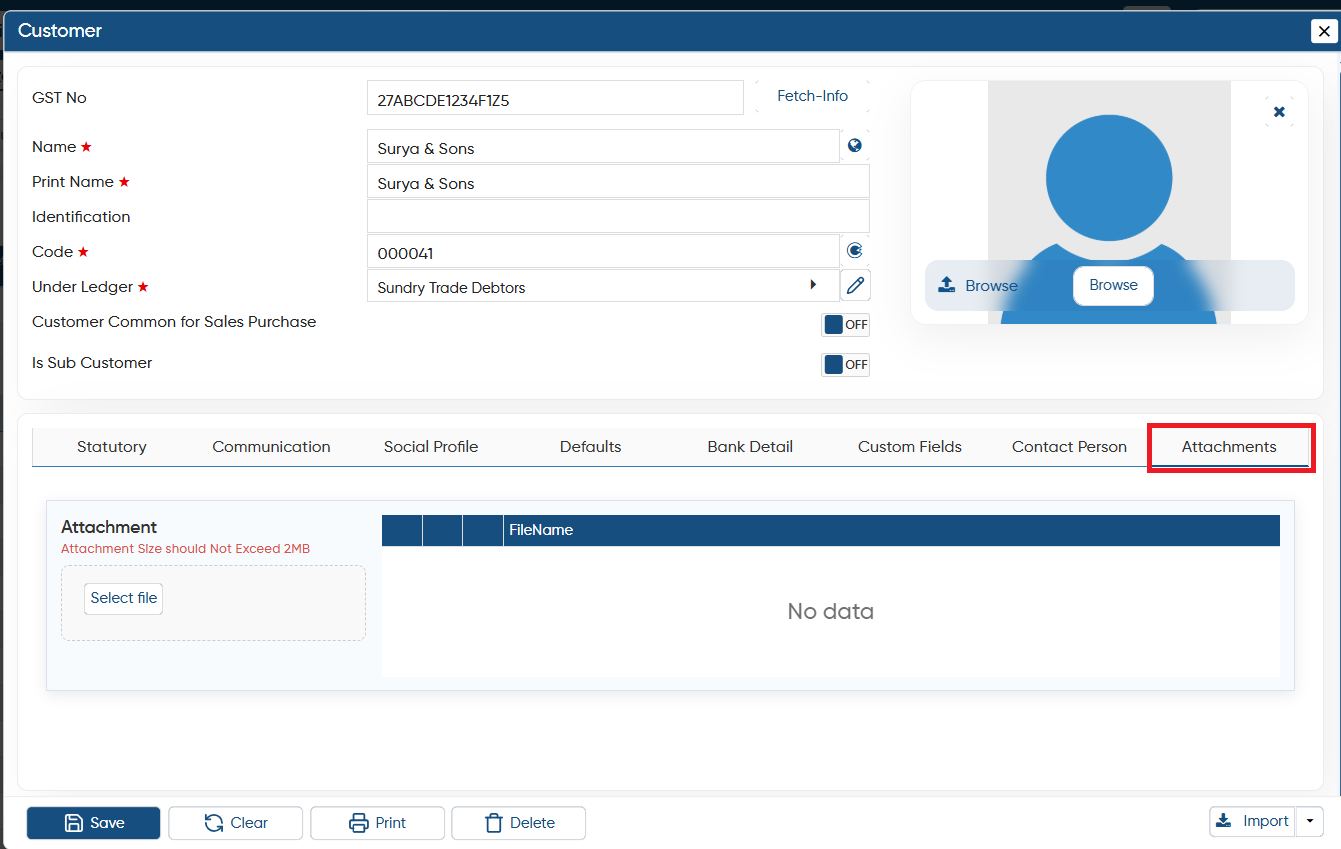
If you have any document which you want to attach with the Customer Master, click on 'Select File' button then select the directory and file which you needs to attach.
Thereafter, click on 'Save' button to save the details.
-
Clear: Click on 'Clear' button if you want to remove the all details.
-
Print: If you want to print the Customer Ledger click on 'Print' button.
-
Delete: If you want to delete the specific customer then click on 'Delete' button. If there will be any transaction with the party then you will not be able to delete the Master.
-
Exit: To exit from the window click on 'Exit' button.
-
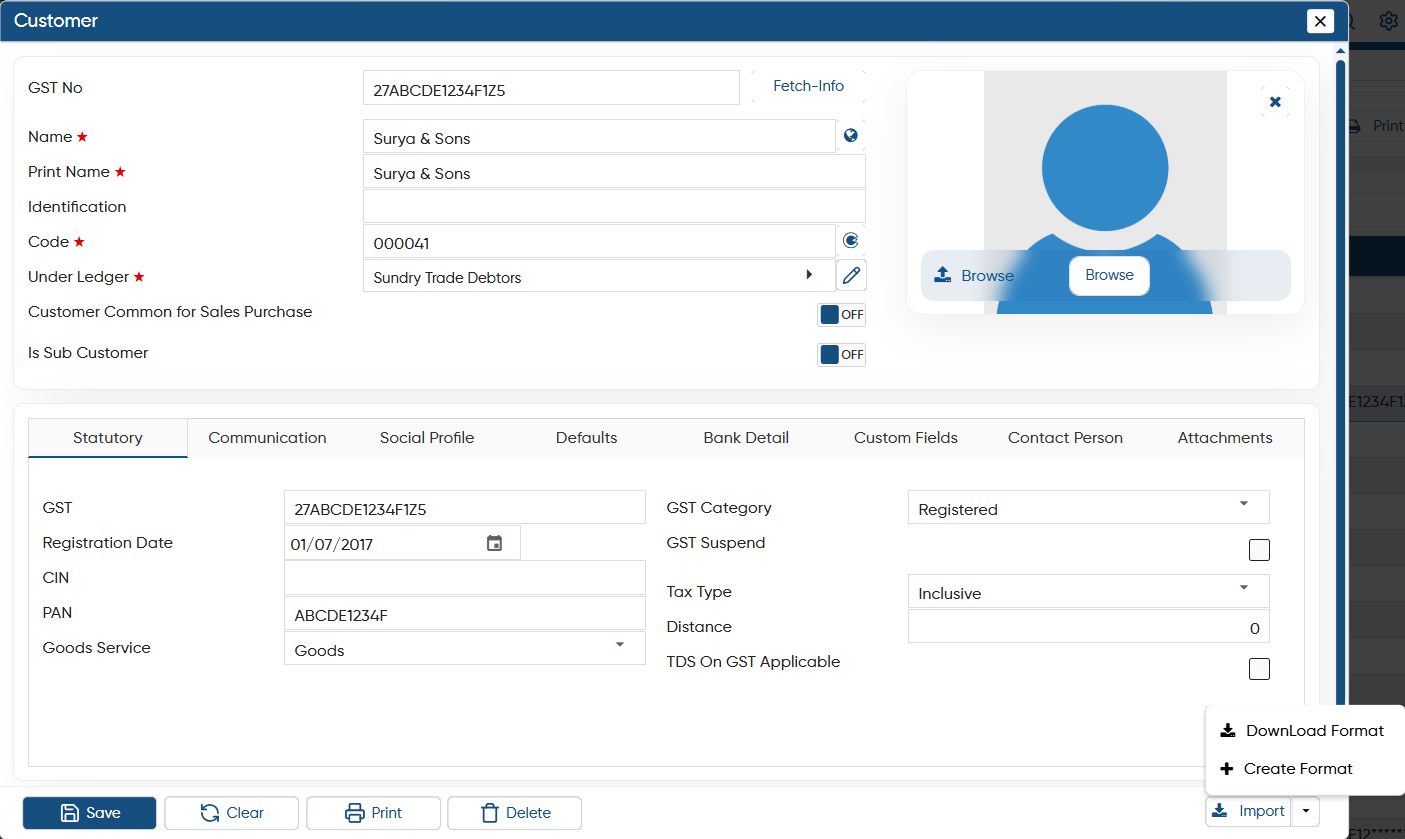
You can also import the customer details directly through the excel. Click on 'Import' dropdown and then click on 'Download Format' button.
You need to download the provided template format to ensure the data is entered correctly in the Excel file. Once updated, this file can be imported seamlessly into the system for accurate data integration.
|
-
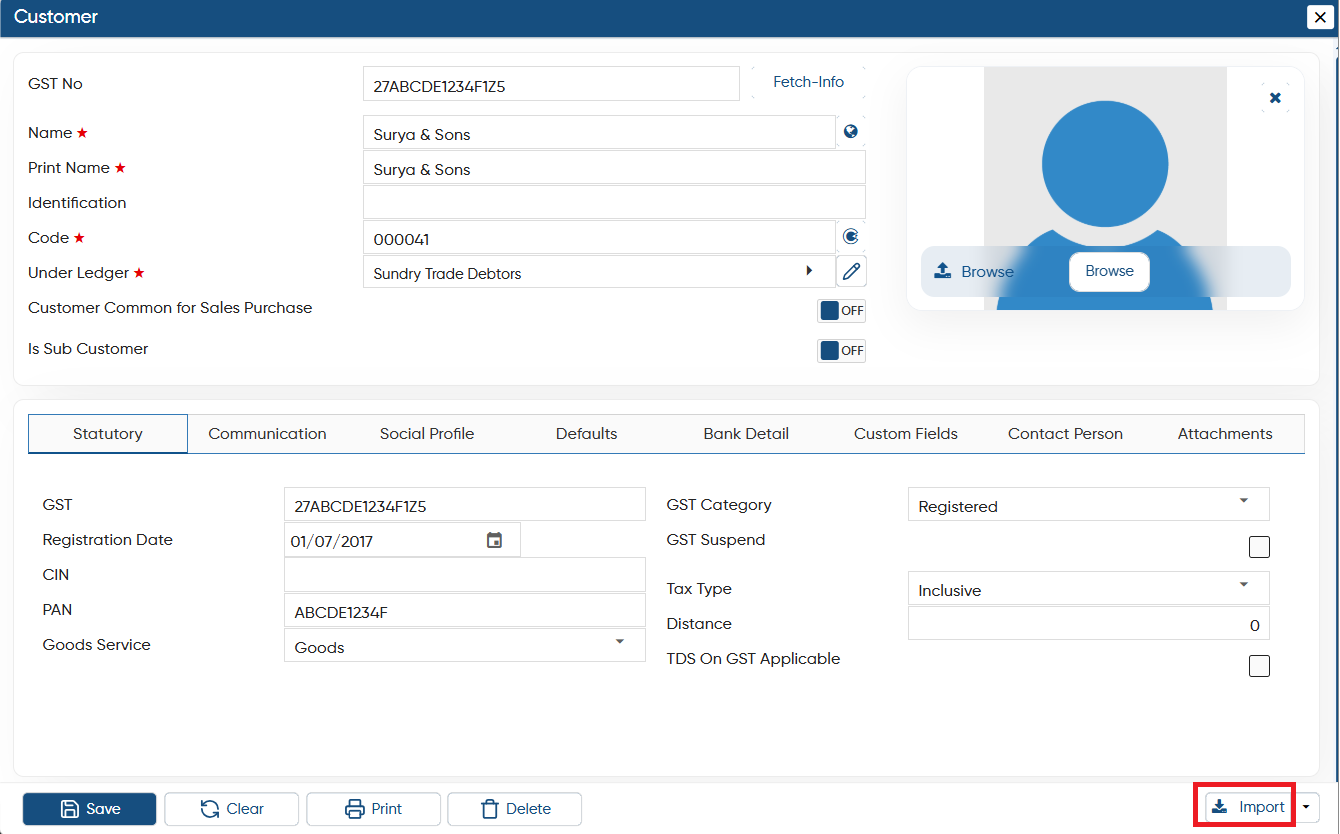
The excel file will get exported, mention your data in the file and save it.

-
Now click on 'Import' button to import the excel file data.
-
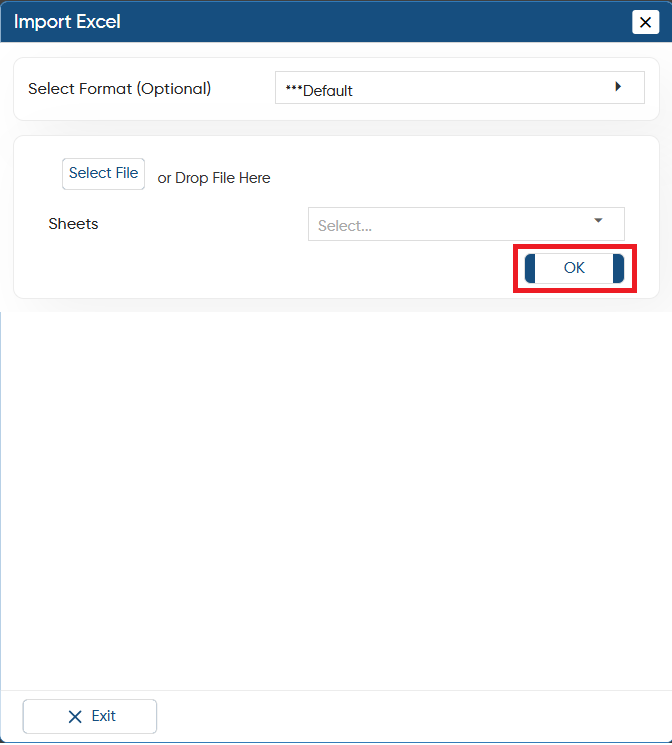
Click on 'Select File' button, and select the directory and file where it has been saved. Click on 'OK' button.
-
Thereafter, you can view the Customer master data will be imported.
After Importing the customer master, refresh the data to properly display the data.
|
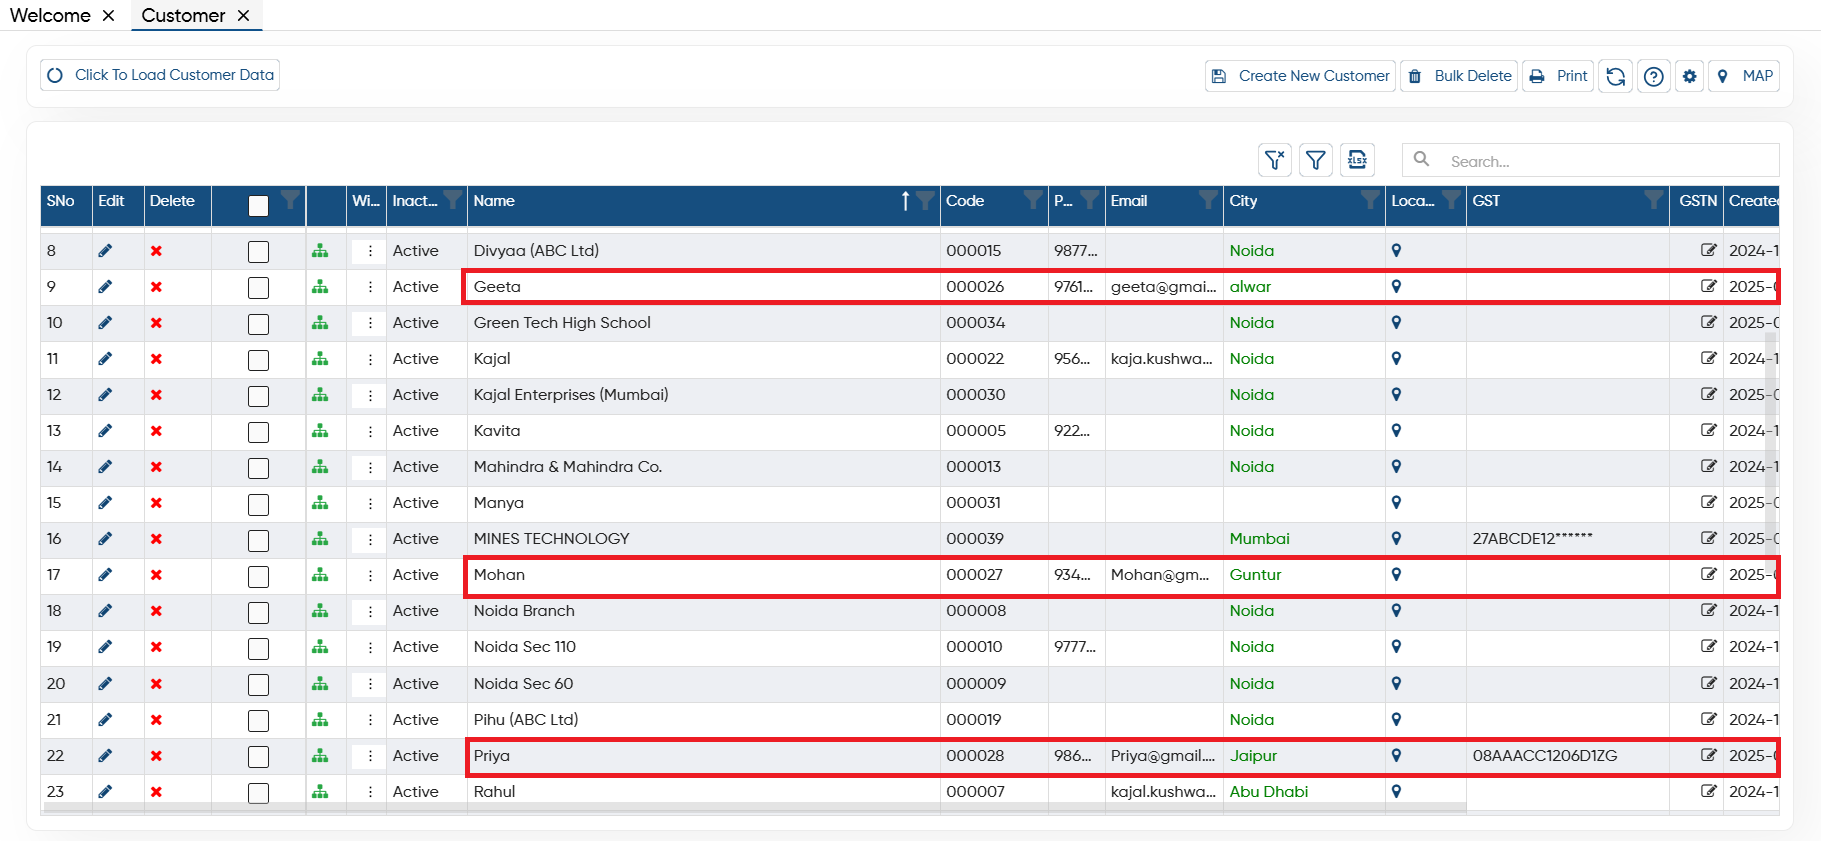
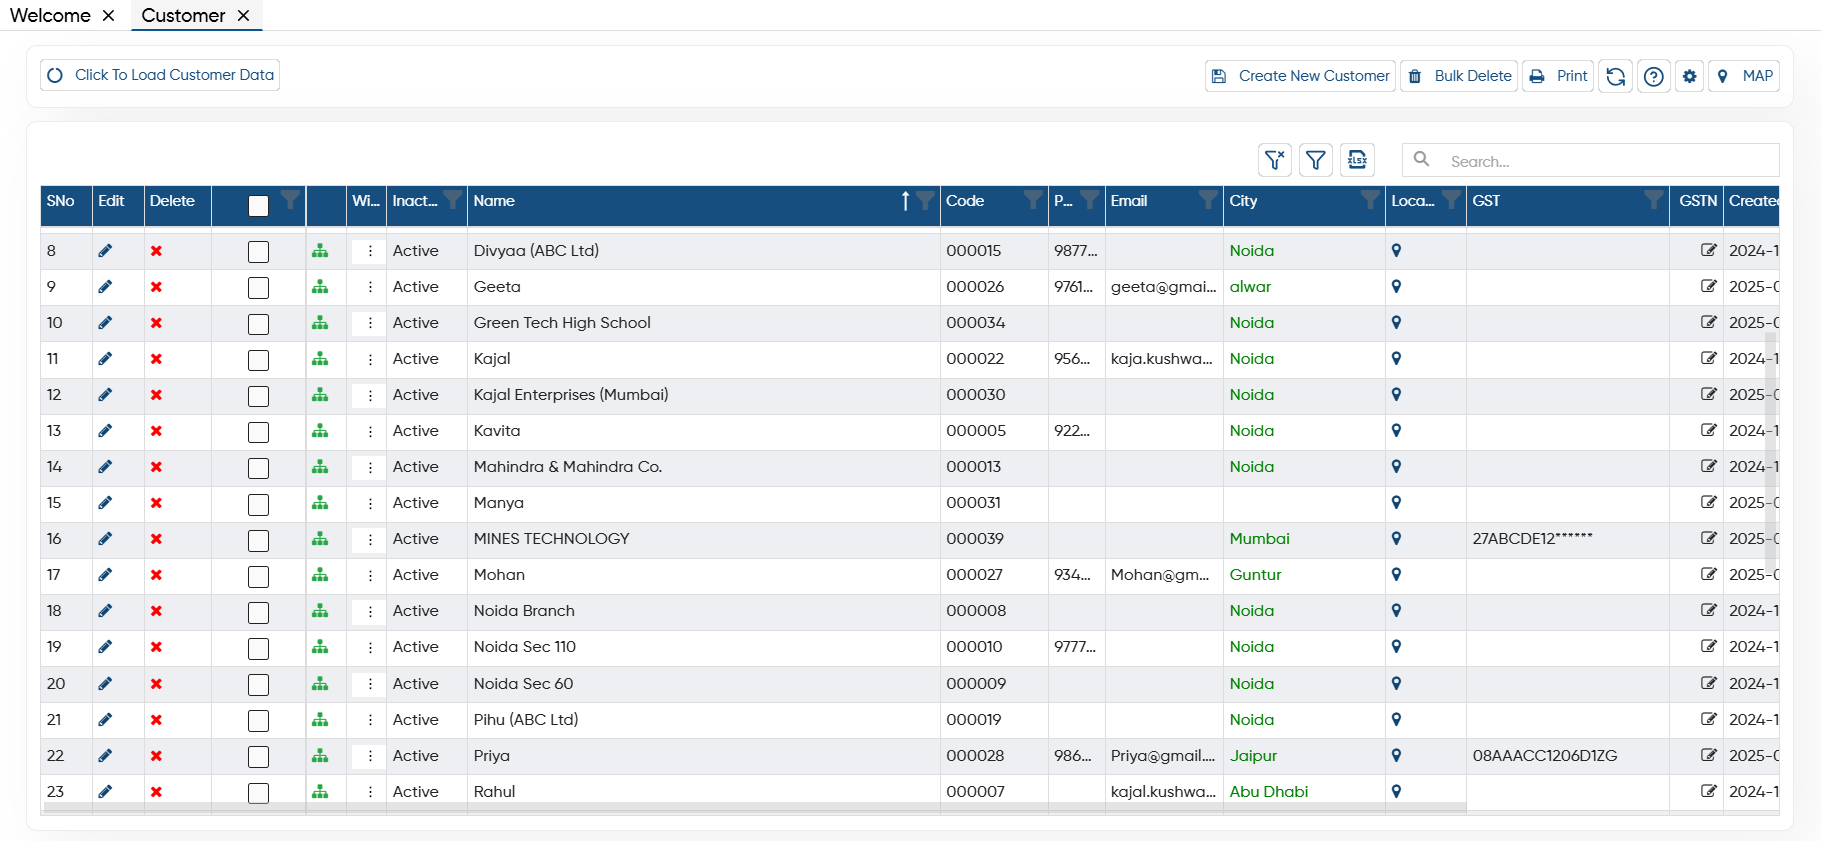
After the master creation if you required any changes or updation, or you want to delete any specific customer details then you can easily do so.
-
 Click on Edit icon to modify any customer master details.
 -
 Click on Cross icon to remove or delete any customer master. You can only delete the master when there will be no transaction or entry available in the data.
-
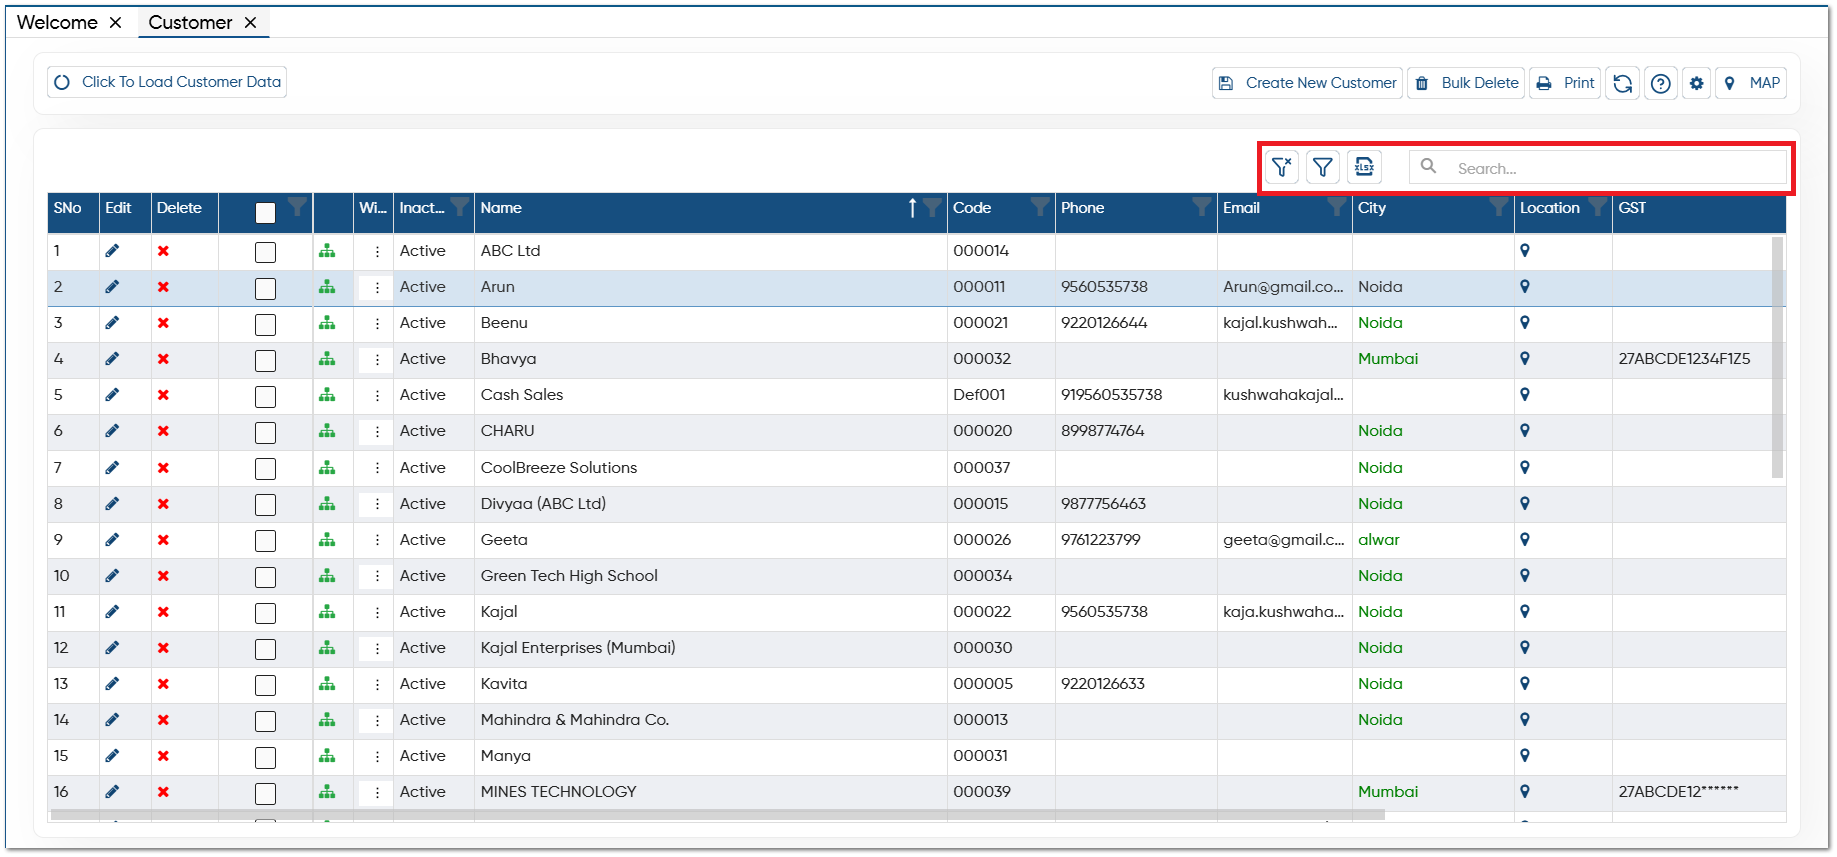
Clear Filter: Click on the Clear Filter icon, to remove all the filters you have applied on the customer master list.
-
Show Filter: Through the ‘Show Filter’ icon, you can enable column-wise filtering. Once activated, a search icon will appear at the top of each column, allowing you to filter the list easily.
-
Excel: You can export the all data in excel file also, to export the data click on excel icon.
-
Search: To search any record in the list you can type the Customer Name, Code, Phone No etc in search, software will display the result on the screen.
-
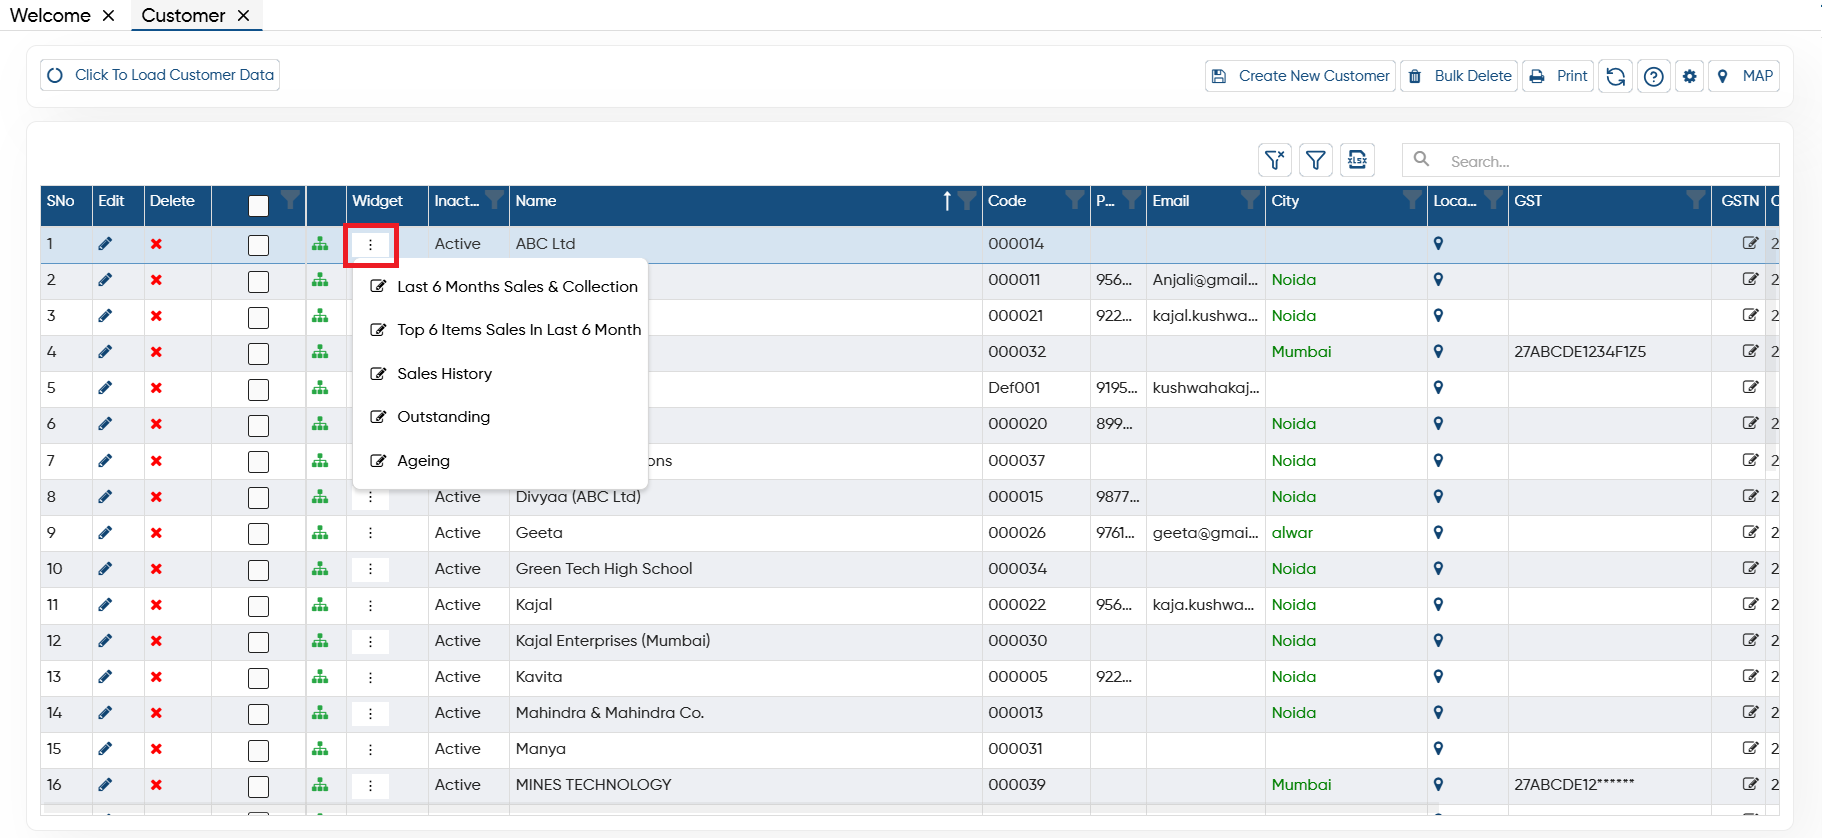
Click on the 'Widgets' icon of a specific customer to view the Sales Report such as
-
Last 6 Months Sales & Collection
-
Top 6 Items Sales & in Last 6 Month
-
Sales History
-
Outstanding
-
Ageing
-
If you want to check the specific Customer Location, click on 'Location' icon then a Google Map window will open showing the customer location based on the Address, Longitude-Latitude you have mentioned in Master.
In this way you can manage the Customer Master in AlignBooks.