
Item Master
In every business, keeping track of the quantity of the products or items you deal with is essential. This helps you manage your inventory efficiently and make necessary updates or adjustments to optimize your financial resources.
To achieve this, the Item Master in AlignBooks allows you to create a detailed profile for each item. This profile includes all the necessary information about the product, such as its name, category, pricing, and stock details. Setting up an item’s profile is typically a one-time process when adding a new product to your system.
Once added, this item data serves as a central reference and is used extensively for generating invoices, purchase orders, stock reports, and other important documents in various formats. By maintaining accurate item details, you can streamline operations, reduce errors, and make informed business decisions.
-
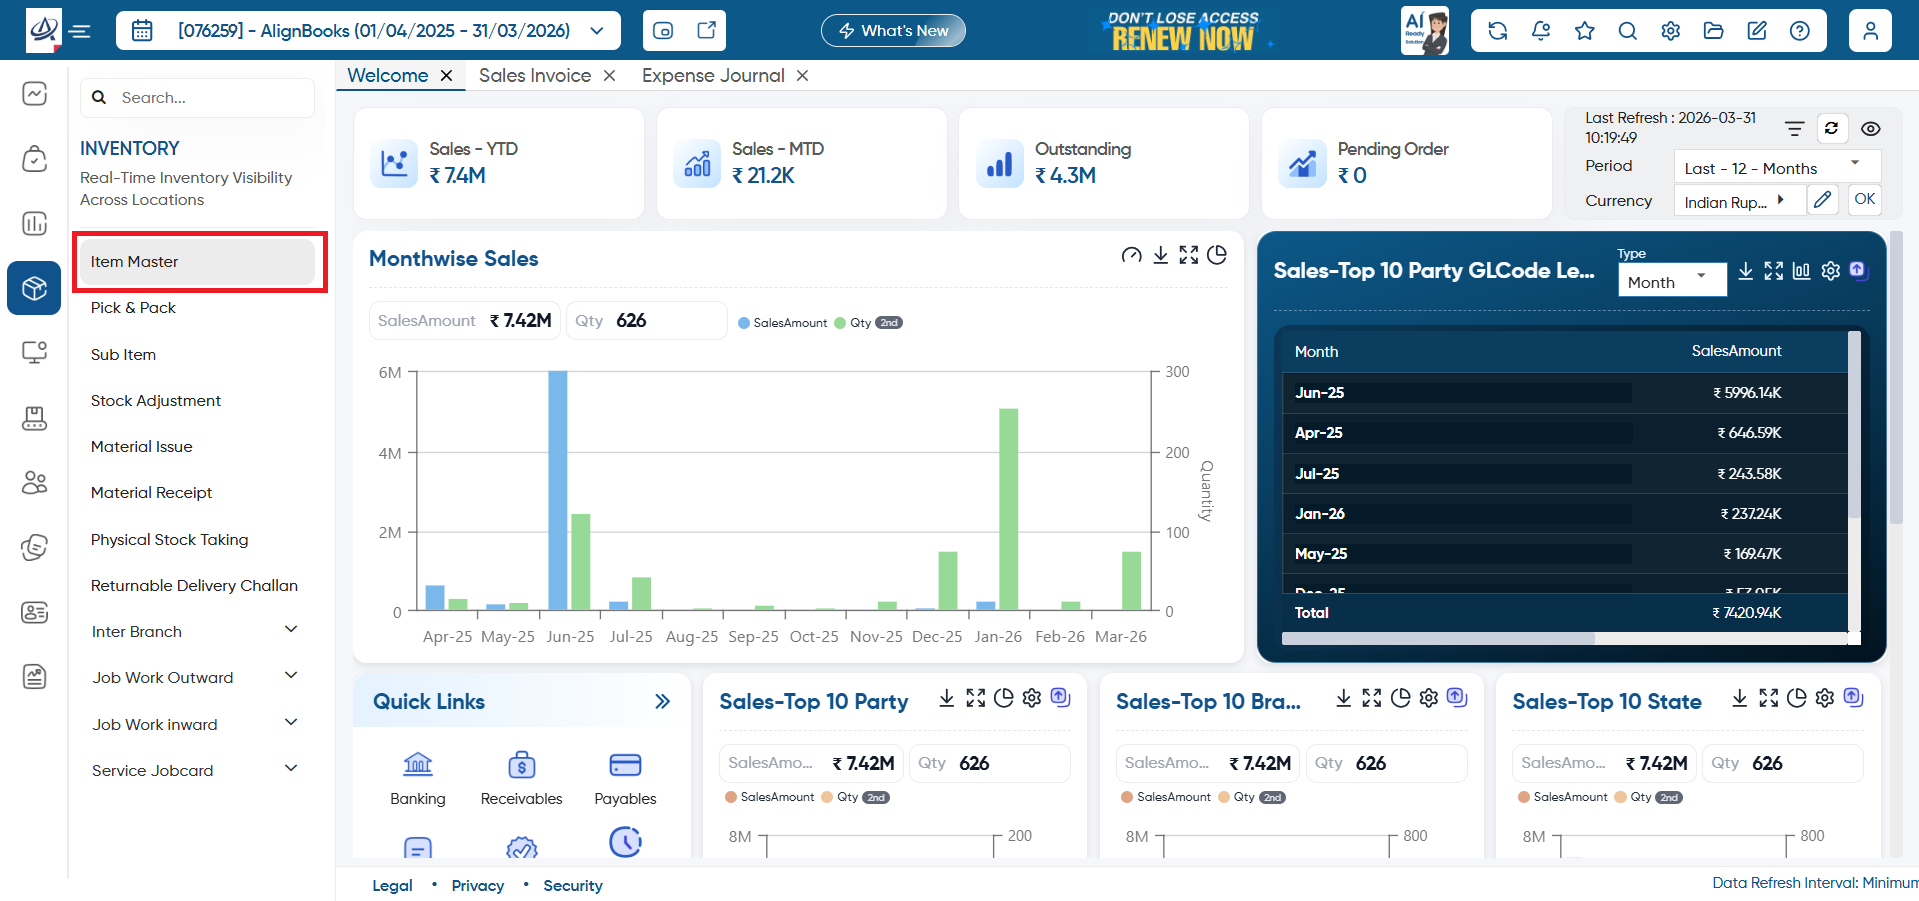
Go to Inventory > Item Master.
-
Click to Load Item Master Data: To load the all item master list created in the system, click on the given button.
-
Download Pre-Configured Items: AlignBooks also provides a pre-configured items list based on the company trade. You can download the item list by clicking the given button. After clicking on this option, you have to exit from the window and after that you can view another tab will open in AlignBooks to select the Business or Branch and download the items.
-
Create New Item: To Add New Item click on the button and add the item details.
-
Bulk Delete: If you want to delete multiple items then tick the checkbox corresponding to the Item Names and click on the button. (In case item have any transaction then you cannot delete the item).
-
Refresh: If after making changes to any item or newly added item does not display on the screen, click on the 'Refresh' icon, this will refresh the data and display with latest changes to the items.
-
Help: To access the help manual related to the feature, click on the given icon.
-
Configuration: To enable approval for item master creation, you can assign a specific user. Whenever a new item is created, it will be sent to the selected user for approval.
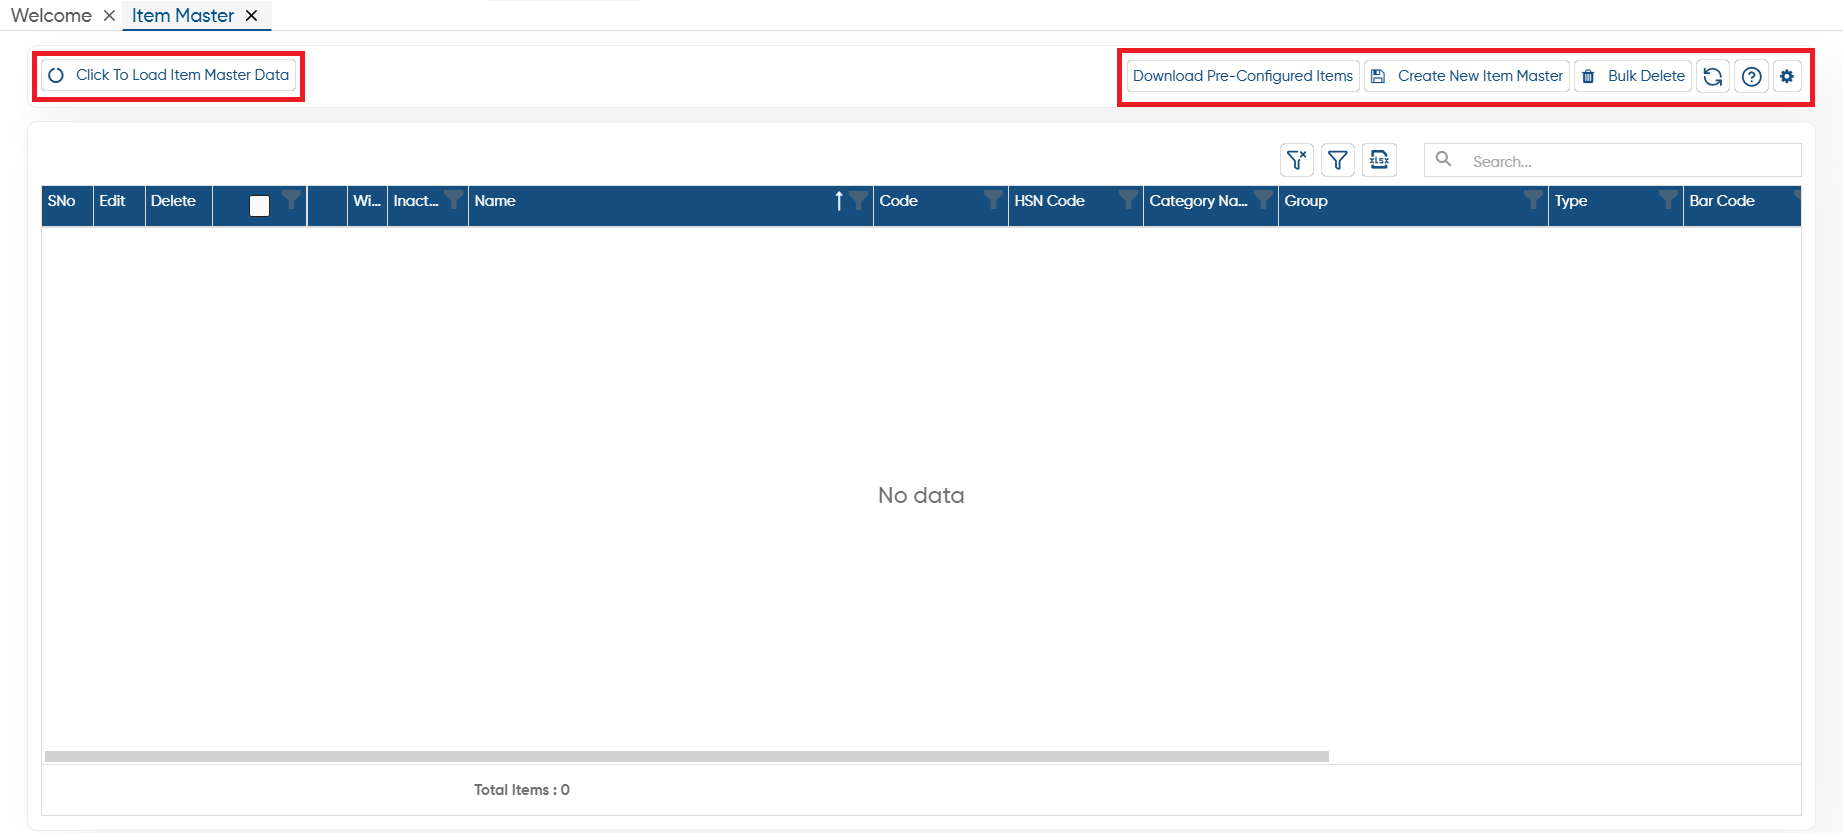
Here, you have to select the category of the Item that you want to Add.
-
Inventory Items: Choose this category for items you want to track in stock. The system will keep a record of these items, allowing you to monitor stock levels and generate reports for better analysis. When selling these items, the system will let you proceed based on the configuration.
-
Non-Inventory Items: If you don’t need to track stock or generate reports for certain items, place them in this category. These items won’t be monitored for stock levels. Non inventory items such as office supplies, software licenses etc.
-
Service Items: This category is for services rather than physical products. Since services don’t require stock tracking, no inventory records will be maintained. You can simply describe the service you are providing or receiving.
-
Bundle Items: Use this category when you want to sell multiple items together as a package or promotional offer. This is useful for creating special deals or product combinations that customers can purchase as a set.
Basic Information
-
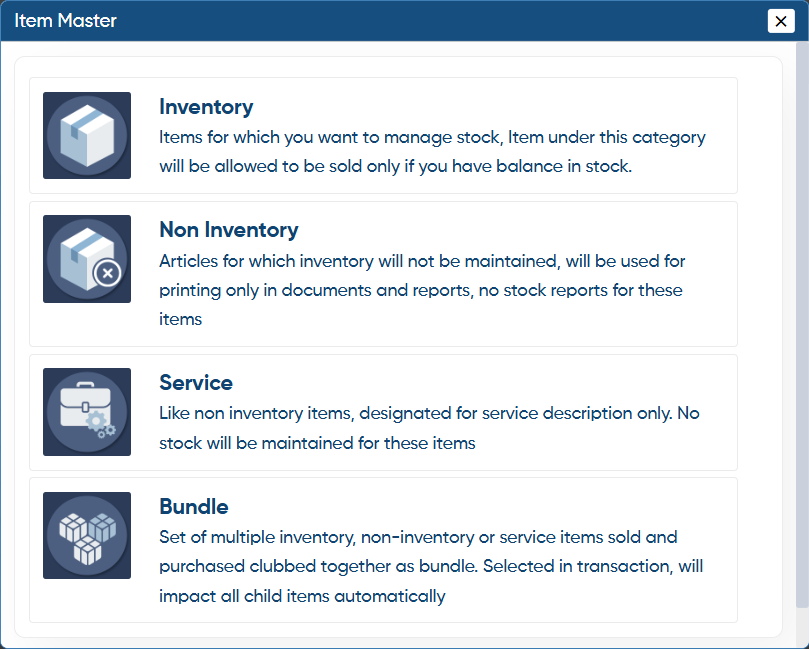
Browse: You can attach any image or photo of the Item for your identification. Browse the image and upload it in Item Master.
-
Item Mode: Based on the item category selection mode name will display here. it's not editable.
-
Name: Enter the name of the item by which you want to identify the item in the data.
 With the help of the given icon at the end of the item Name field will help you to manage the Items name in different language. You can use this to identify the item name better in other language.
-
Code: The software will auto pick the item's code, you can change it as per your preference. The Code can be use to search the item and load in the invoice. AlignBooks allows you to generate the report based on the Item's code.
-
Under Group: Select the option for grouping the item as per your business needs. You can Add the Group of the Item by clicking on the Add icon.
-
Stock Unit: Based the unit option selection, the Stock unit option will display. Here, you can select or create the Unit name.
-
Inactive: If the item in the future no longer needed then you can turn 'On' this option then item will not display while billing.
-
GST Classification (HSN/SAC): Select the HSN/SAC of the item as per the GST norms. You can create the HSN/SA if any of it is not available. HSN/SAC helps to calculate the tax on the Items.

Advance Info
-
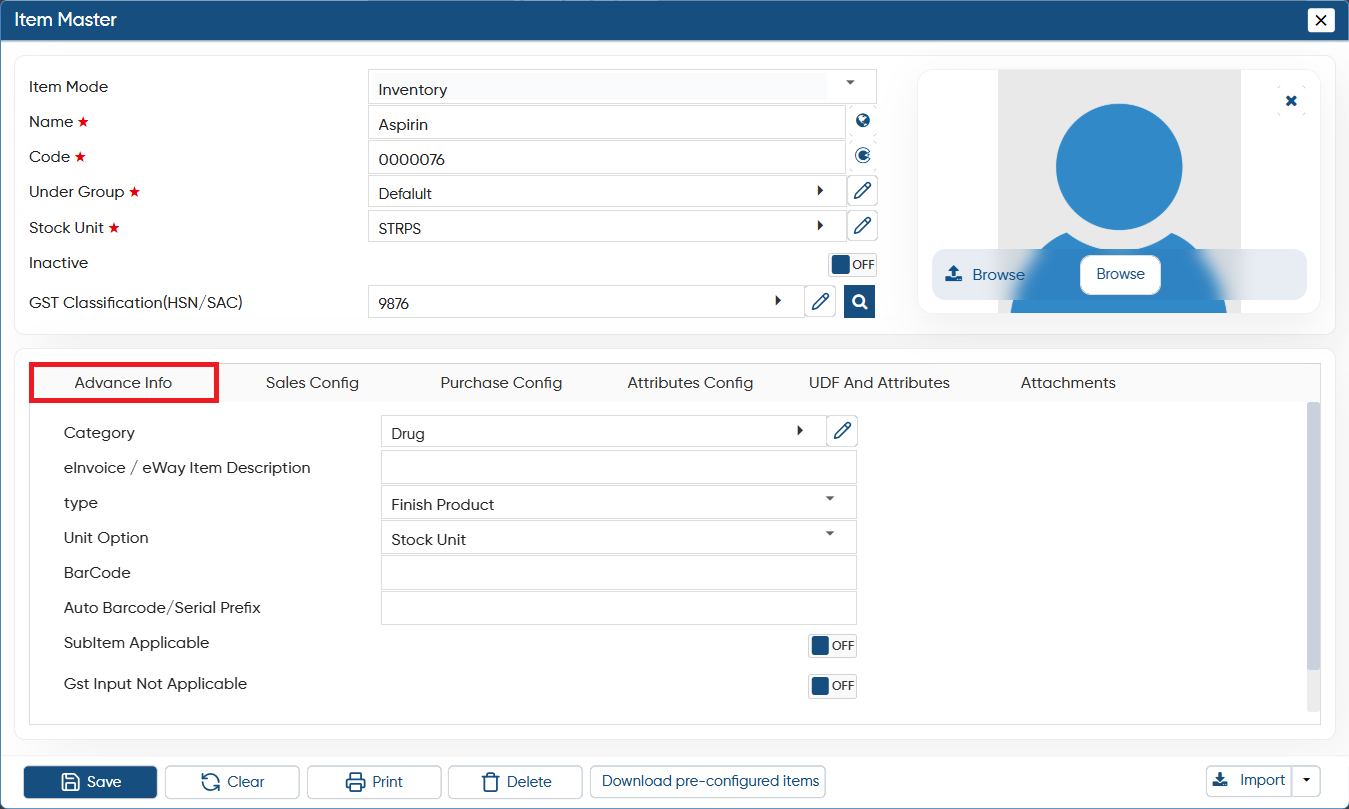
Category: If you want to classify the items in specific categories, you can select the category. You can create the Categories of the item as required simply by clicking on Add icon.
-
Brand: Select the brand of the item as per your requirement.
-
eInvoice/ eWay Item Description: If you required separate description for this item only for eInvoice and eWay then you can mention it here.
-
Type: Here, you need to select the type of the item whether it's a finished product, Raw Material, Semi Finished etc.
-
Unit Option: Select the unit of the item where the item is only in single unit or items have multiple units.
StockUnit: Select the option to maintain the item in single unit.
Stock_PackUnit: Select the option to maintain the item in 2 units, such as 1 STRP have 10 Tabs.
Stock_Pack GUnit: Select the option to maintain the item in 3 units, such 1 Carton have 10 bags, and each bags have 10 PCS.
-
Barcode: Barcode refers to the unique code which include the details of the item. You can mention the item barcode here.
-
Auto Barcode/Serial Prefix: In AlignBooks you can generate the barcodes of the item based on the prefix you fix here.
-
SubItem Applicable: Enable this option if the item belongs to a main item group or is a sub-item under another primary item.
-
Gst Input Not Applicable: Turn 'On' this option if GST input is not applicable on this item.
-
Print Barcode: Turn 'On' the option, if you want to allow to print the barcode of the item.
Sales Config
-
Description: The software auto picks the item name as the description of the item. You can manually mention the description of the item for the better identification.
-
Sales GL: Sales General Ledger is auto picked by the software. GL is used for the item posting. This filed is available only if you have configured the Posting Ledger Based On the 'Item' in Sales Setup.
On the right hand side you can view the multiple rates field. You can mention the MRP, Minimum Price, Sales Rate, Wholesale Rate, Dealer Rate, Discount, Party Brand Discount for this specific item only for sales.
On the Right hand side, you can mention the different Rates & Discount of the item for Sales.

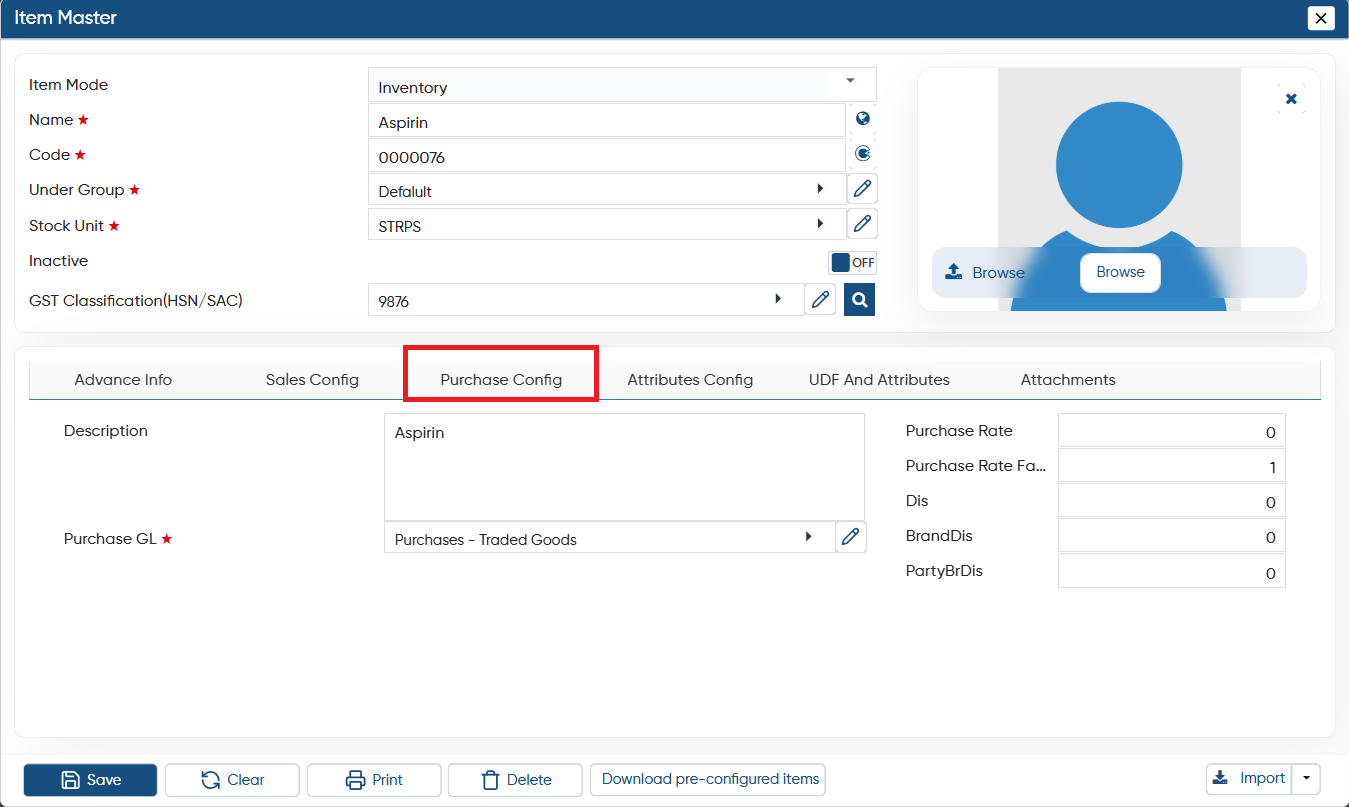
Purchase config
-
Description: The software auto picks the item name as the description of the item. You can manually mention the description of the item for the better identification.
-
Purchase GL: Purchase General Ledger is auto picked by the software. GL is used for the item posting. This filed is available only if you have configured the Posting Ledger Based On the 'Item' in Purchase Setup.
You can fix the multiple rate for purchase as well such as Purchase Rate, Discount, Party Discount etc.
On the Right hand side, you can mention the different Rates & Discount of the item for Purchase.
Attribute Config
-
Item Workflow: Select the workflow of the item, whether the item is of Garment, Jewellery, Machine etc.
-
Procurement Type: Procurement type refers to the way a business sources or acquires goods and services. It defines how an item is obtained for business use and tells whether you are buying, making, or outsourcing the item. It helps track the supply chain properly. Additionally, affects stock planning, costing, and reporting in the software.
-
Minimum Level: Here, you can set the minimum level of the item. If the item stock goes to the minimum level the software will alert you (If configured in the Inventory Setup).
-
Maximum Level: Here, you can set the maximum level of the item. If the item stock level goes more than the required stock then the software will alert you (If configured in the Inventory Setup).
-
Purchase Warranty Months: Specify the number of warranty months applicable to the item at the time of purchase, if available.
-
Sales Warranty Months: Here specify the number of warranty months at the time of sale.
-
Weighing Scale Mapping Code: Weighing Scale Mapping Code refers to a unique code used to link or integrate a digital weighing scale with your software system. This code helps the software recognize the scale and automatically fetch the item's weight during billing or inventory processes.
-
Rack-bin No: If your items are maintained Rack wise then you can mention the rack number here.
-
Add in Item Set template: If you creates the Set of item, then you can add the item in a specific set as required.
-
Input dimension: Enable this option if your items are measured based on dimensions. When activated, the software will prompt you to enter the dimensions during both purchase and sale transactions.
-
Batch wise Inventory: If you want to maintain the item Batch wise then turn 'On' this option.
-
Batch wise Rate: Turn 'On' this option to maintain the Batch wise rate of the item as per your requirement.
-
Drug Type: If you deals in pharmaceuticals products, then select the drug type of the item.
-
Salt: Salt is basically used as an alternate for the medicine or drug type products. If the item have any salt, you can mention the salt name here.
-
Serial Tracking: Serial number are like batch number, if you manage your item based on the serial number then you can turn on this option and can track your items based on the serial number.
-
Skip this item from Loyalty Point: In AlignBooks, you can create and manage Loyalty Cards to reward long-term customers with points based on their purchase invoices. Loyalty points are calculated on the invoice value, and if you wish to exclude any specific item from earning points, simply check the corresponding box.
-
Exclude in CVSS App list: CVSS App is for your customers from where they can place the orders, view the outstanding, invoices details. If you want to exclude the item from the CVSS app then turn 'On' this option.

UDF And Attributes
If you required to maintain any details of the item or enable any extra field, you can enable them from Inventory setup and those field will display here.
-
To save the details click on 'Save' button.

-
Clear: If you want to remove the details you mentioned for the item and want to mention the new details again then click on the 'Clear' button.
-
Print: If you want to generate the PDF or print the item details click on 'Print' button. AlignBooks provides multiple format to print the item details.
-
Delete: To remove or delete the item click on 'Delete' button.
-
Import: This button helps you to Download the predefined templates of Item Master, Mapping Code, Bundle so that you can mention the details in that excel template and Import those details in Bulk. Click on the dropdown to download the specific template.
-
Download Pre-Configured Items: AlignBooks also provides a pre-configured items list based on the company trade. You can download the item list by clicking the given button. After clicking on this option, you have to exit from the window and after that you can view another tab will open in AlignBooks to select the Business or Branch and download the items.

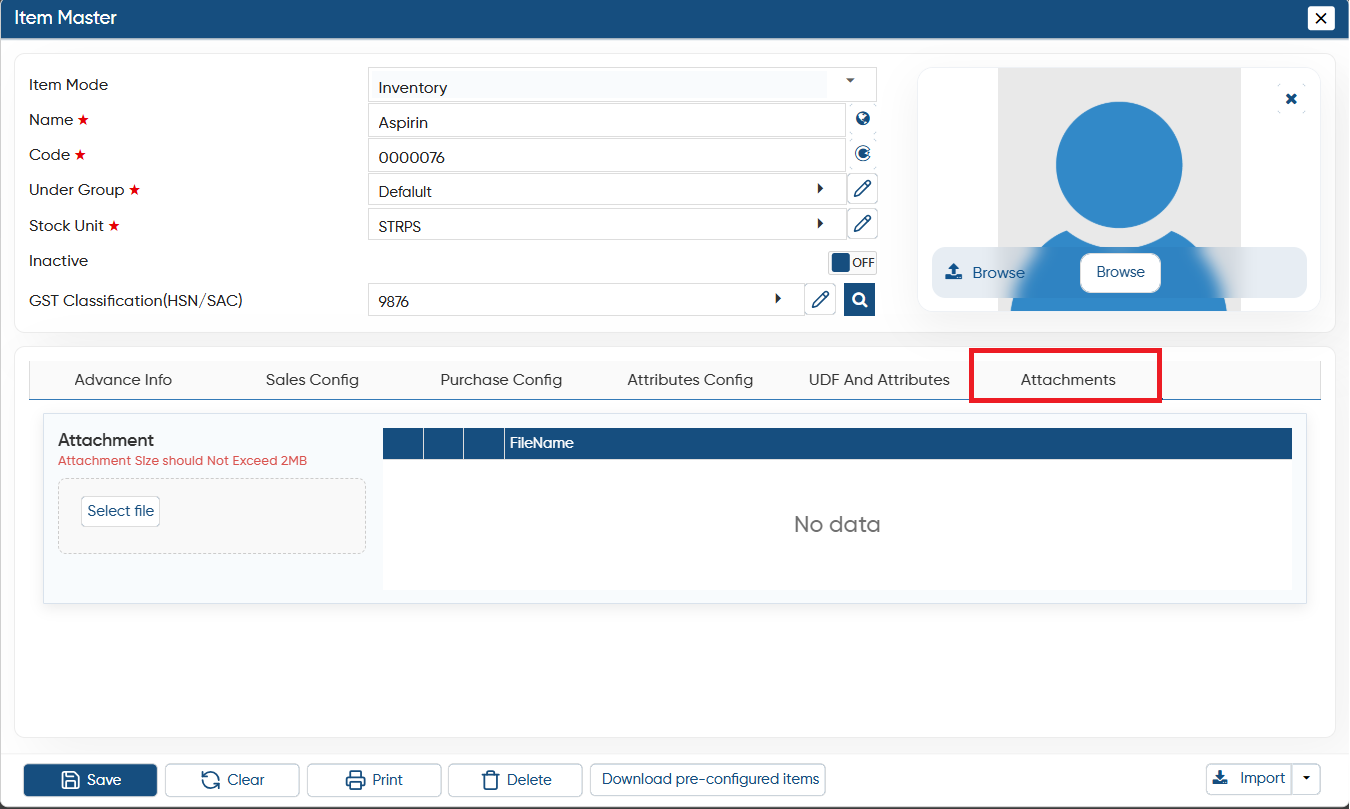
Attachments
-
If you have any document, images related to the item, you can upload the image.
-
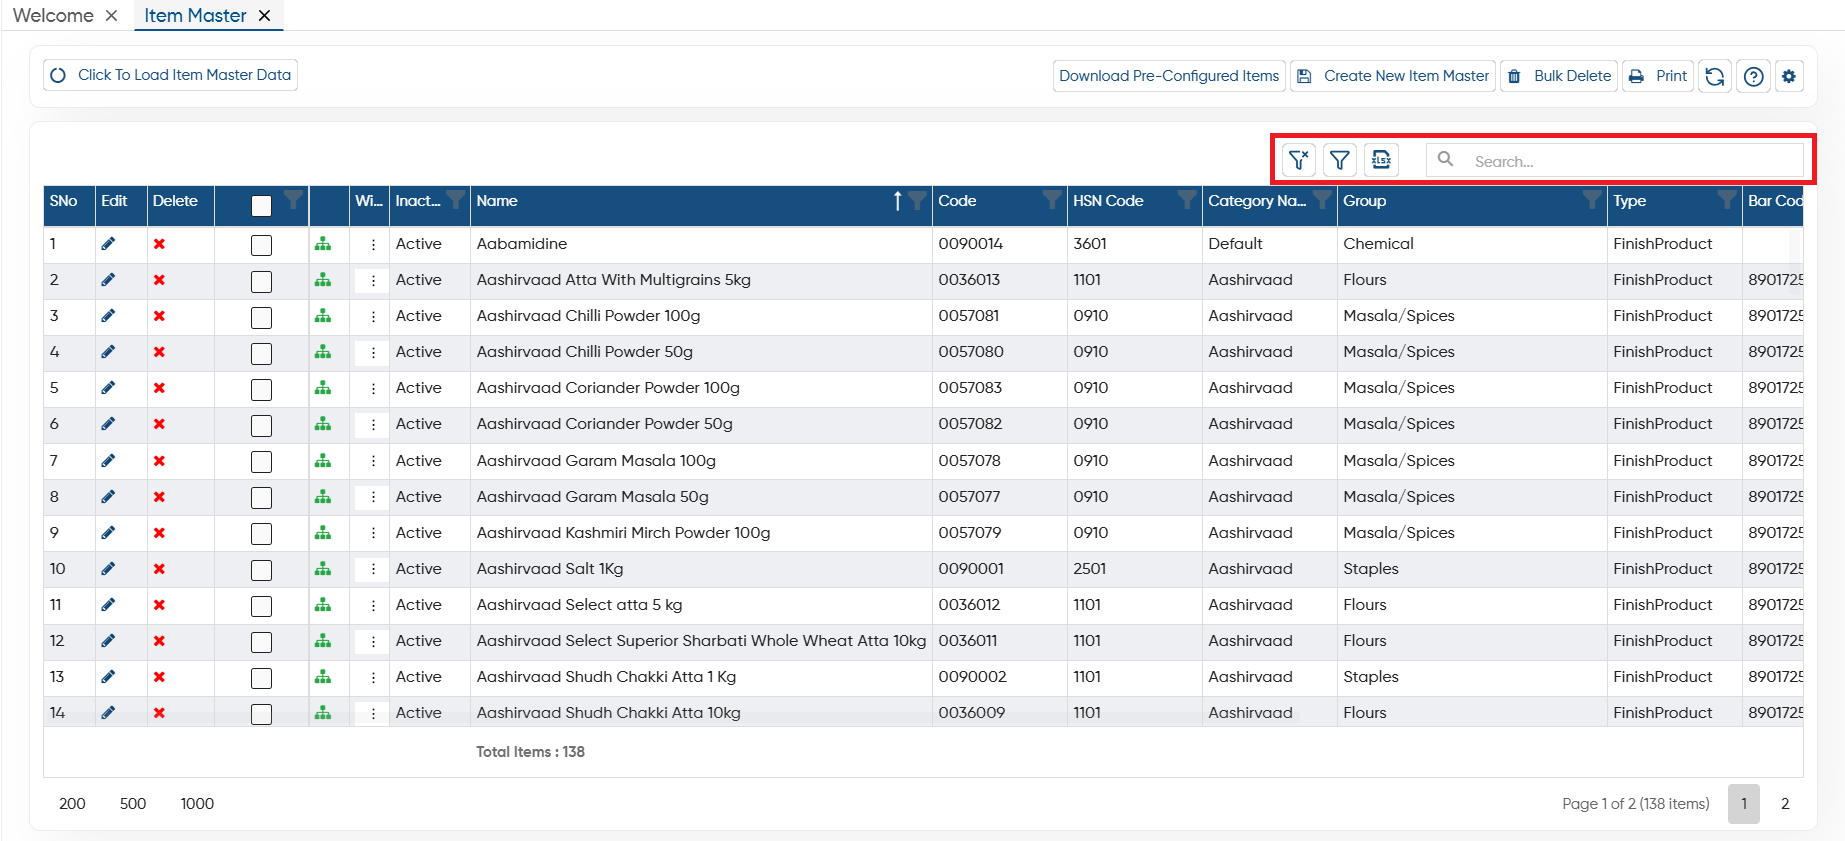
Clear Filter: After enabling the Filter if you want to remove all filter click on this button.
-
Show Filter: To enable the Filter click on the button, it will display the filter option for each column.
-
Excel: If you want to generate the item list in excel file, click on the icon and all the items details will be generate in Excel File.
-
Search: To find any of the item from the list, type the item Name, Code or specific Branch, Group, Type etc the software will display the result on the screen.
 Click on the Edit icon to modify the item details.
 Click on cross icon to delete a specific item.
-
You can set approval for newly created ledgers at multiple levels based on your business requirements. Using this icon, you can check the approval status, such as who needs to approve it and who has already approved it.
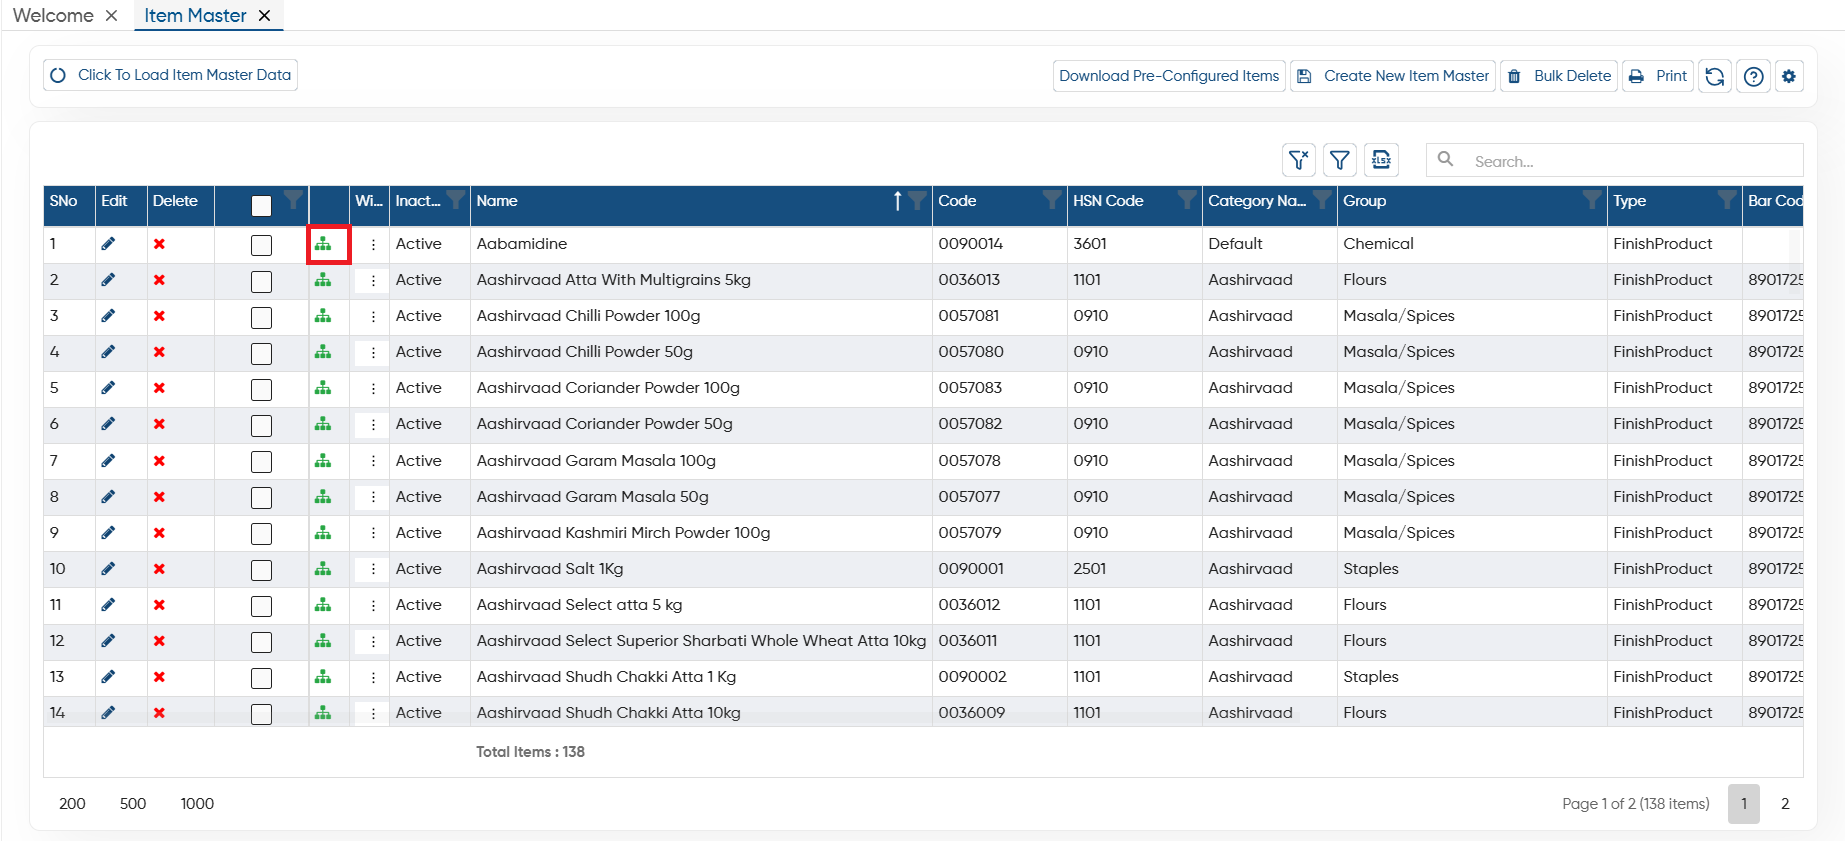
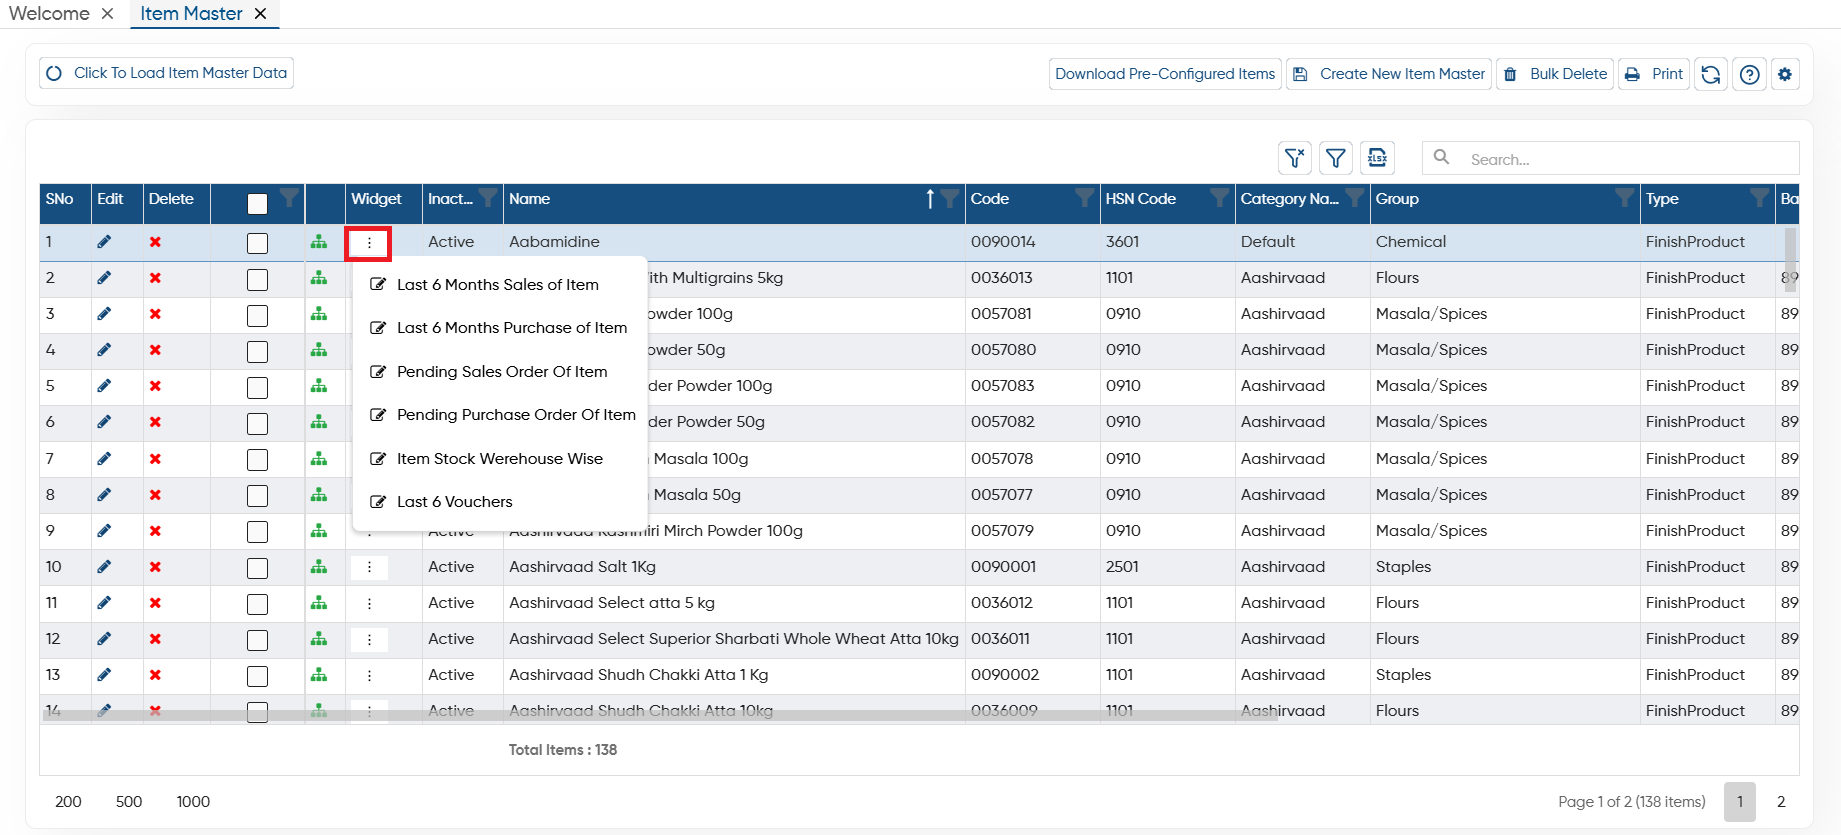
Click on the 'Widgets' icon on a specific Item to view the different reports.
-
Last 6 Months Sales of Item
-
Last 6 Months Purchase of Item
-
Pending Sales Order Of Item
-
Pending Purchase Order Of Item
-
Item Stock Warehouse Wise
-
Last 6 Vouchers
In this way, you can Create and Manage the Item Master in AlignBooks.