
Request For Quotation
The ‘Request For Quotation’ process begins once all proposal details are clear and any queries between both sides have been resolved. After reviewing the proposal and confirming the scope, terms, and expectations, you can formally invite the vendor to submit their quotation.
This step ensures that there is a mutual understanding of requirements before discussing pricing. It helps avoid confusion later and allows the vendor to provide an accurate quotation based on the finalized scope and agreed conditions.
-
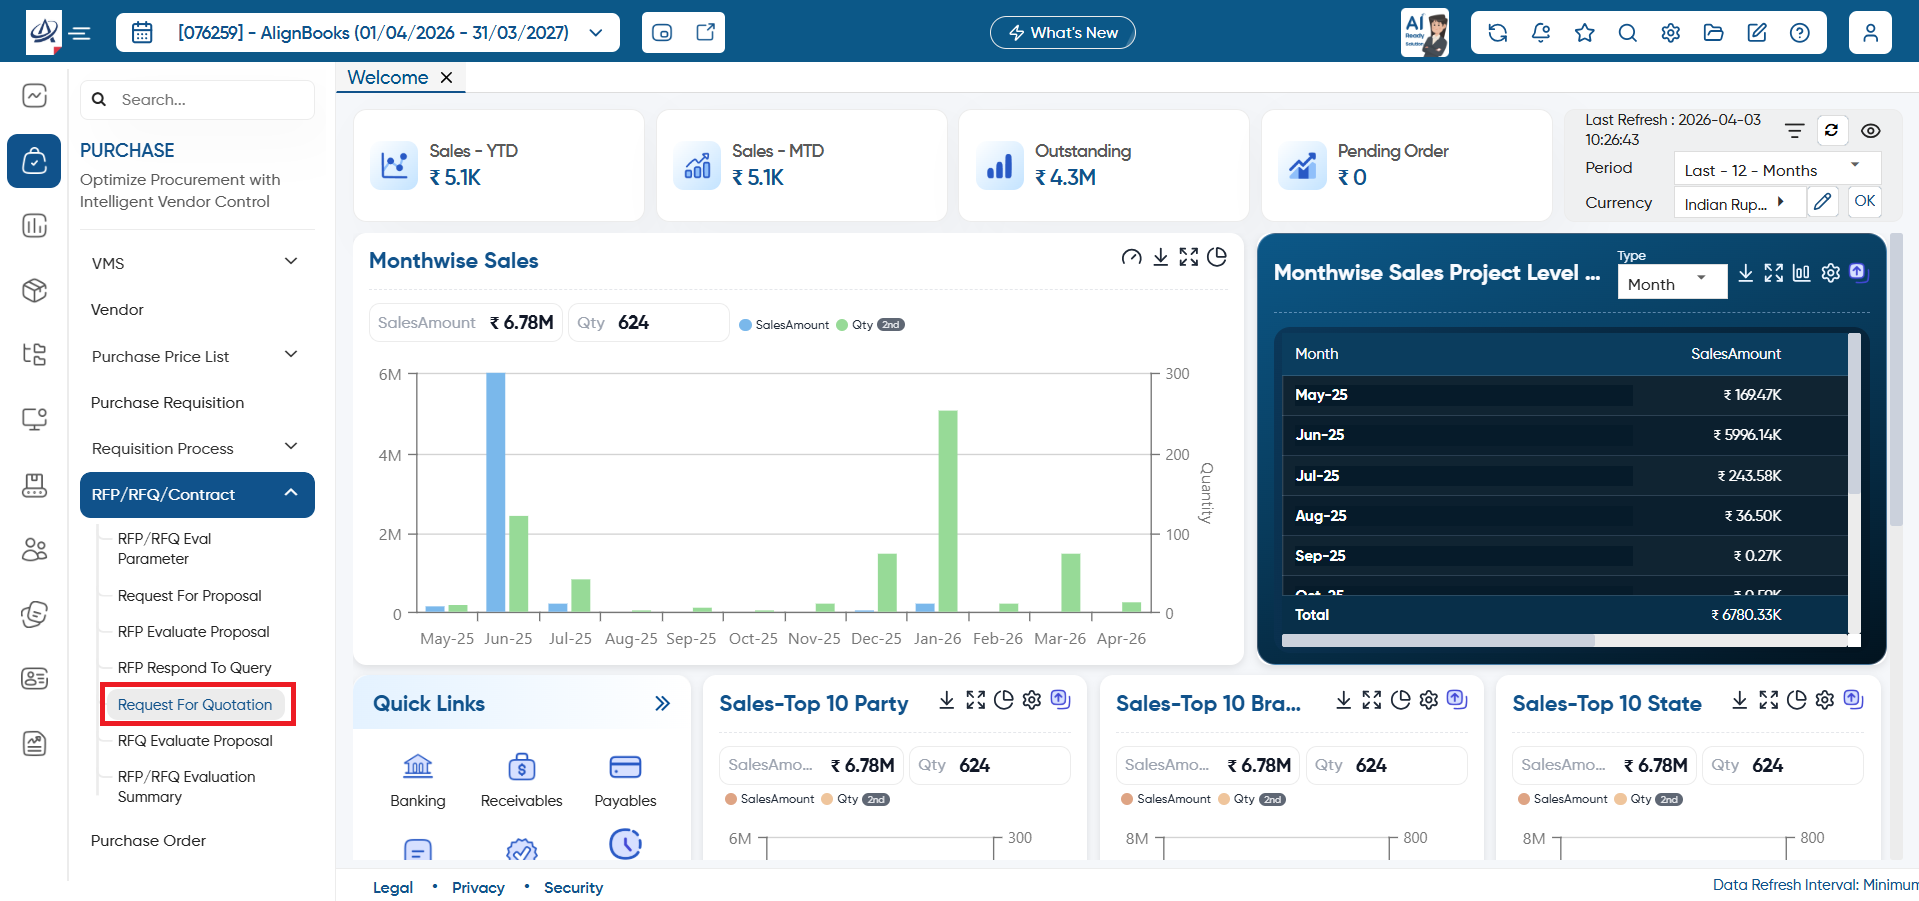
To request for quotation, open the ‘Purchase’ > ‘RFP/RFQ/Contract’ > ‘Request For Quotation’ option.
-
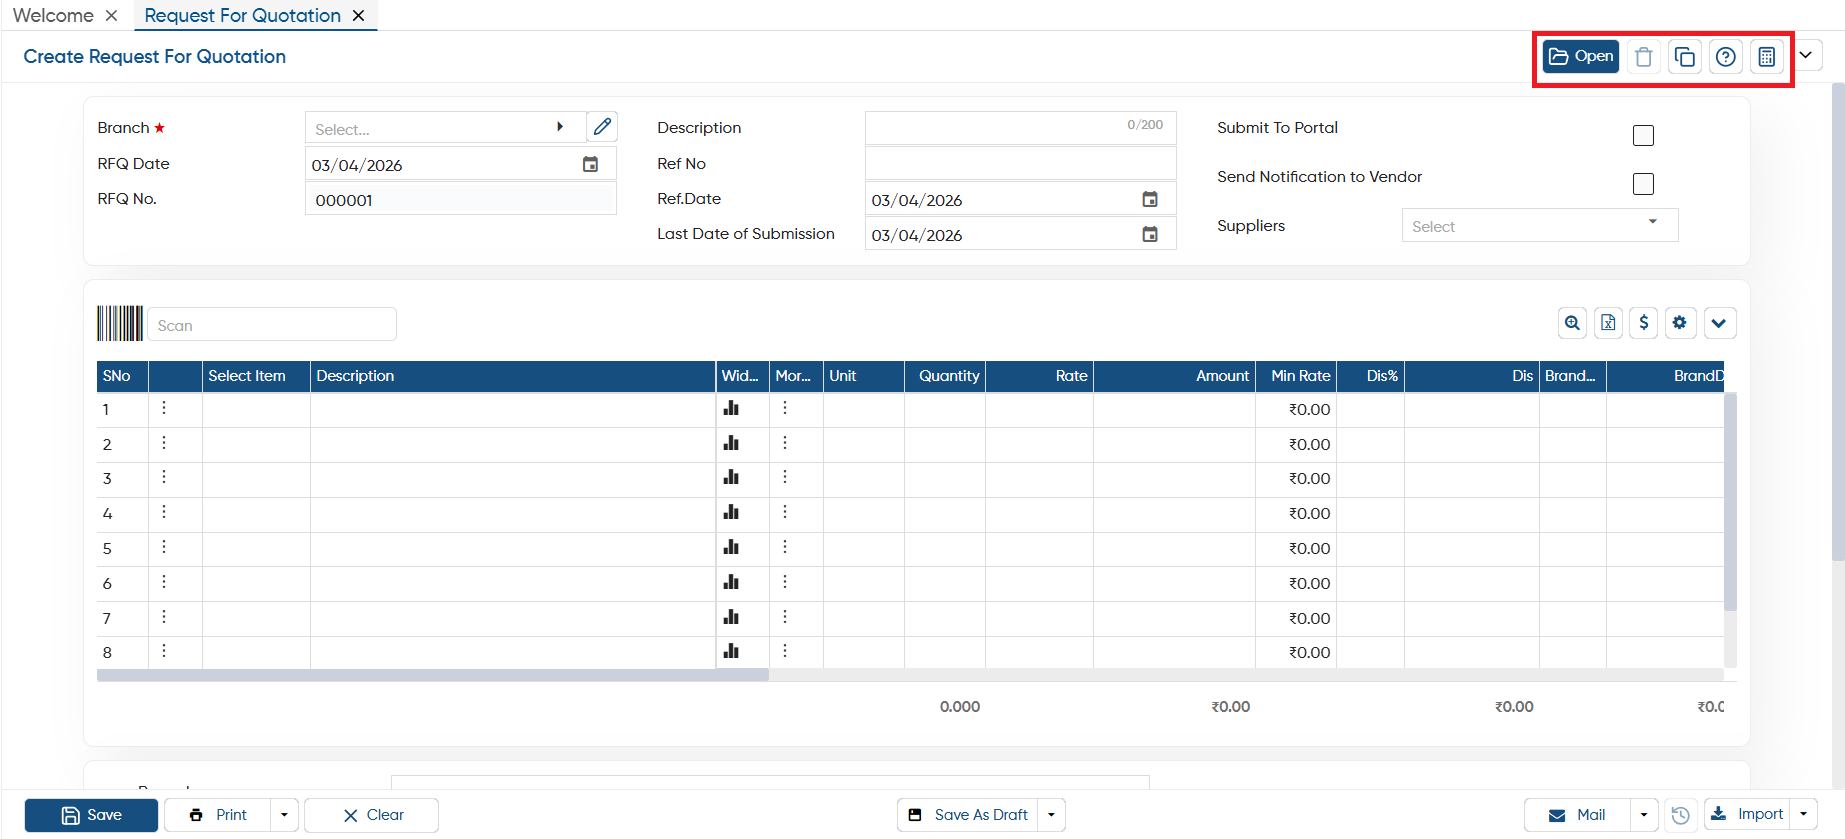
Open: This option allows you to view selected document you have created in the software. If you required to make any changes in the saved invoice you can click on 'Open' icon, select the date range and can make changes in it.
-
Delete: With this option, you can remove or delete the document permanently.
-
Copy: This feature lets you copy the invoice and create a new one based on the same details, which you can then modify as needed.
-
Help: Click on the help icon to access the step by step guide of the Process.
-
Calculator: AlignBooks includes an inbuilt calculator that you can use while working within the software, making calculations easier.
-
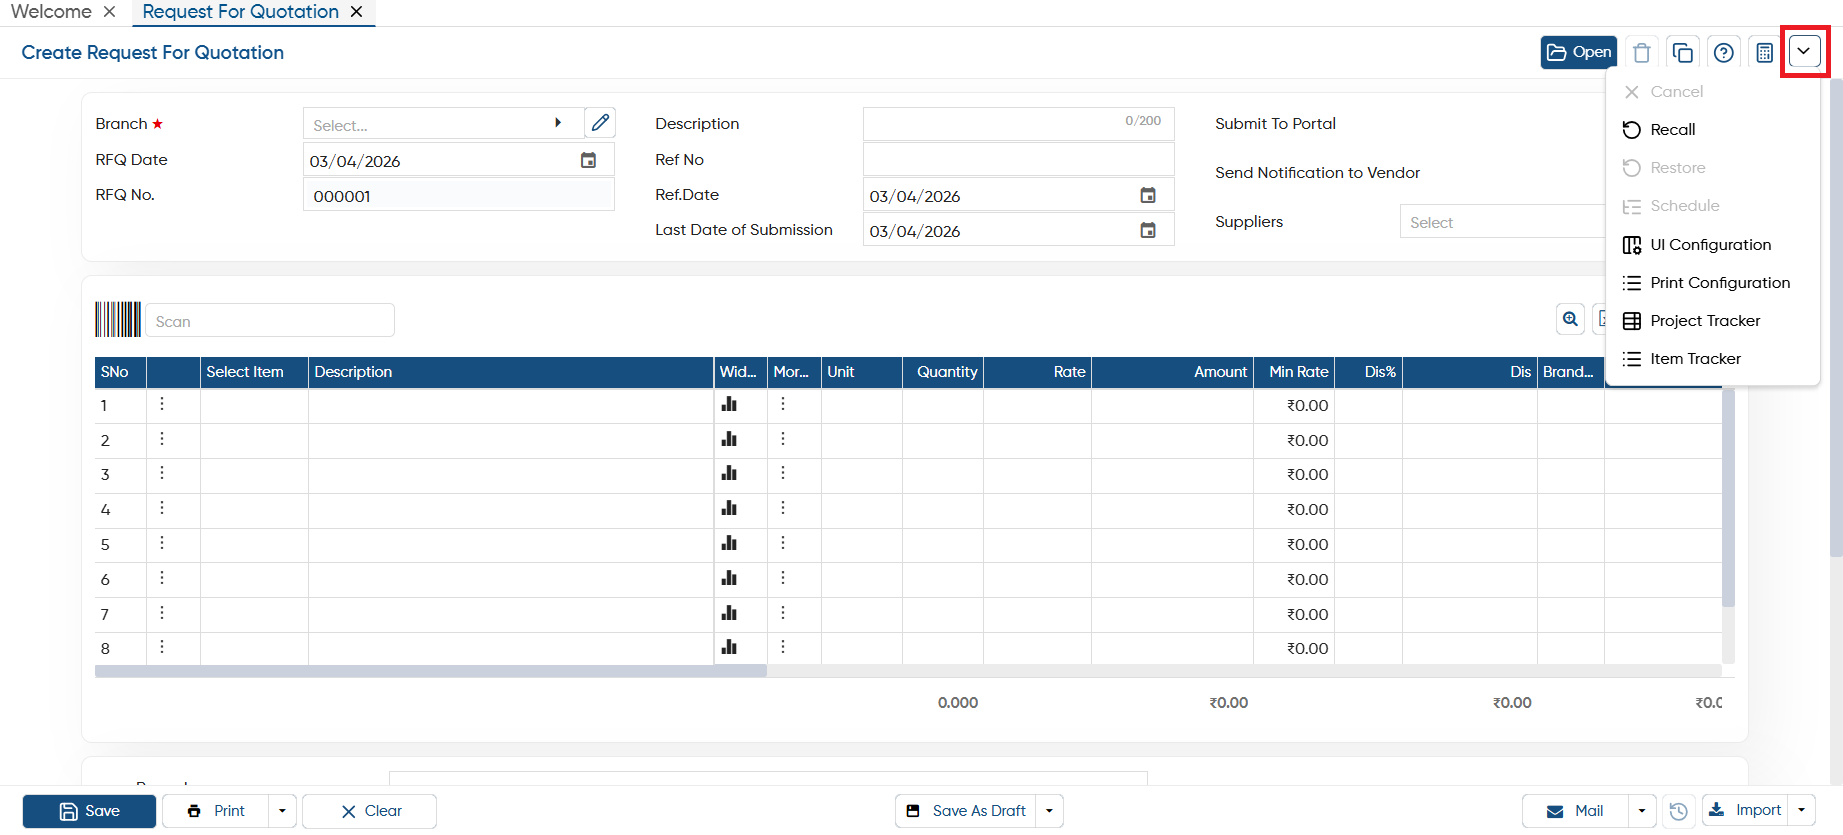
Cancel: If you no longer need an open document but don't want to permanently delete it, click on the ‘Cancel’ button. This will cancel the document but keep it in the list, allowing you to restore it whenever needed.
-
Recall: This option is used when a customer bill (POS Invoice) is put on hold. You can click on this option to retrieve the held invoice and continue billing from where you left off.
-
Restore: If you click on a cancelled document, the ‘Restore’ option will appear, allowing you to restore the document to its previous state.
-
Schedule: If you need to create the same document with the same details regularly on a fixed schedule, you can set up a Schedule for it. The document will then appear in the ‘Post Recurring Module’ of AlignBooks. From there, you can post the document with just one click, without having to prepare it repeatedly. This also serves as a reminder for you.
You can only schedule the document after you have saved it. The schedule option is not available while you're in the process of creating the cheque return entry.
|
-
UI Configuration: For additional settings related to this voucher, navigate to the configuration option. There, you can adjust settings such as invoice numbering, email, WhatsApp, SMS, approvals, and more.
-
Print Configuration: This option lets you customize the voucher print settings, including header/ footer remarks, terms & conditions, and setting the default invoice format etc.
-
Project Tracker: This option helps you track any project using details like work orders, site summary, budget vs actual, and progress, etc. You can also see how many records have been created for each process, making it easier to monitor project performance and stay on track.
-
Item Tracker: This option helps you track a specific item and see in which projects or transactions it has been used. You can also check how many requests and issues have been created for that item, helping you manage stock better and avoid shortages or overuse.
-
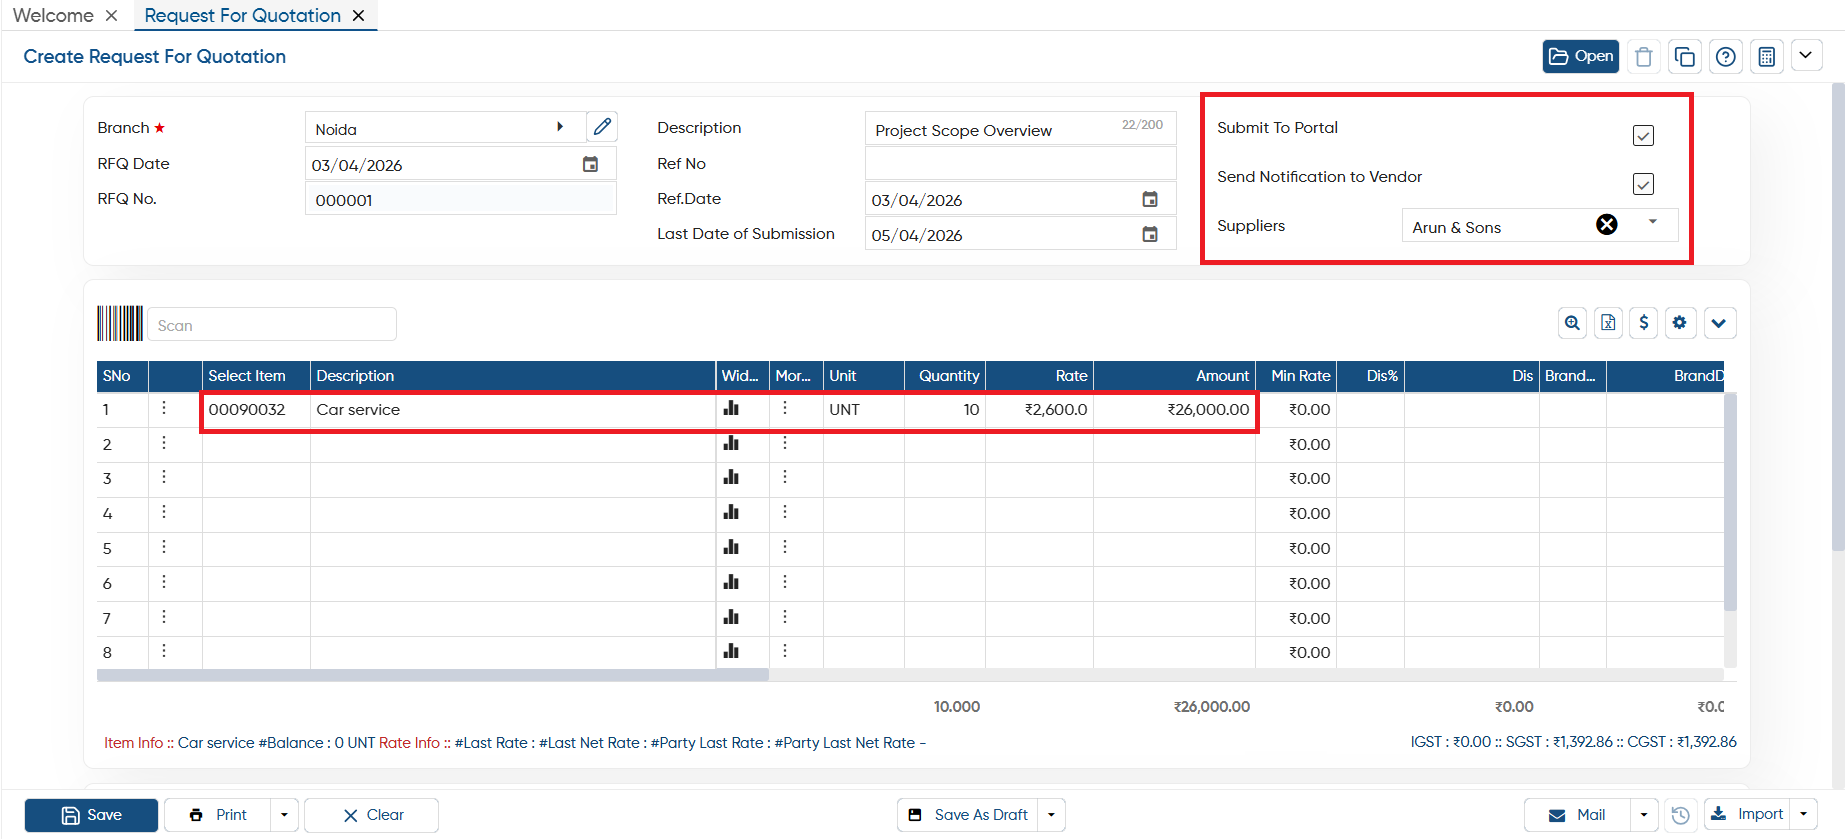
Branch: Select the branch that is raising the RFP. This helps in identifying which branch is responsible for the requirement.
-
RFQ Date: Enter the date on which the Request for Quotation is created or issued. This helps in tracking when the quotation request is shared.
-
RFP No.: This is the unique identification number of the RFQ. It helps in tracking, referencing, and managing the quotation in records and reports.
-
Ref No: You can mention any internal reference number or related document number for cross-reference purposes.
-
Description: Provide a short summary or title of the quotation. This gives vendors a quick understanding of what the RFQ is about.
-
Ref. No: Mention the reference number related to the project or supporting document. This is used for documentation and tracking purposes.
-
Ref. Date: Mention the reference date related to the project or supporting document. This is used for documentation and tracking purposes.
-
Last Date of Submission: Enter the final date by which vendors must submit their quotation. After this date, submissions may not be accepted.
-
Submit To Portal: When this option is selected, the RFQ is published on the vendor portal, allowing vendors to view and respond to it.
-
Send Notification to Vendor: If enabled, the system sends a notification to the selected vendors informing them that a new RFQ has been requested.
-
Suppliers: Select the vendors who are eligible to receive this RFQ request. Only the selected suppliers will be able to view and submit quotations through the portal.
Thereafter, load the Items and click on the ‘Save’ button to save the quotation.
-
Zoom: Click on the ‘Zoom’ icon to view all the items in the Invoice at once. This helps you to view all the loaded items on a single page or screen for better clarity and easy review.
-
Excel: Click on the 'Excel' icon to export the invoice items details in excel file.
-
Dollar: The 'Dollar' icon will help you to see the financial posting for this bill.
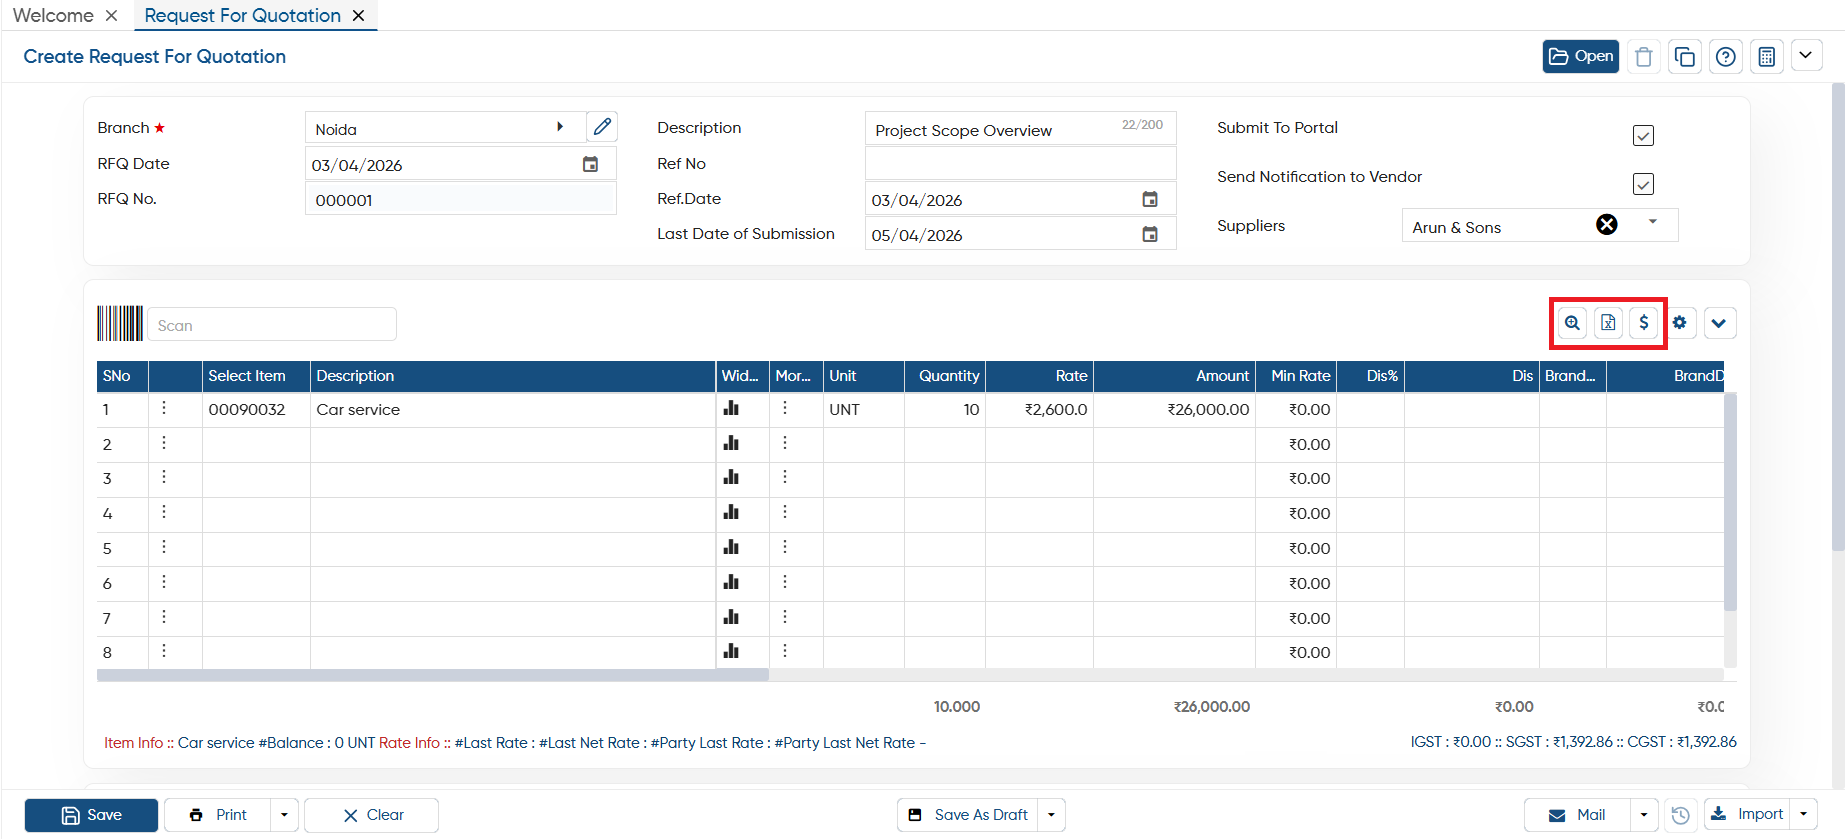
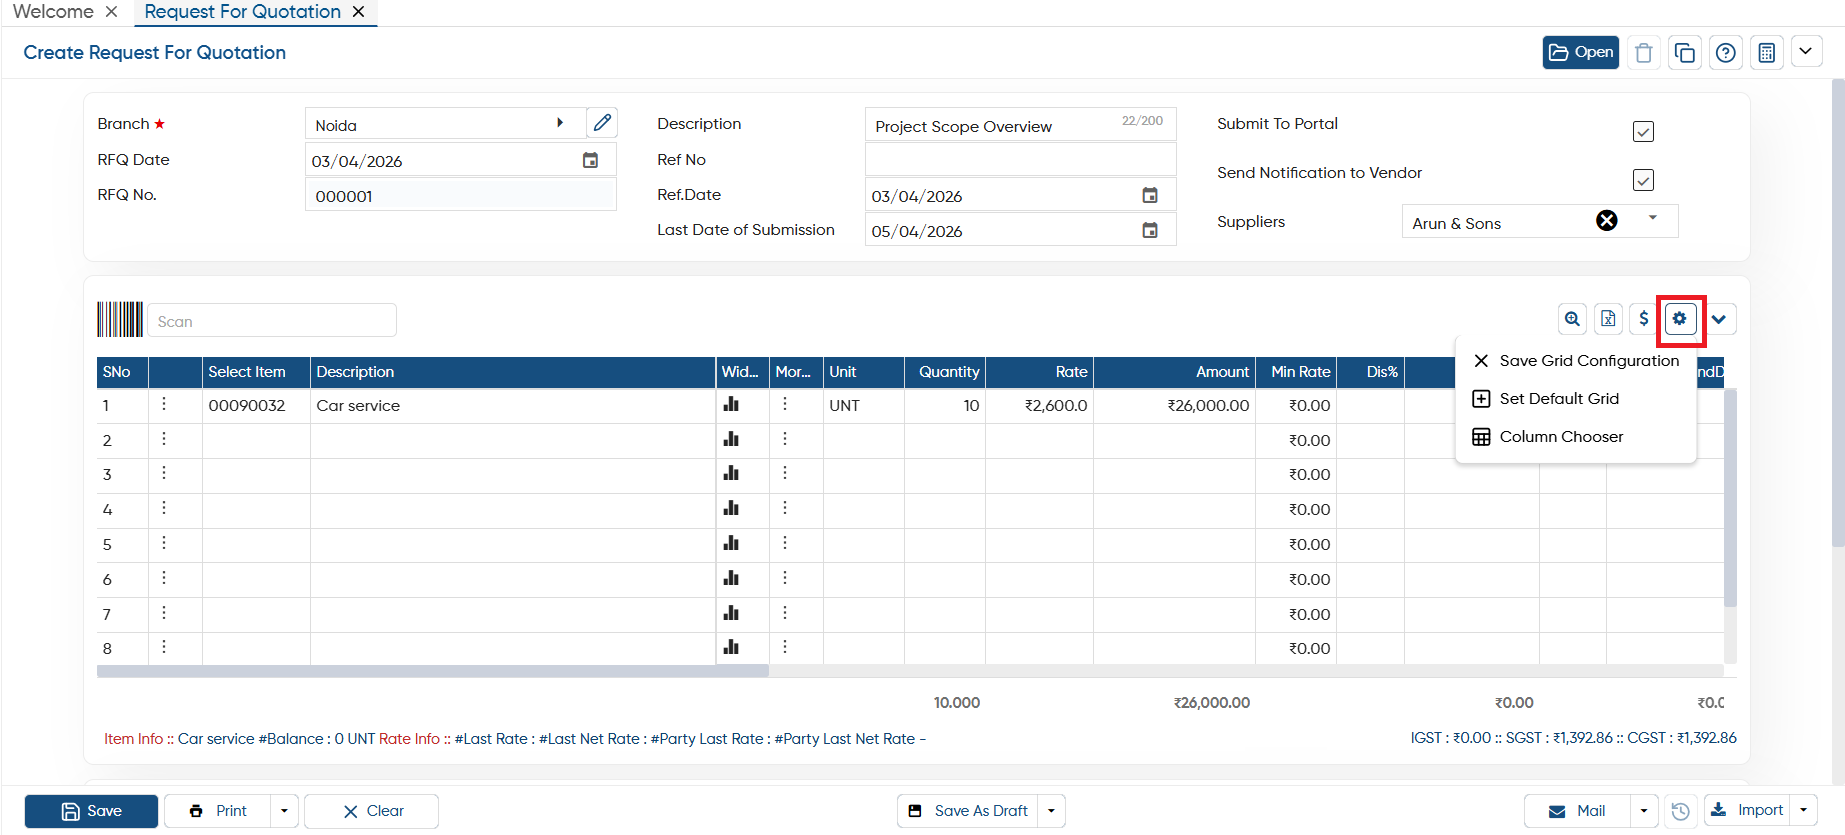
Click on the 'Settings' icon to customize the Item Table according to your preferences.
-
Save Grid Configuration: This option lets you save any changes you’ve made to the item table settings, so you don’t need to reconfigure them each time.
-
Set Default Grid: With this option, you can set your preferred item table configuration as the default, making it easier for future use.
-
Column Chooser: This feature allows you to drag and drop columns in the table. To add or remove a column, simply drag it into or out of the table.
-
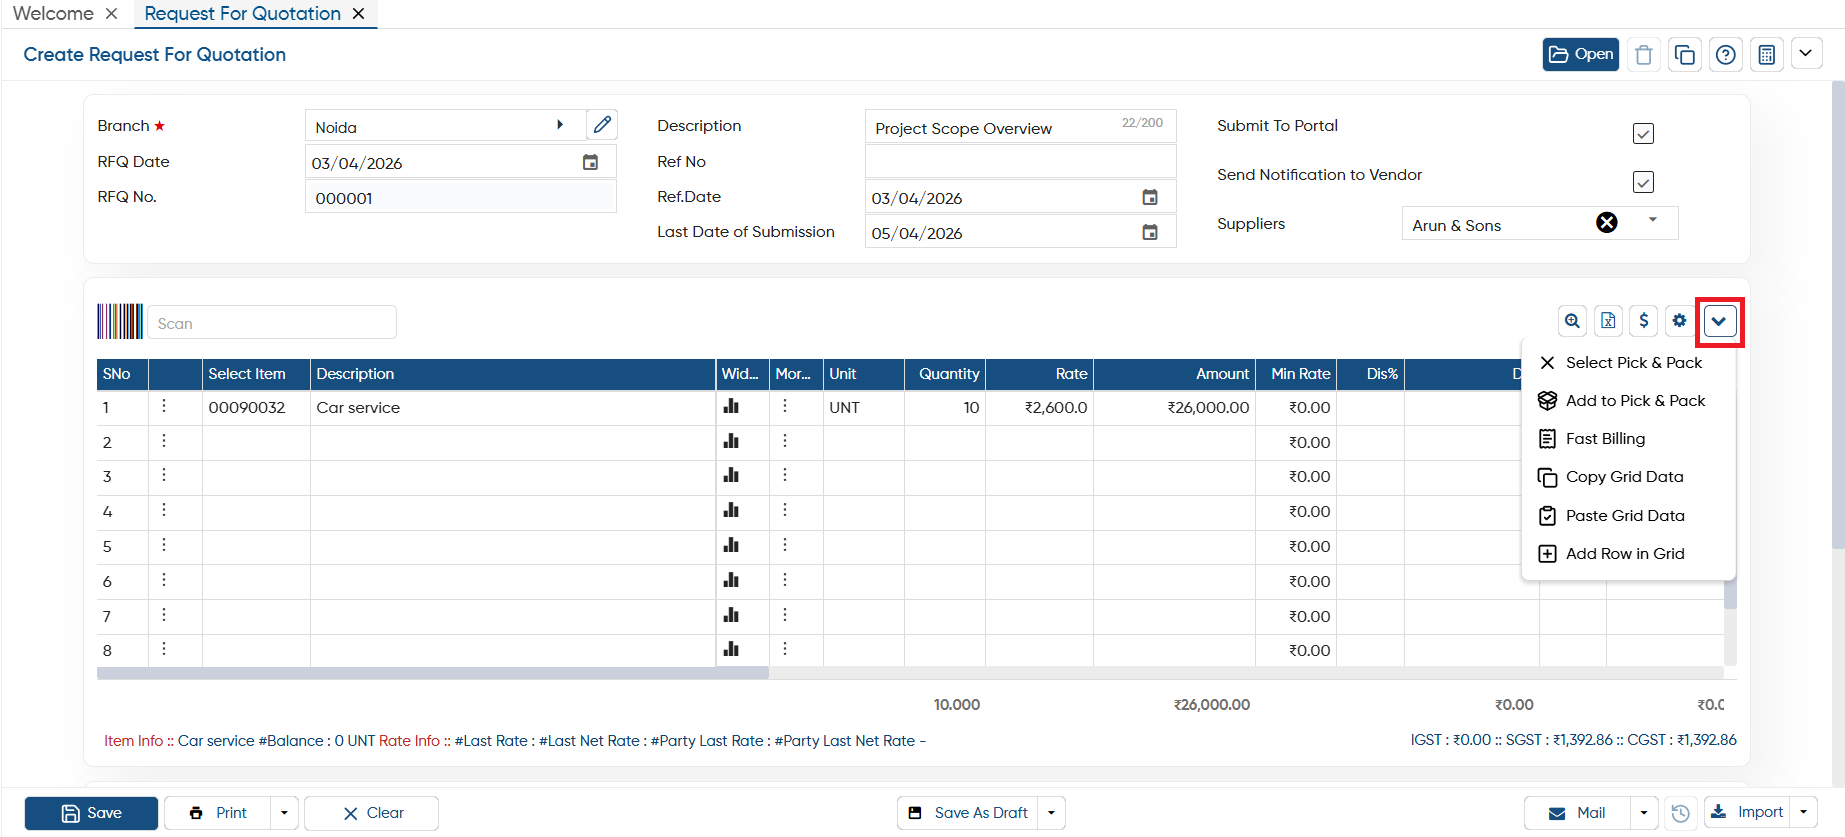
Pick And Pack: This option allows you to create a set of items that can be quickly loaded into the invoice, ensuring all items in the set are automatically added.
-
The ‘Pick and Pack’ option works similarly to the ‘Bundle’ feature, with one key difference: Pick and Pack is party-specific, meaning you can link it to a fixed party and set a default Lot Quantity, whereas Bundle is flexible for all parties and does not allow predefined lot quantity or a prompt to enter it.
-
To use it, simply select 'Pick and Pack' and click the 'OK' button besides the field.
2. Add to Pick & Pack: Through this option, you can create a new Pick & Pack list. A window will open showing the items already added in the invoice. You can enter a name for the Pick & Pack, and the system will create a new pack with the selected loaded items.
3. Fast Billing: Using this option, you can select multiple items at the same time to add to the invoice. It also offers extra filters that help you narrow down and refine the item list for easier selection.
-
From Item List: This option displays the complete item list. You can select multiple items, enter the required quantity for each item, and load them into the invoice in one go.
-
From Item Balance List: This option shows the available stock balance of items. You can view the current quantity in hand, select the required items, enter the quantity, and load multiple items into the invoice at once.
-
Comma Separated Code, Qty: In this option, you need to enter the item code and quantity separated by a comma for each item. By entering all item codes with their quantities in the given format, you can load multiple items into the invoice instantly.
4. Copy Grid Data: This is a Copy button that lets you copy the items from a specific invoice and easily paste them into another invoice. This feature helps save time when you need to duplicate items across multiple invoices.
5. Paste Grid Data: After copying the Items for another invoice you can click on 'Paste' button to paste the copied items in the invoice.
6. Add Row in Grid: Click on the ‘Add row in grid’ to insert more rows into the Item Table, allowing you to add additional items as needed. This helps you expand the list and include all required items in the invoice.
-
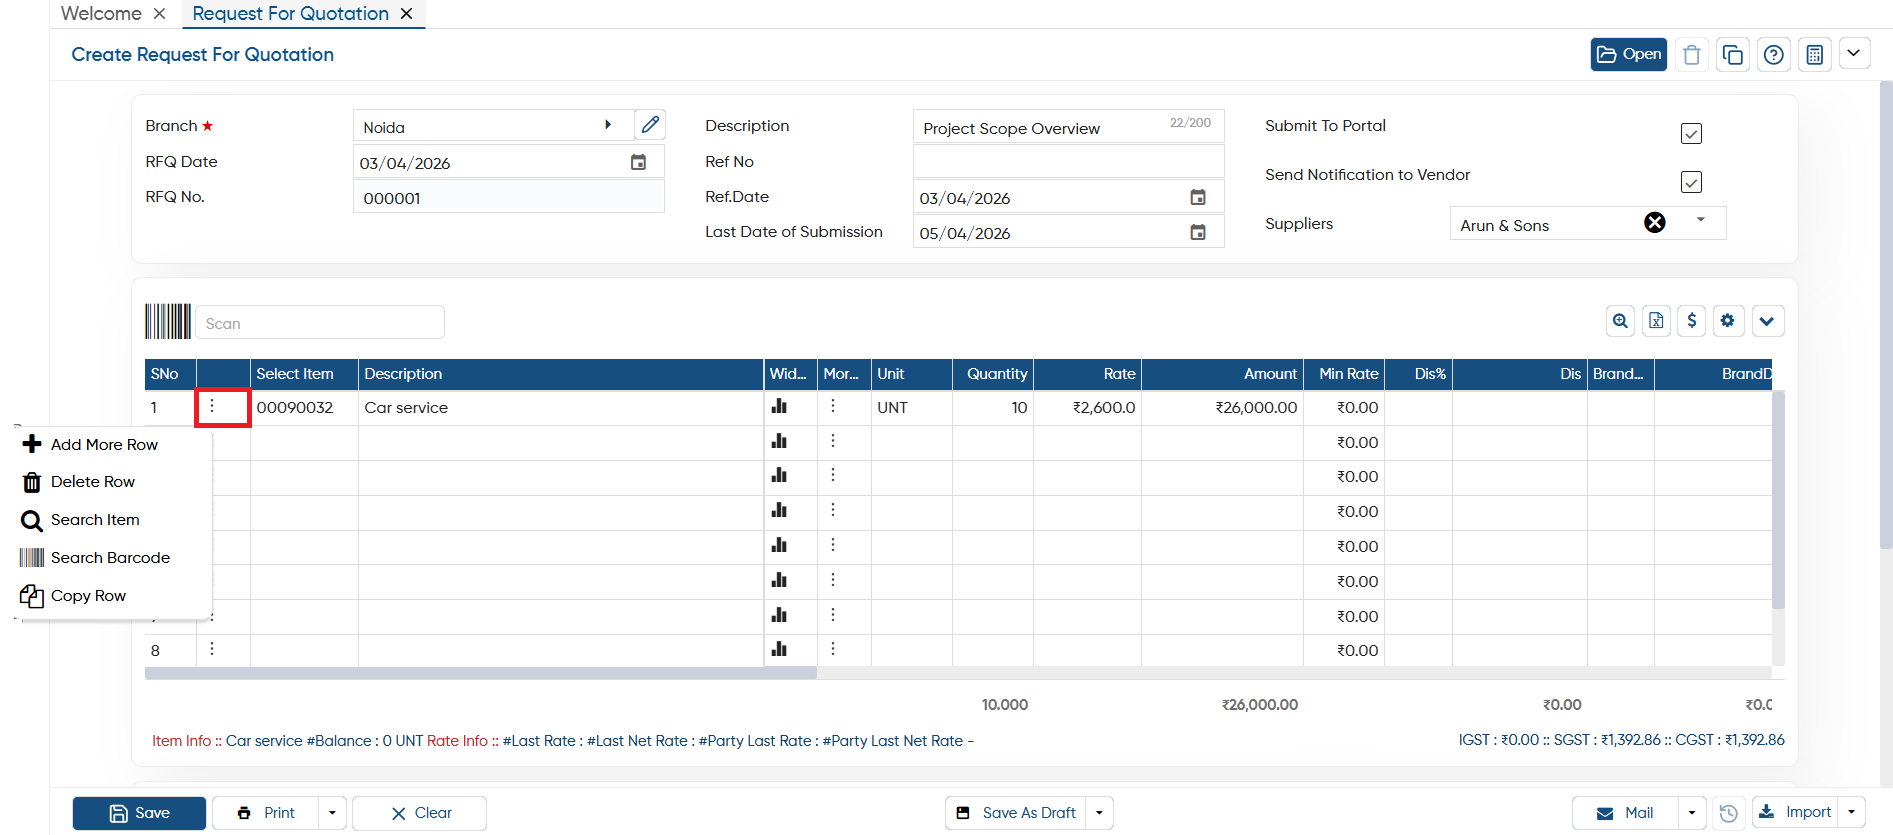
Add More Row: Click on this option to insert more rows into the Item Table, allowing you to add additional items as needed. This helps you expand the list and include all required items in the invoice.
-
Delete Row: Click on the ‘Delete Row’ option to remove a specific row or item from the invoice. This allows you to delete any unnecessary items with ease.
-
Search Item: Click on the ‘Search’ option on a specific item to view its complete details, including item balance, packing, sale rate, and more. This helps you quickly access important information about the item.
-
Search Barcode: Through this option, you can search and load an item by entering or scanning its barcode.
-
Copy Row: This option allows you to copy a specific row in the invoice, helping you quickly duplicate the same item details.
-
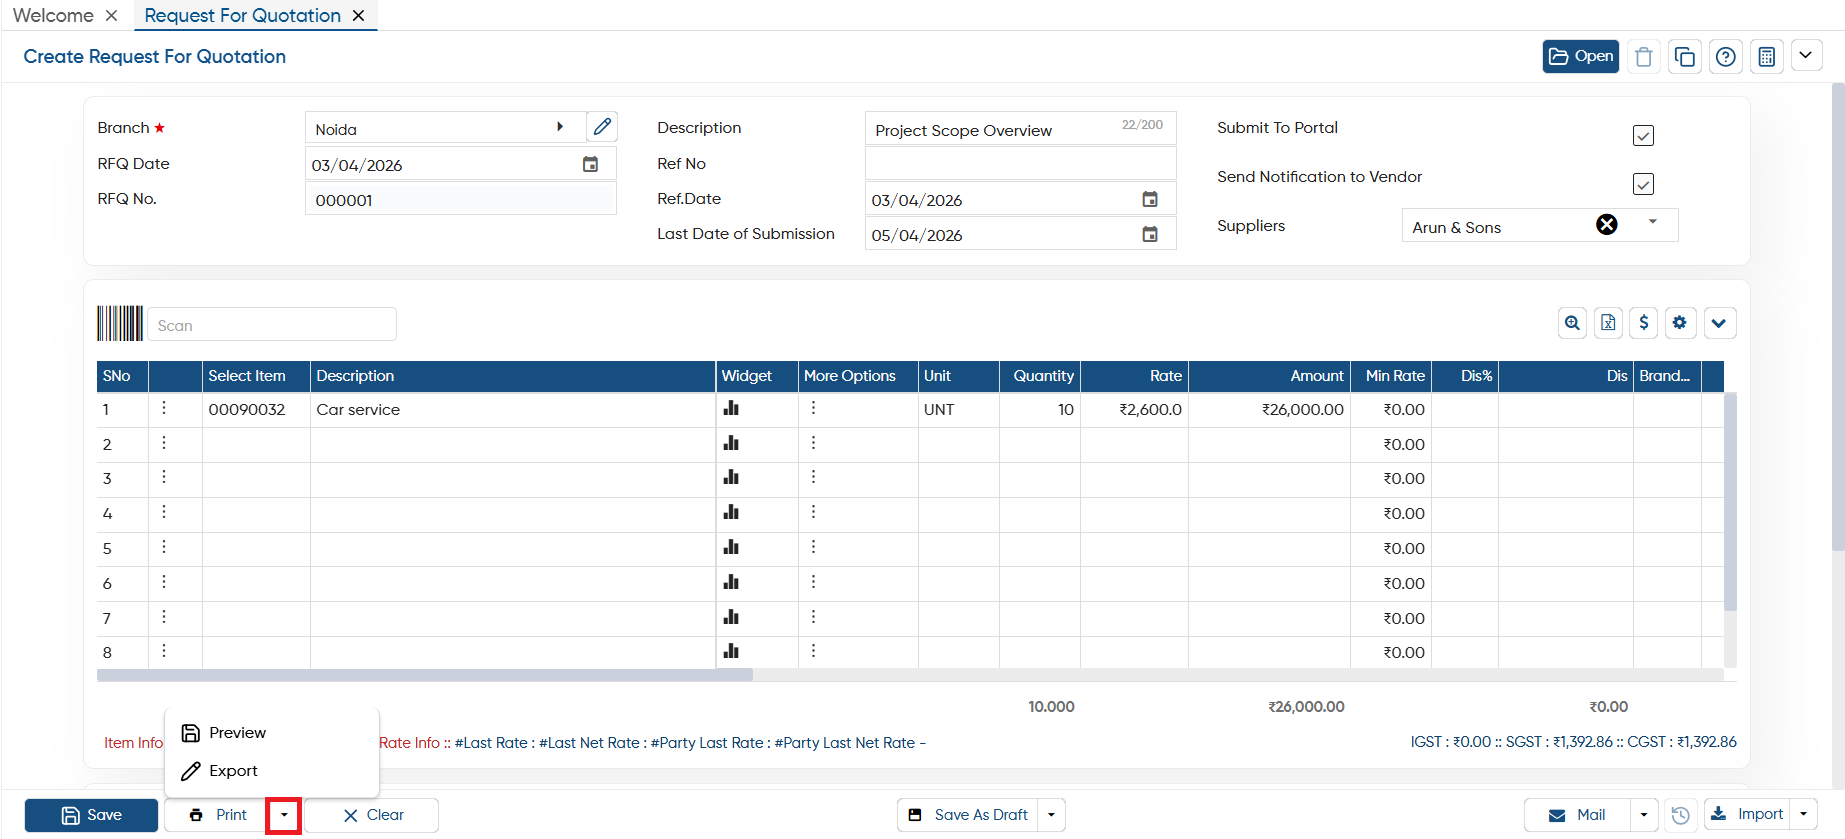
Preview: This option allows you to view a print preview of the invoice before finalizing it.
-
Export: If you want to download the invoice as a PDF, click on the ‘Export’ button, select your preferred format, and the invoice PDF will be downloaded.
-
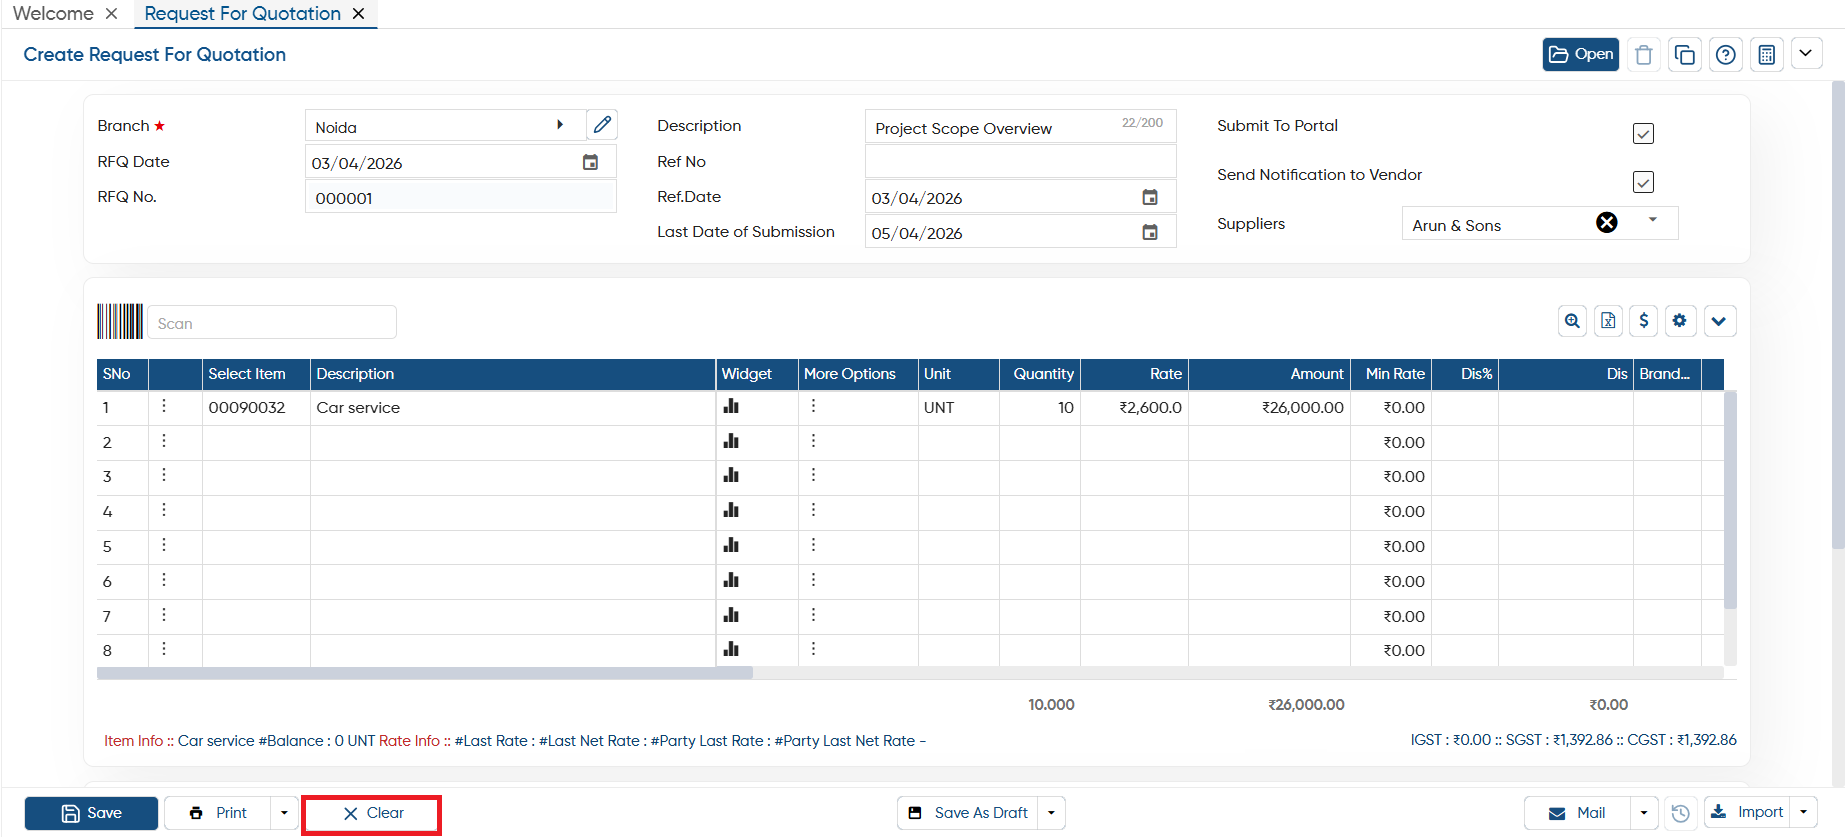
If the data on the current screen is no longer needed or you want to start fresh with a new invoice details, click the 'Clear' button. This will remove all the data from the current invoice, giving you a clean slate to enter new details.
-
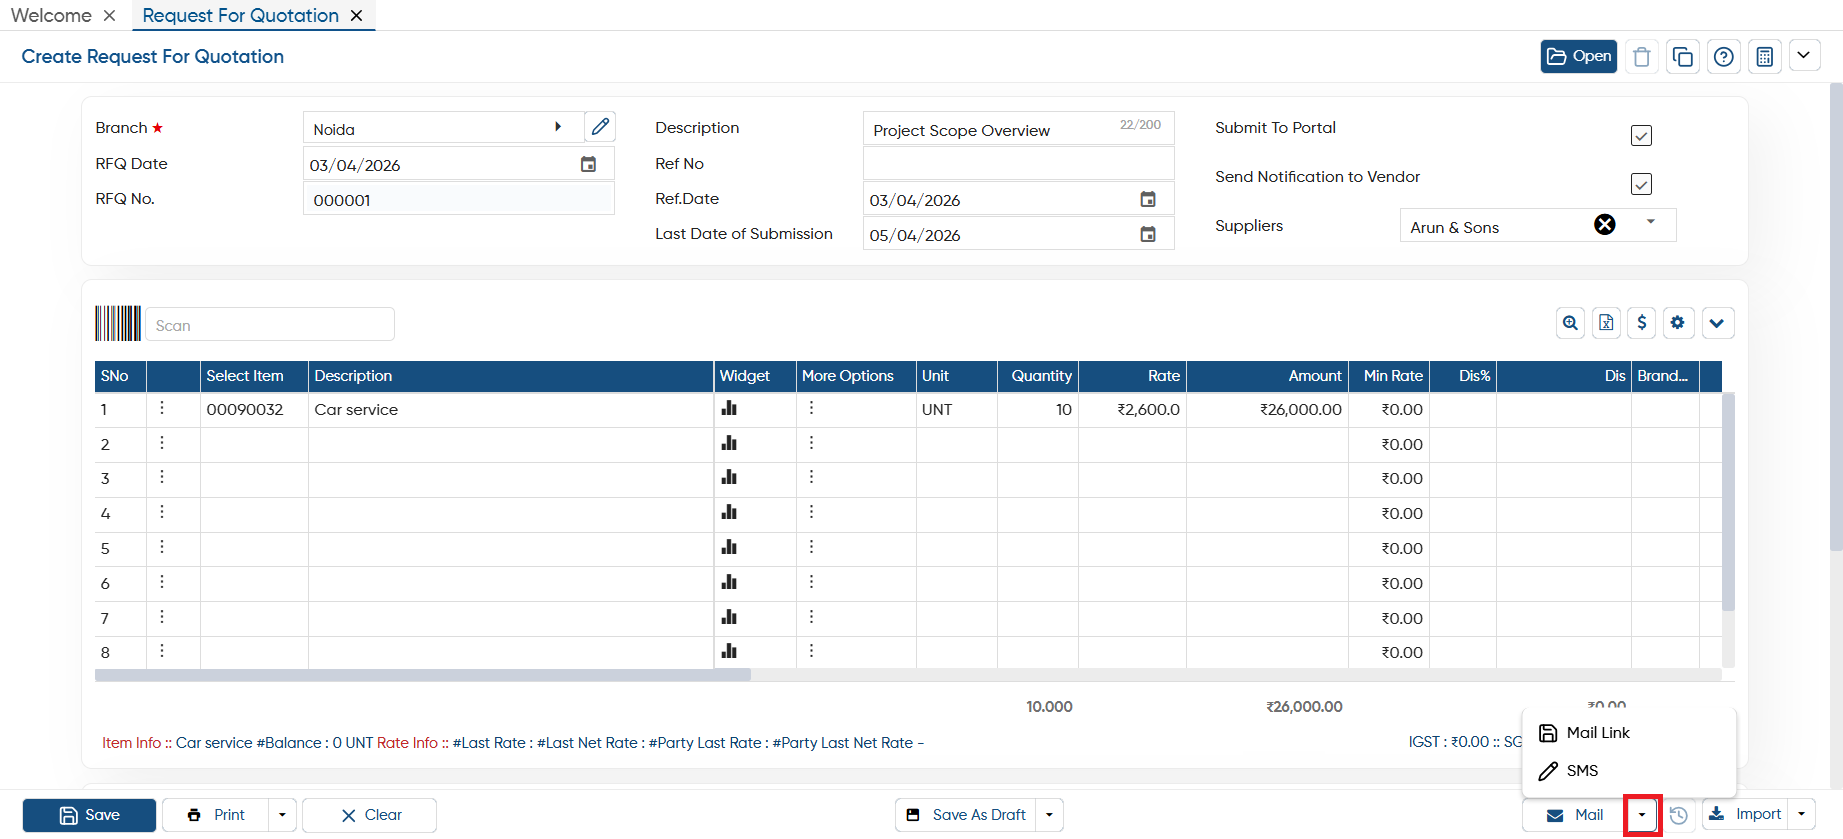
Mail Link: AlignBooks allows you to easily share the invoice link along with an attachment directly to the vendor or customer email address. (Customer - In case you are dealing in both Sale and Purchase with the party)
-
SMS: You can also send the invoice link and attachment via SMS to the vendor or customer, based on your preference. (Customer - In case you are dealing in both Sale and Purchase with the party)
For sharing invoice link and Attachment via Email and SMS you need to Integrate Email and SMS setup in AlignBooks.
|
-
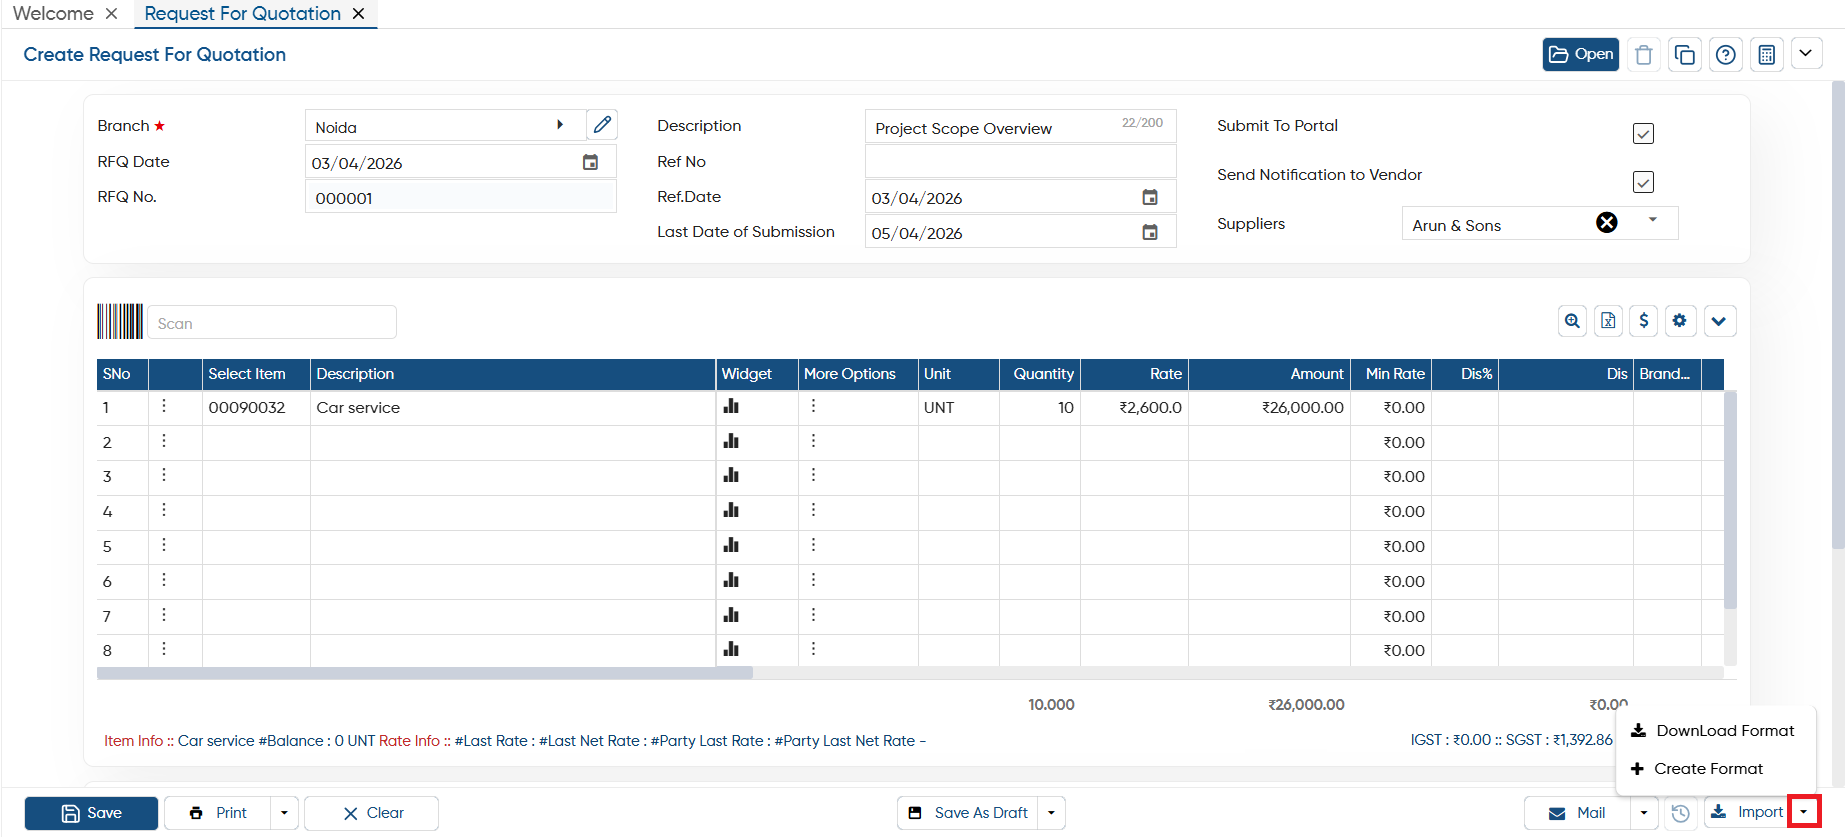
Download Format: If you want to import data from an Excel file, you can download the template through this option. After entering the data, you can directly import the file into AlignBooks.
-
Create Format: You can also create a custom format and map the columns with your Excel file. Make sure the field headings in the Excel file match those in the software when mapping the columns.
In this way you can create and manage Request For Quotation in AlignBooks.