
Sales Return Challan
A Sales Return Challan is a document issued by a buyer when returning goods to the seller due to defects, damages, or incorrect shipments. It serves as proof of the return transaction and typically includes details such as the product description, quantity, reason for return, and invoice reference.
This challan helps maintain proper records in accounting and inventory management, ensuring transparency between both parties. It also facilitates adjustments in accounts, such as refunds, credit notes, or replacement of goods, to maintain accurate financial records.
Sales Return Challan is divided in 3 parts:
-
Document Header Details
-
Item Table
-
Document Footer Details
-
Go to Sales > Sales Return Challan.

Document Header Details
-
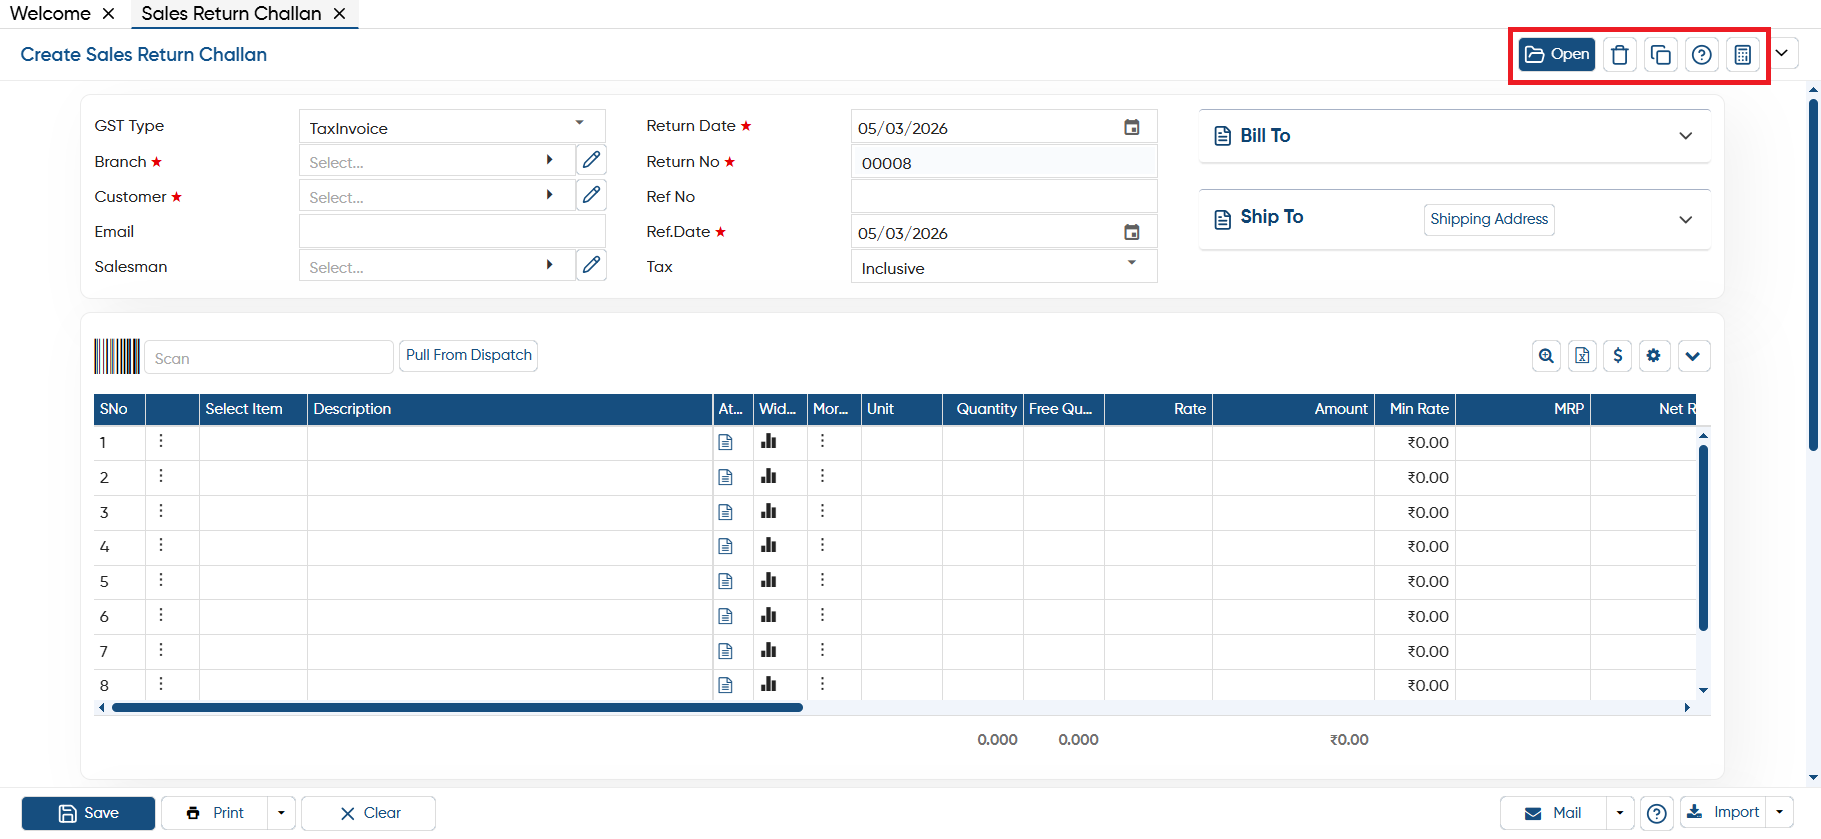
Open: This option allows you to view all the sale return challan you have created in the software. If you required to make any changes in the saved challan you can click on 'Open' icon, select the date range and can make changes in it.
-
Delete: With this option, you can remove or delete a sale return challan permanently.
-
Copy: This feature lets you copy the challan and create a new one based on the same details, which you can then modify as needed.
-
Help: Click on the help icon to access the step by step guide of the Sales Return Challan Process.
-
Calculator: AlignBooks includes an inbuilt calculator that you can use while working within the software, making calculations easier.
-
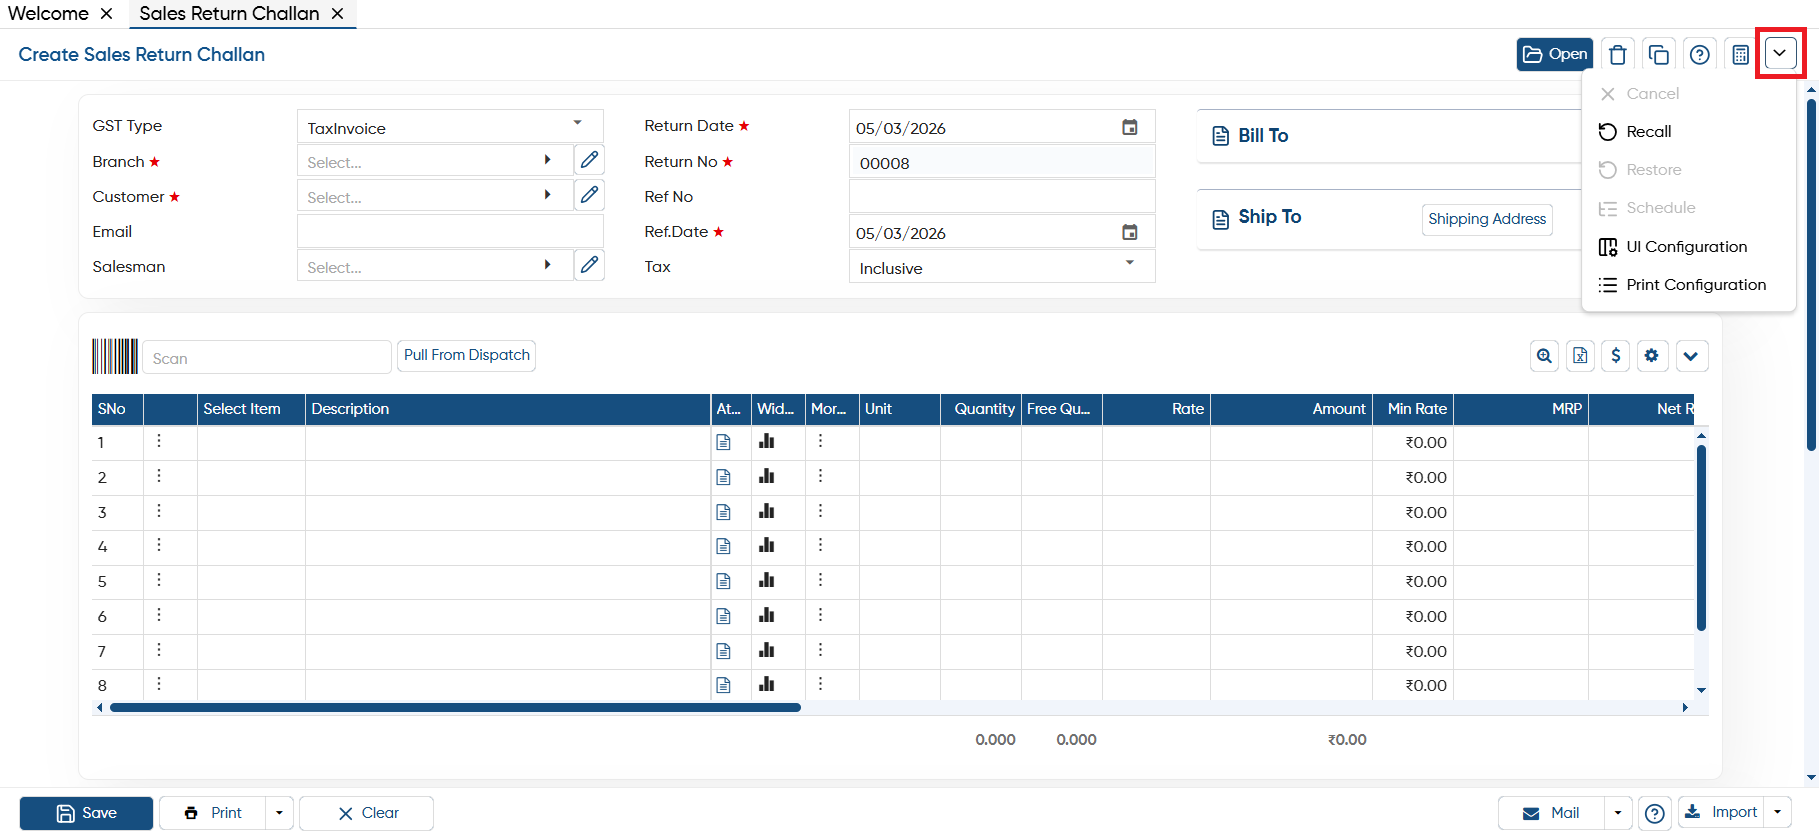
Cancel: If you no longer need an open document but don't want to permanently delete it, click on the ‘Cancel’ button. This will cancel the document but keep it in the list, allowing you to restore it whenever needed.
-
Recall: This option is used when a customer bill (POS Invoice) is put on hold. You can click on this option to retrieve the held invoice and continue billing from where you left off.
-
Restore: If you click on a cancelled document, the ‘Restore’ option will appear, allowing you to restore the document to its previous state.
-
Schedule: If you need to create the same challan with the same details regularly on a fixed schedule, you can set up a Schedule for it. The document will then appear in the ‘Post Recurring Module’ of AlignBooks. From there, you can post the challan with just one click, without having to prepare it repeatedly. This also serves as a reminder for you.
|
-
UI Configuration: For additional settings related to this document, navigate to the configuration option. There, you can adjust settings such as invoice numbering, email, WhatsApp, SMS, approvals, and more.
-
Print Configuration: This option lets you customize the invoice print settings, including header/ footer remarks, terms & conditions, and setting the default invoice format etc.
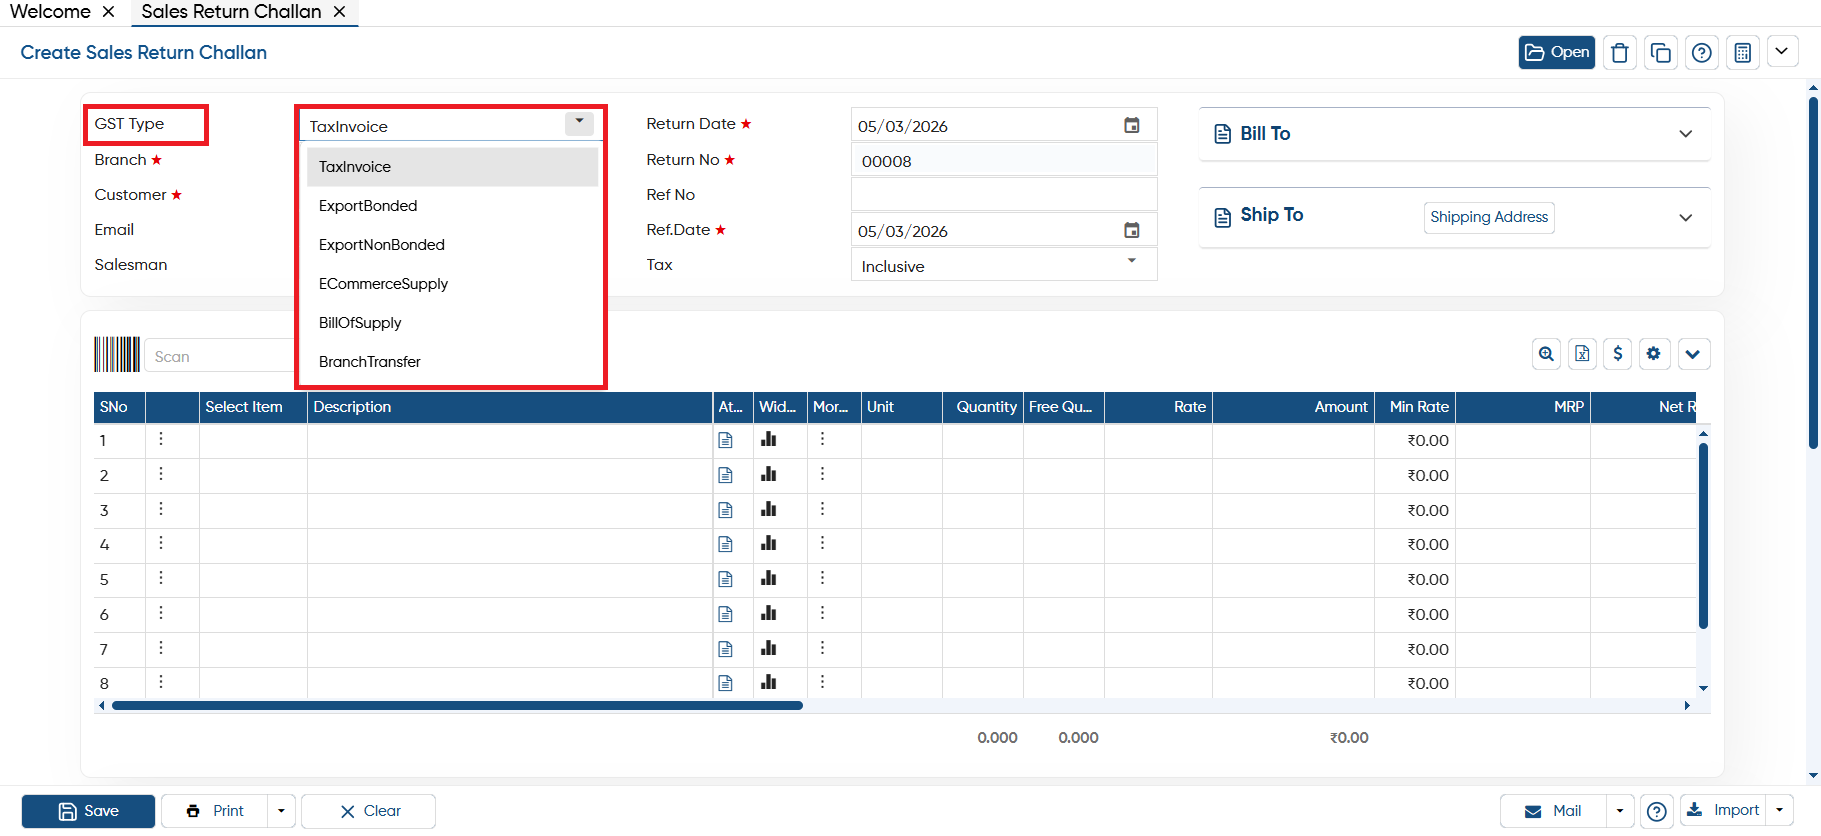
In 'GST Type' option, select the option as per the requirement.
-
Tax Invoice: This includes sales return within the same state (intrastate) or between states (interstate) to both registered and unregistered buyers. It excludes exports, supplies to SEZ (Special Economic Zone), bills of supply, and e-commerce transactions.
-
ExportBonded: These are export sales return made to overseas buyers or SEZ without paying tax. The tax rate is zero, and no tax is posted. This happens under an Export Bond or LUT (Letter of Undertaking).
-
ExportNonBonded: These are export sales return to overseas buyers or SEZ with tax payment. Tax is calculated as per applicable rates but is not included in the bill amount. Instead, tax is recorded separately under specific accounts for payable and recoverable taxes.
-
ECommerceSupply: Sales Return made through e-commerce platforms fall under this category. Buyer’s GSTIN (if registered) is recorded, and the transaction is treated as B2B. If the buyer is unregistered, it is treated as B2C, and the e-commerce platform’s GSTIN appears in GSTR-1.
-
BillOfSupply: This is used for sales return where no tax is charged to the customer. It’s typically used by dealers under the Composition Scheme, as they cannot collect taxes.
-
BranchTransfer: This is for transferring goods between branches located in different states (interstate transfers).
-
Branch: If your company has multiple branches, they can be in the same state or different states. While billing, you can select the branch where the return is being done.
-
Customer: Choose the customer for whom you are creating the Sale Return Challan.
-
Email: If the customer's email is saved in the system, it will be filled in automatically. You can edit it if needed.
-
Salesman: The system will automatically select a salesman if it’s saved in the customer profile. Otherwise, you can choose one manually.
-
Return Date: The system will set today’s date by default. You can change it if needed.
-
Return No: The system will generate an invoice number automatically, but you can enter one manually if required.
-
Ref No: You can enter any reference number related to this invoice.
-
Ref.Date: If there’s a reference date for the Sale Return Challan, you can add it here.
-
Tax: Select whether the tax should be included in the rate or added separately.
|
 icon has been given besides the field so that if you required to make any changes to the selected field details you can click on the icon and make the necessary changes.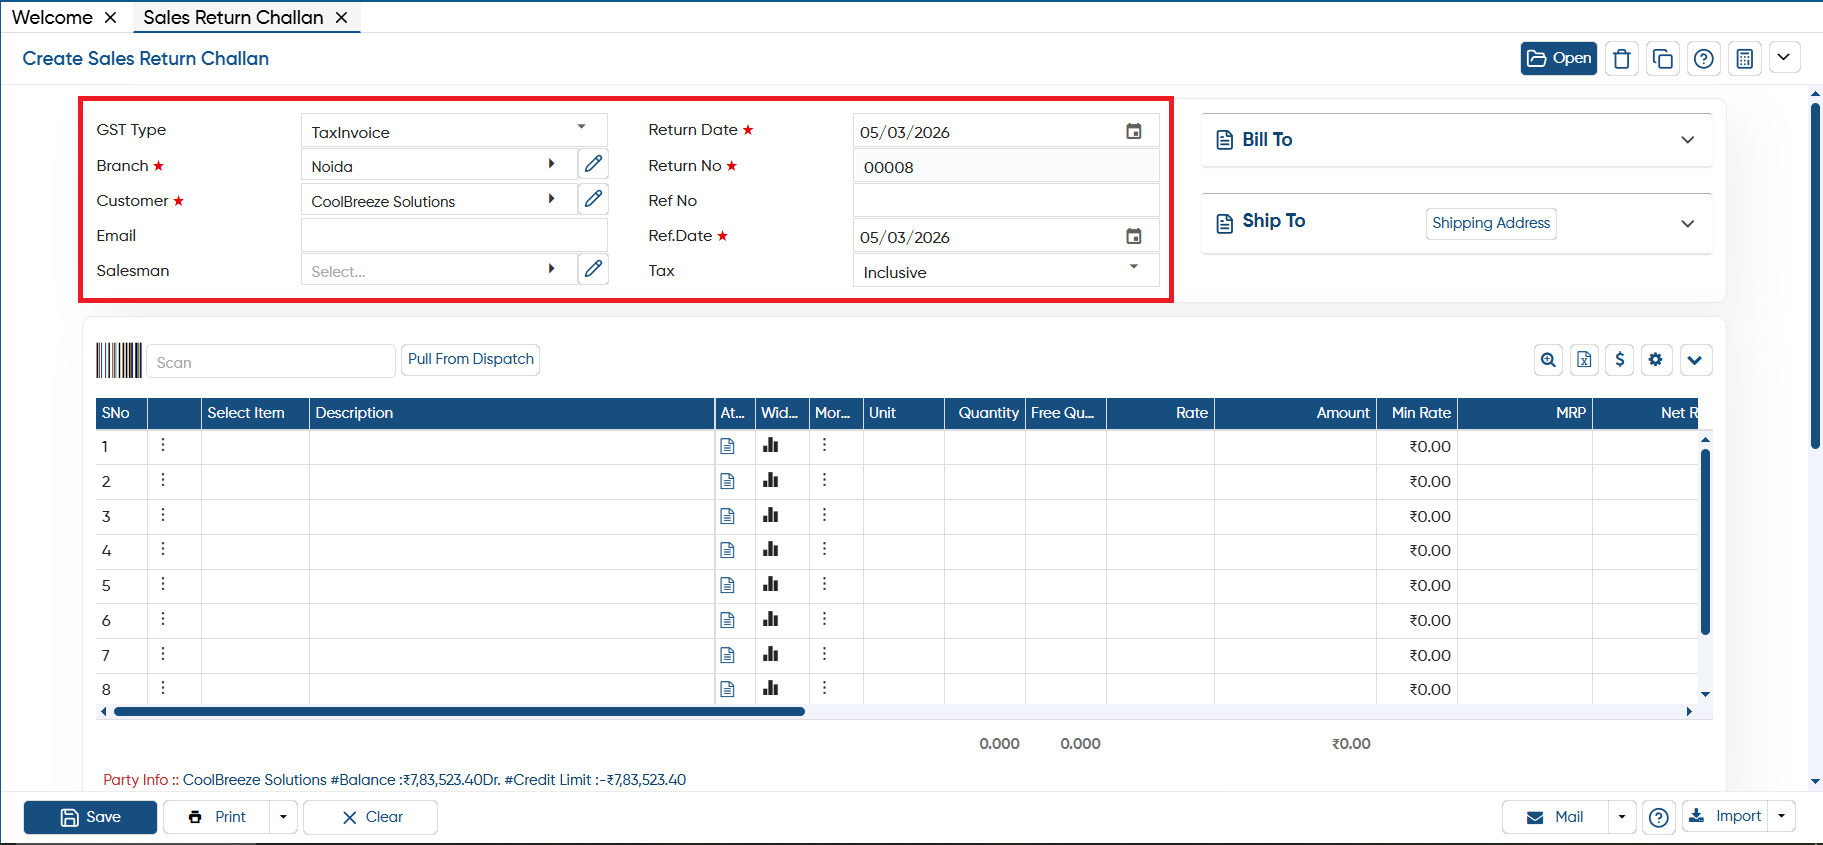
-
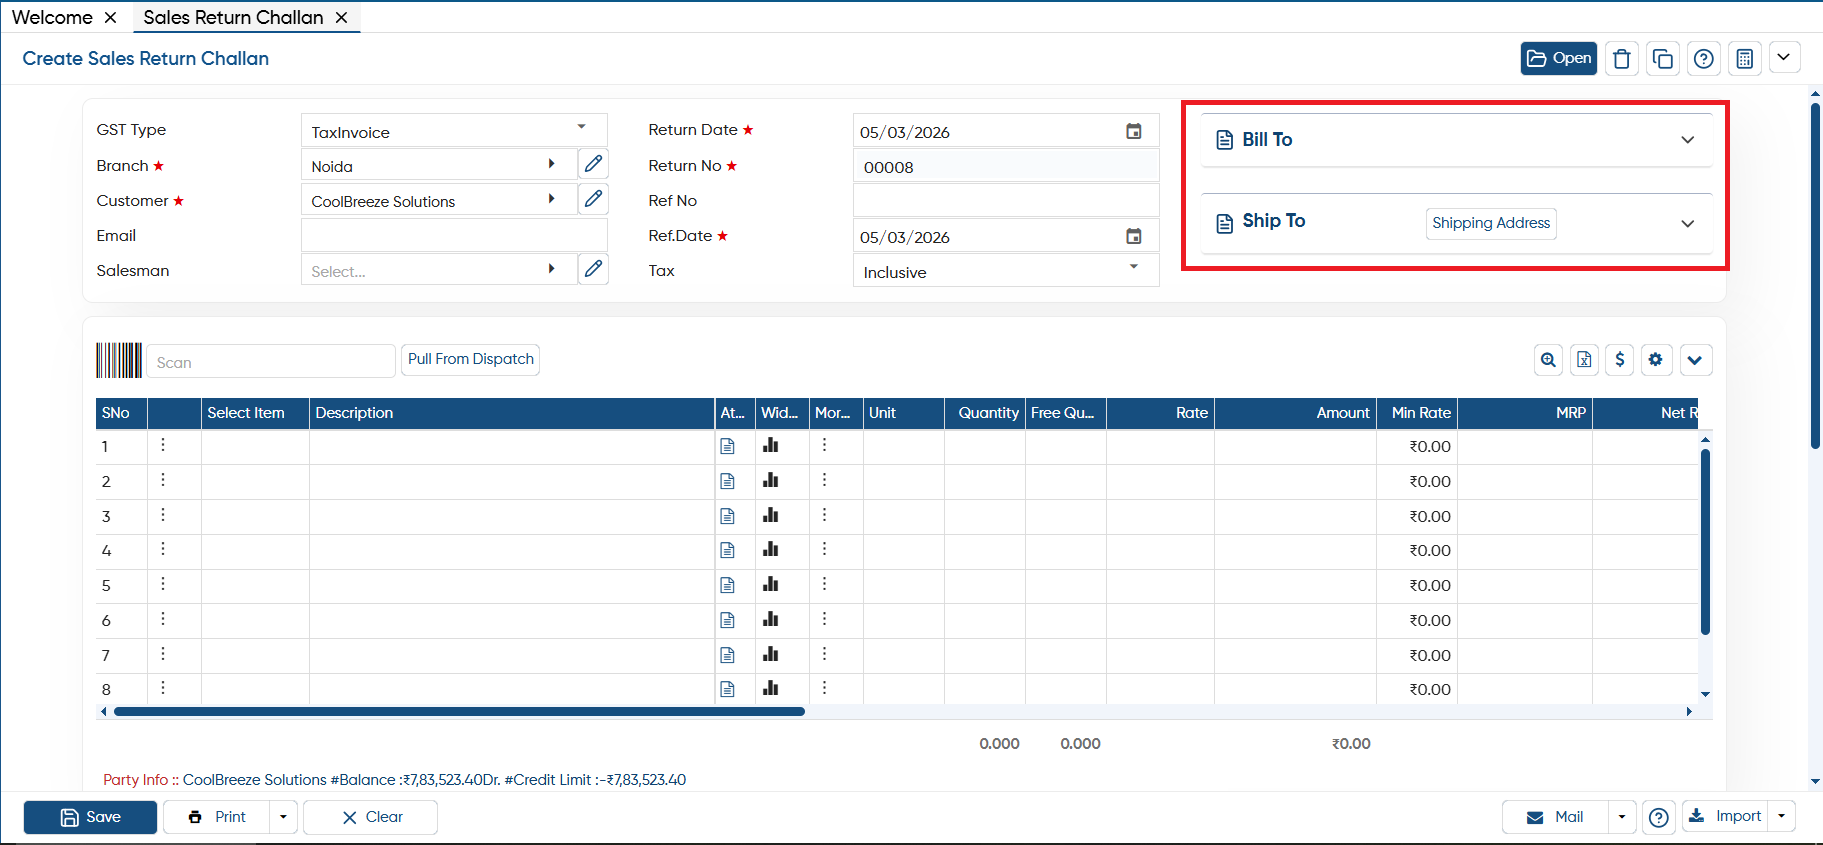
Bill To: Here, you can mention the billing address. This address is associated with the individual or entity responsible for the transaction and where the invoice will be issued. For customers with multiple branches, the billing address typically corresponds to the head office or the location overseeing the purchase, even if the goods are being delivered to a different branch.
The software will automatically fill in the Bill To details if you have already saved it in the customer master. If not, you can enter it manually. To view the fields, click the down arrow key.
-
Ship To: Here, you have to mention the shipping address. It refers to the specific location where goods or products are sent for delivery. It is the final destination where the recipient expects to receive the items ordered. This address can differ from the billing address, especially in cases where the purchaser arranges for the goods to be delivered to a different location, such as a branch office, warehouse, or a third party. The shipping address ensures that the goods are routed correctly and arrive at the intended recipient’s desired location.
If you have updated the shipping address in the customer master, the software will automatically use it.
Item Table
-
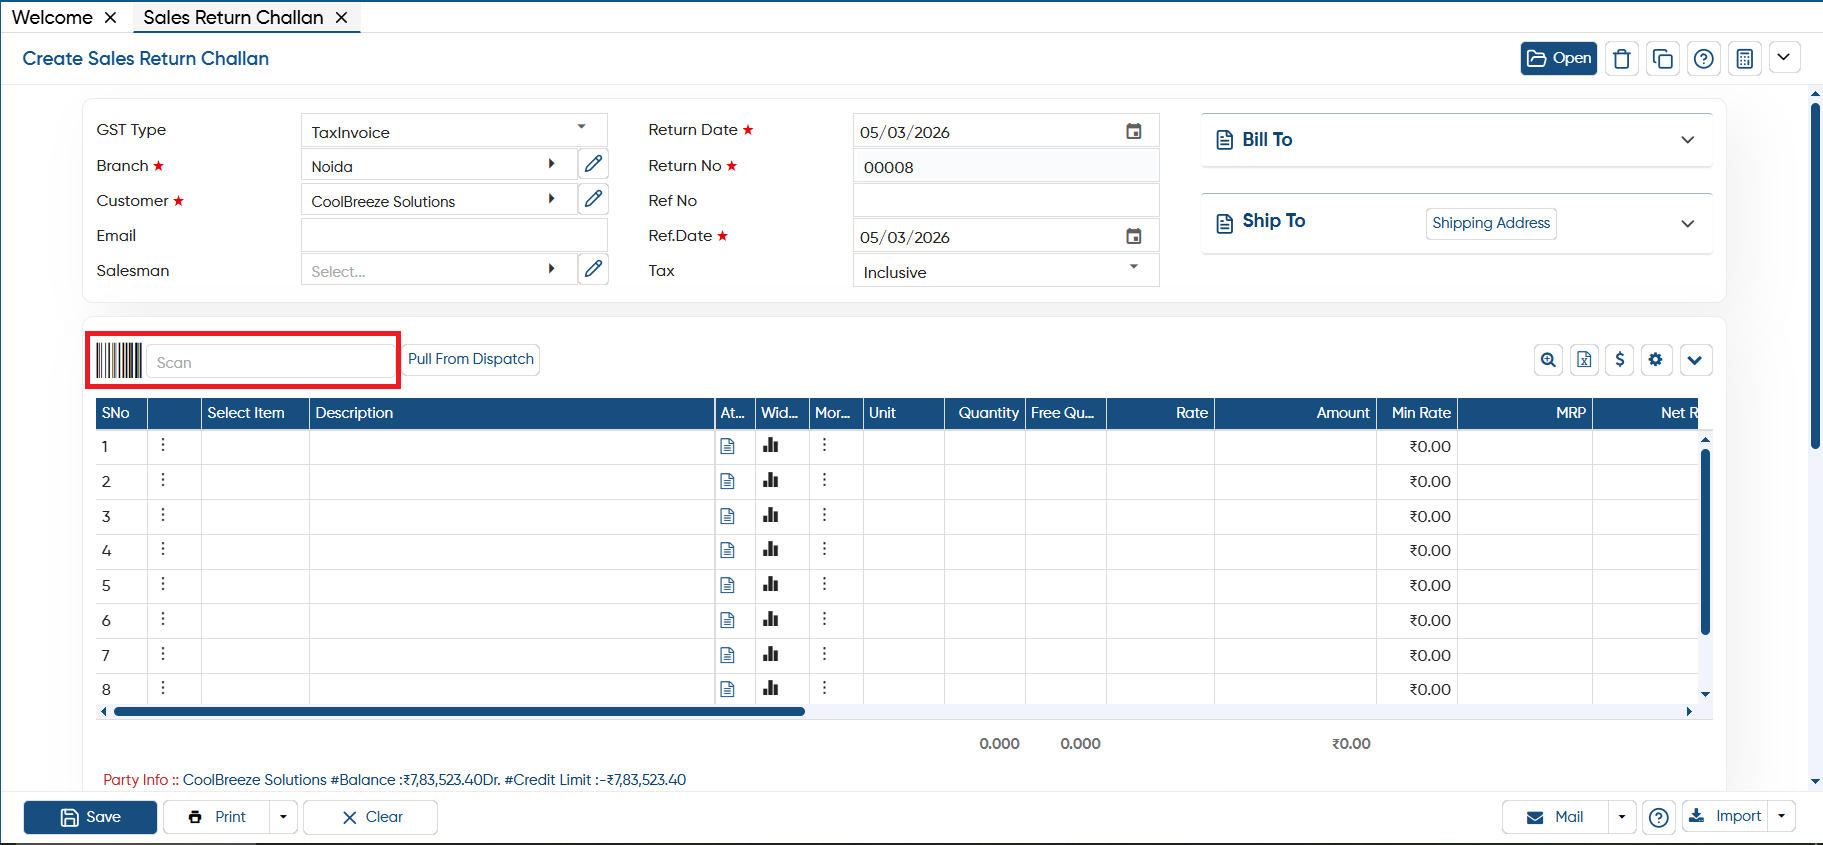
Scan: You can enter the Item Barcode or Item Code here, and the software will automatically add the item to the Sale Return Challan. This option saves your time by removing the need for manual selection, just type in the Barcode or Item Code, and the item will be added instantly.
-
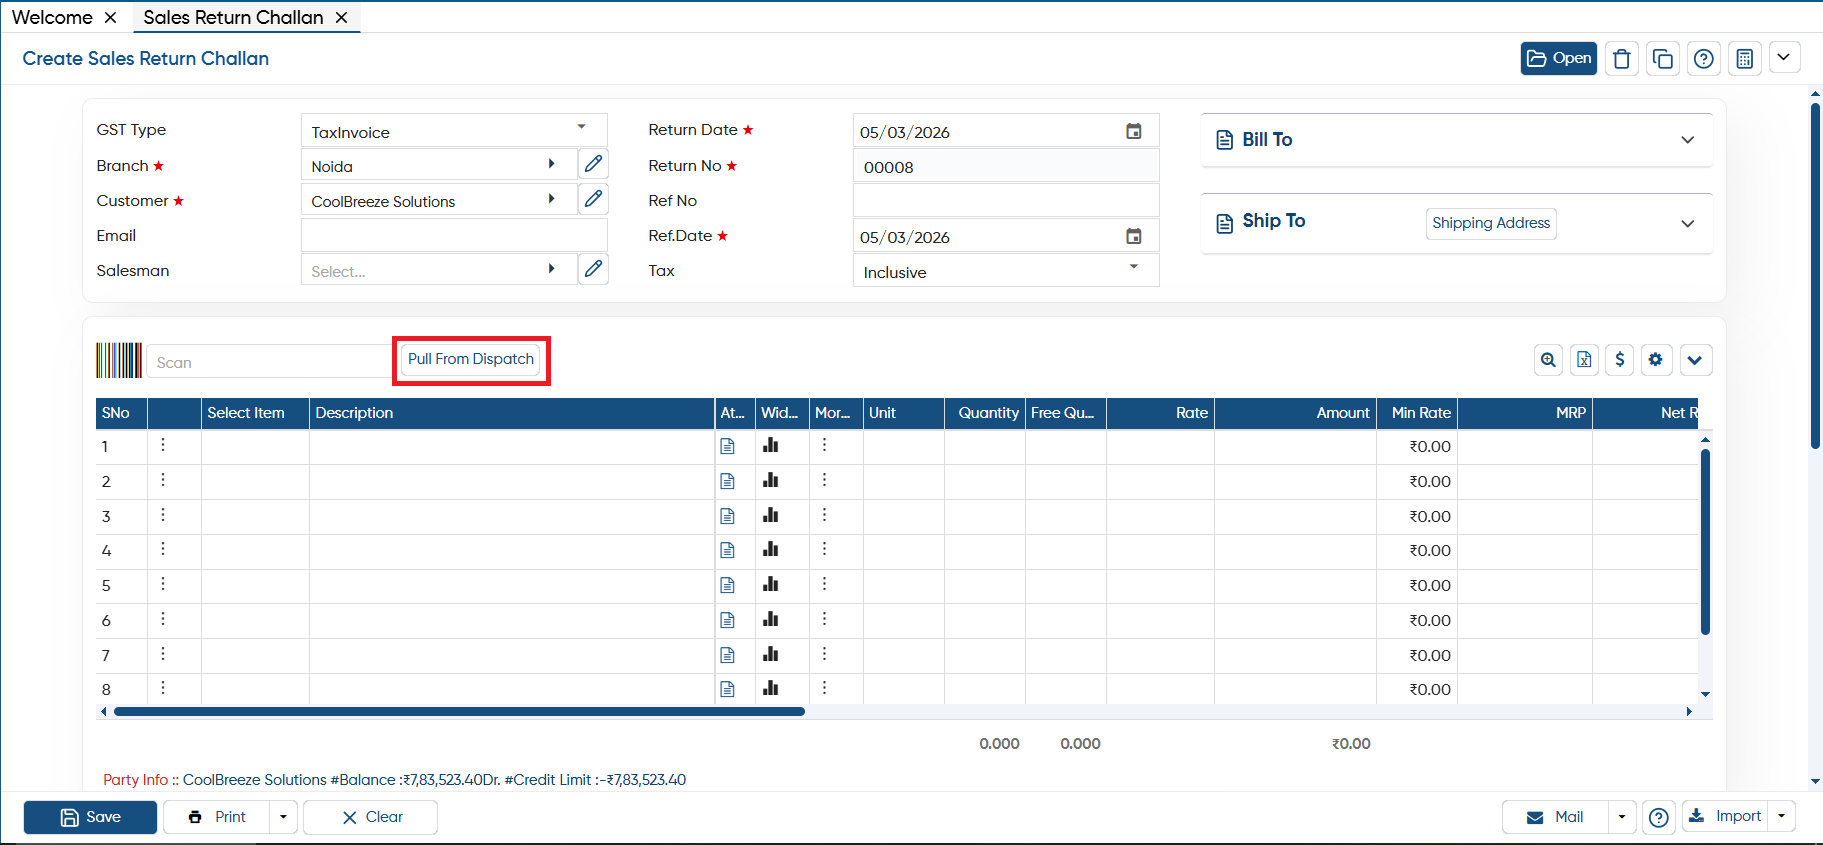
Pull From Dispatch: If you've already created a Dispatch, there's no need to manually reselect the items. You can directly pull the details from the Dispatch into Sales Return Challan. This feature automatically loads all relevant information such as item details, invoice details, and more, saving you time and ensuring accuracy in the invoice creation process.
-
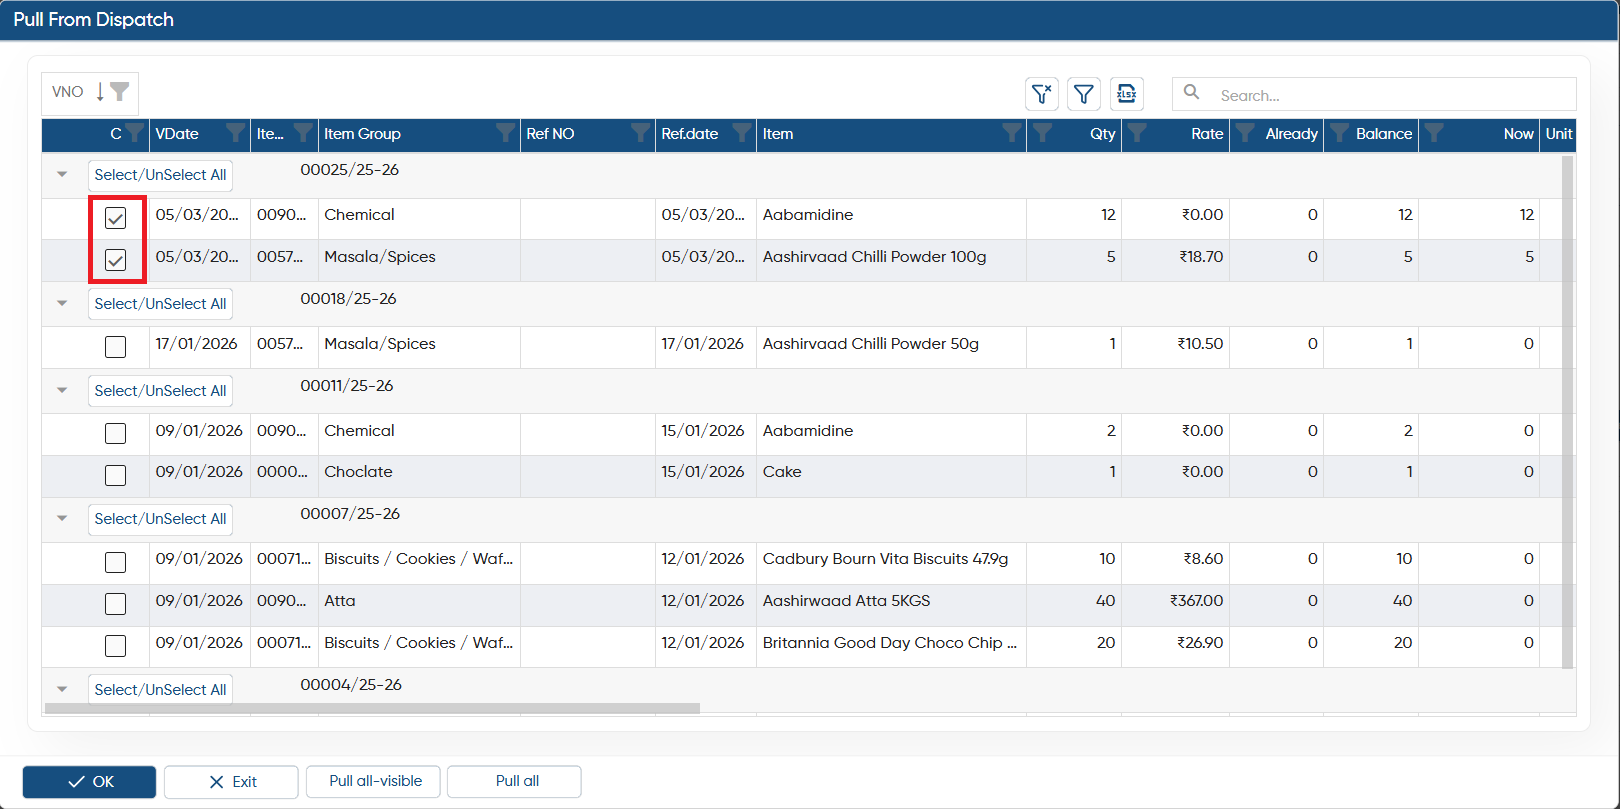
In any case if you don't want to pull all item from the Dispatch then AlignBooks gives you a facility through which you can select specific items and pull them.
-
Click on the ‘Zoom’ icon to view all the items in the sale Return Challan at once. This helps you to view all the loaded items on a single page or screen for better clarity and easy review.
-
Click on the 'Excel' icon to export the invoice items details in excel file.
-
The 'Dollar' icon will help you to see the financial posting for this bill.
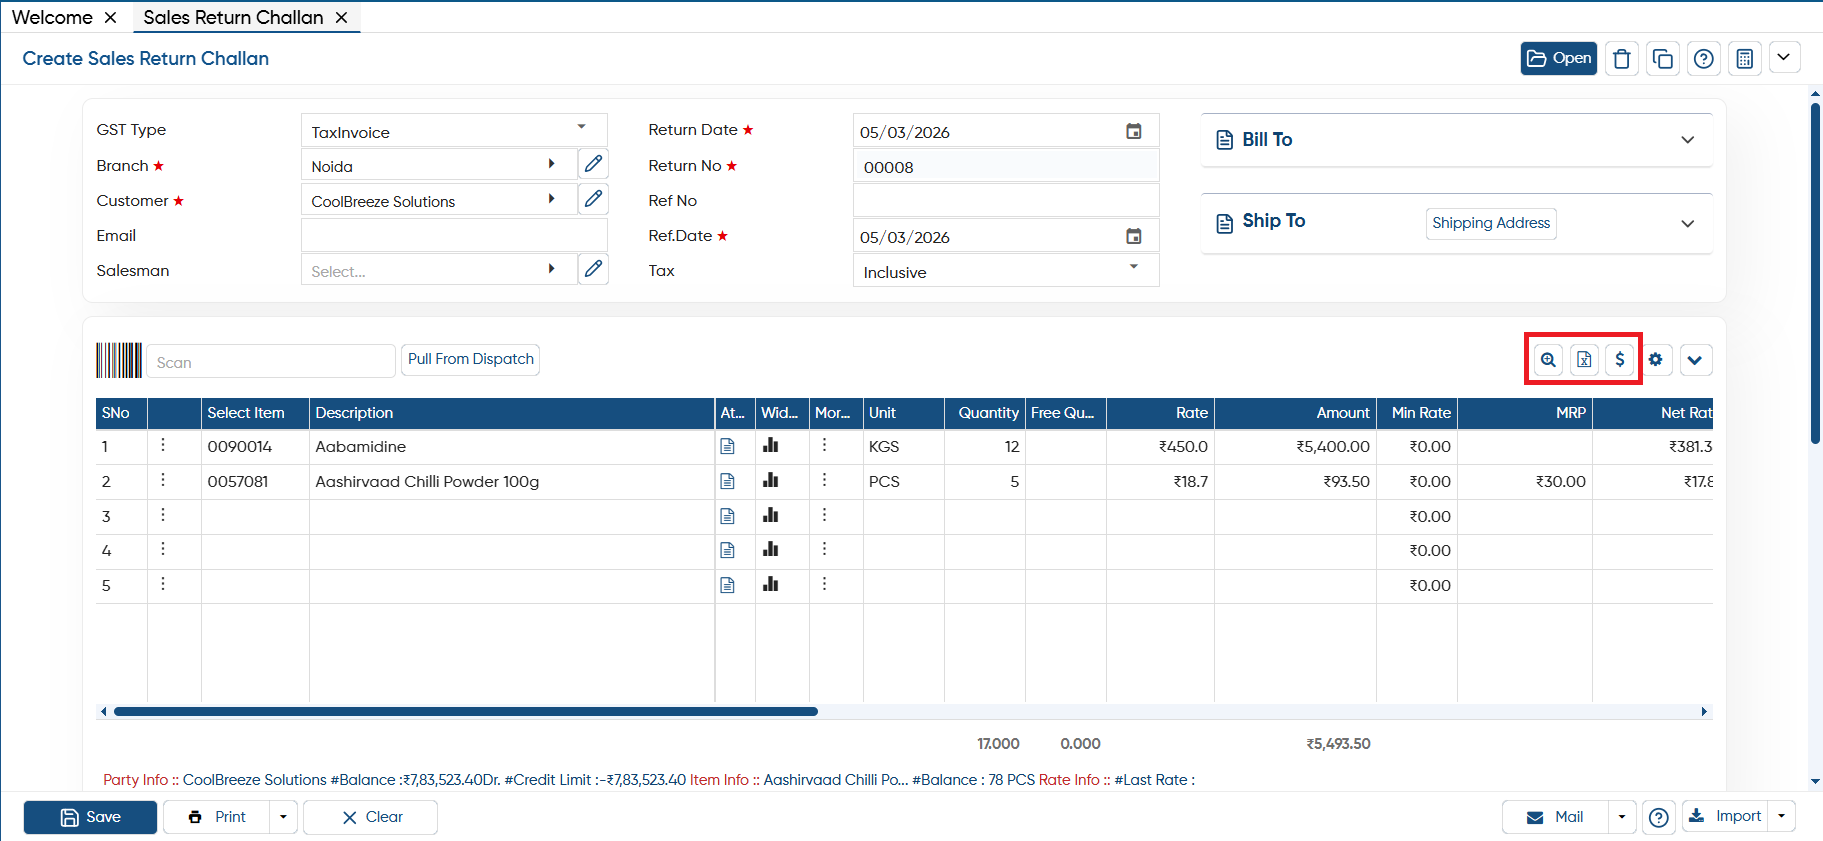
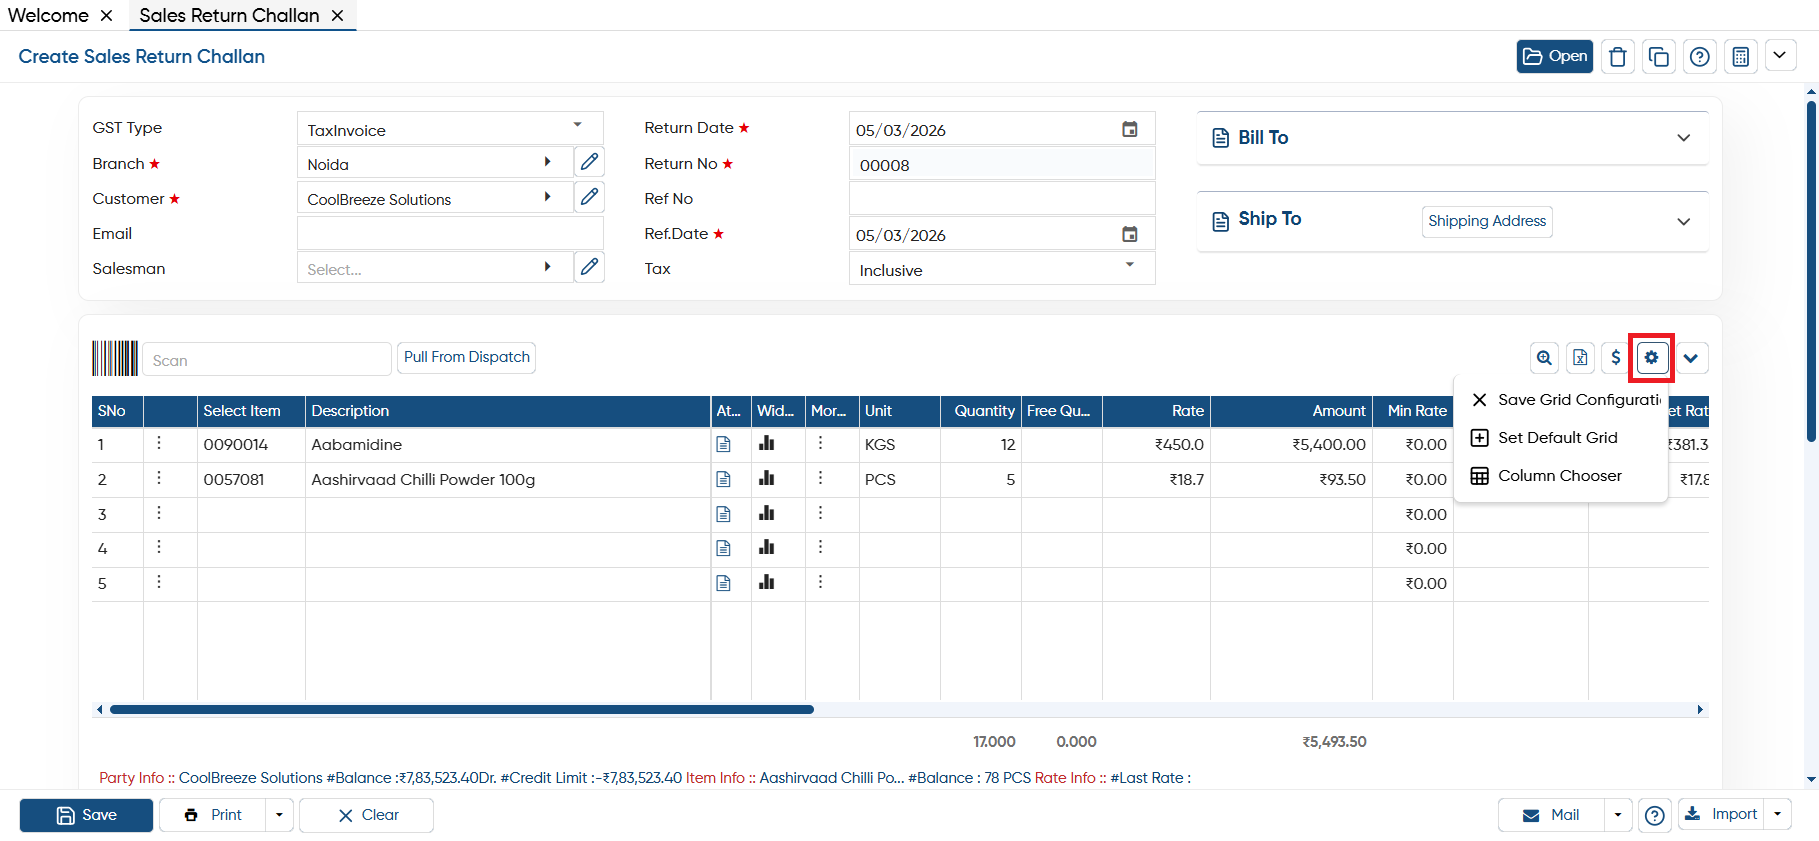
Click on the 'Settings' icon to customize the Item Table according to your preferences.
-
Save Grid Configuration: This option lets you save any changes you’ve made to the item table settings, so you don’t need to reconfigure them each time.
-
Set Default Grid: With this option, you can set your preferred item table configuration as the default, making it easier for future use.
-
Column Chooser: This feature allows you to drag and drop columns in the table. To add or remove a column, simply drag it into or out of the table.
-
Pick And Pack: This option allows you to create a set of items that can be quickly loaded into the challan, ensuring all items in the set are automatically added.
• The ‘Pick and Pack’ option works similarly to the ‘Bundle’ feature, with one key difference: Pick and Pack is party-specific, meaning you can link it to a fixed party and set a default Lot Quantity, whereas Bundle is flexible for all parties and does not allow predefined lot quantity or a prompt to enter it.
-
To use it, simply select 'Pick and Pack' and click the 'OK' button besides the field.
2. Add to Pick & Pack: Through this option, you can create a new Pick & Pack list. A window will open showing the items already added in the invoice. You can enter a name for the Pick & Pack, and the system will create a new pack with the selected loaded items.
3. Fast Billing: Using this option, you can select multiple items at the same time to add to the invoice. It also offers extra filters that help you narrow down and refine the item list for easier selection.
-
From Item List: This option displays the complete item list. You can select multiple items, enter the required quantity for each item, and load them into the invoice in one go.
-
From Item Balance List: This option shows the available stock balance of items. You can view the current quantity in hand, select the required items, enter the quantity, and load multiple items into the invoice at once.
-
Comma Separated Code, Qty: In this option, you need to enter the item code and quantity separated by a comma for each item. By entering all item codes with their quantities in the given format, you can load multiple items into the invoice instantly.
4. Copy Grid Data: This is a Copy button that lets you copy the items from a specific invoice and easily paste them into another invoice. This feature helps save time when you need to duplicate items across multiple invoices.
5. Paste Grid Data: After copying the Items for another invoice you can click on 'Paste' button to paste the copied items in the invoice.
6. Add Row in Grid: Click on the ‘Add row in grid’ to insert more rows into the Item Table, allowing you to add additional items as needed. This helps you expand the list and include all required items in the invoice.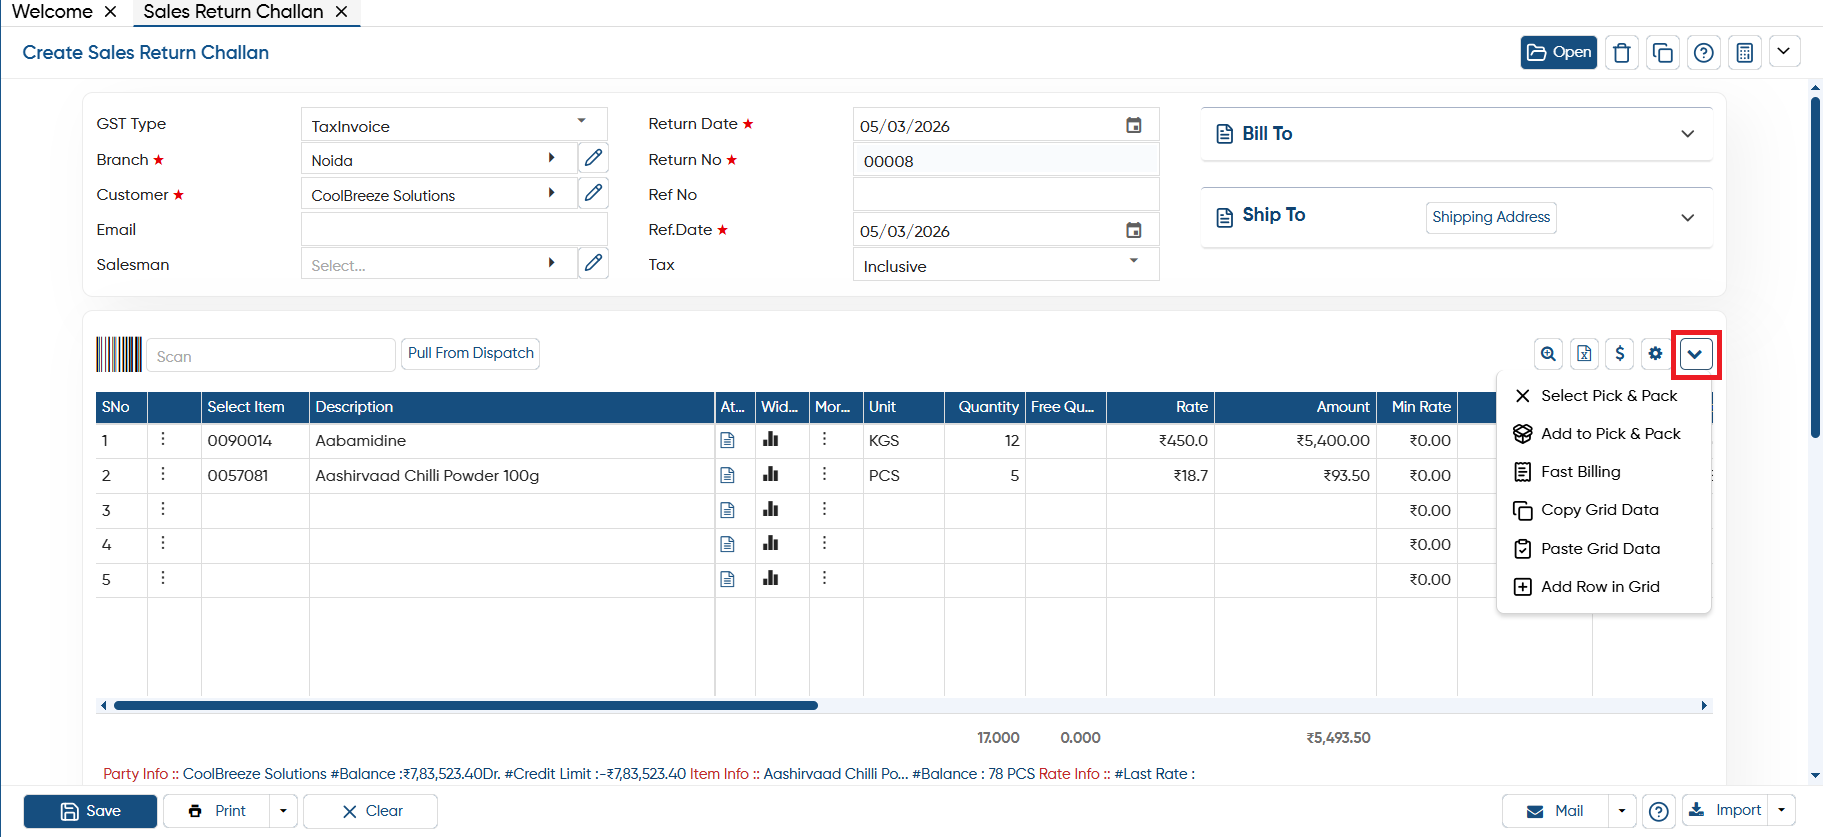
-
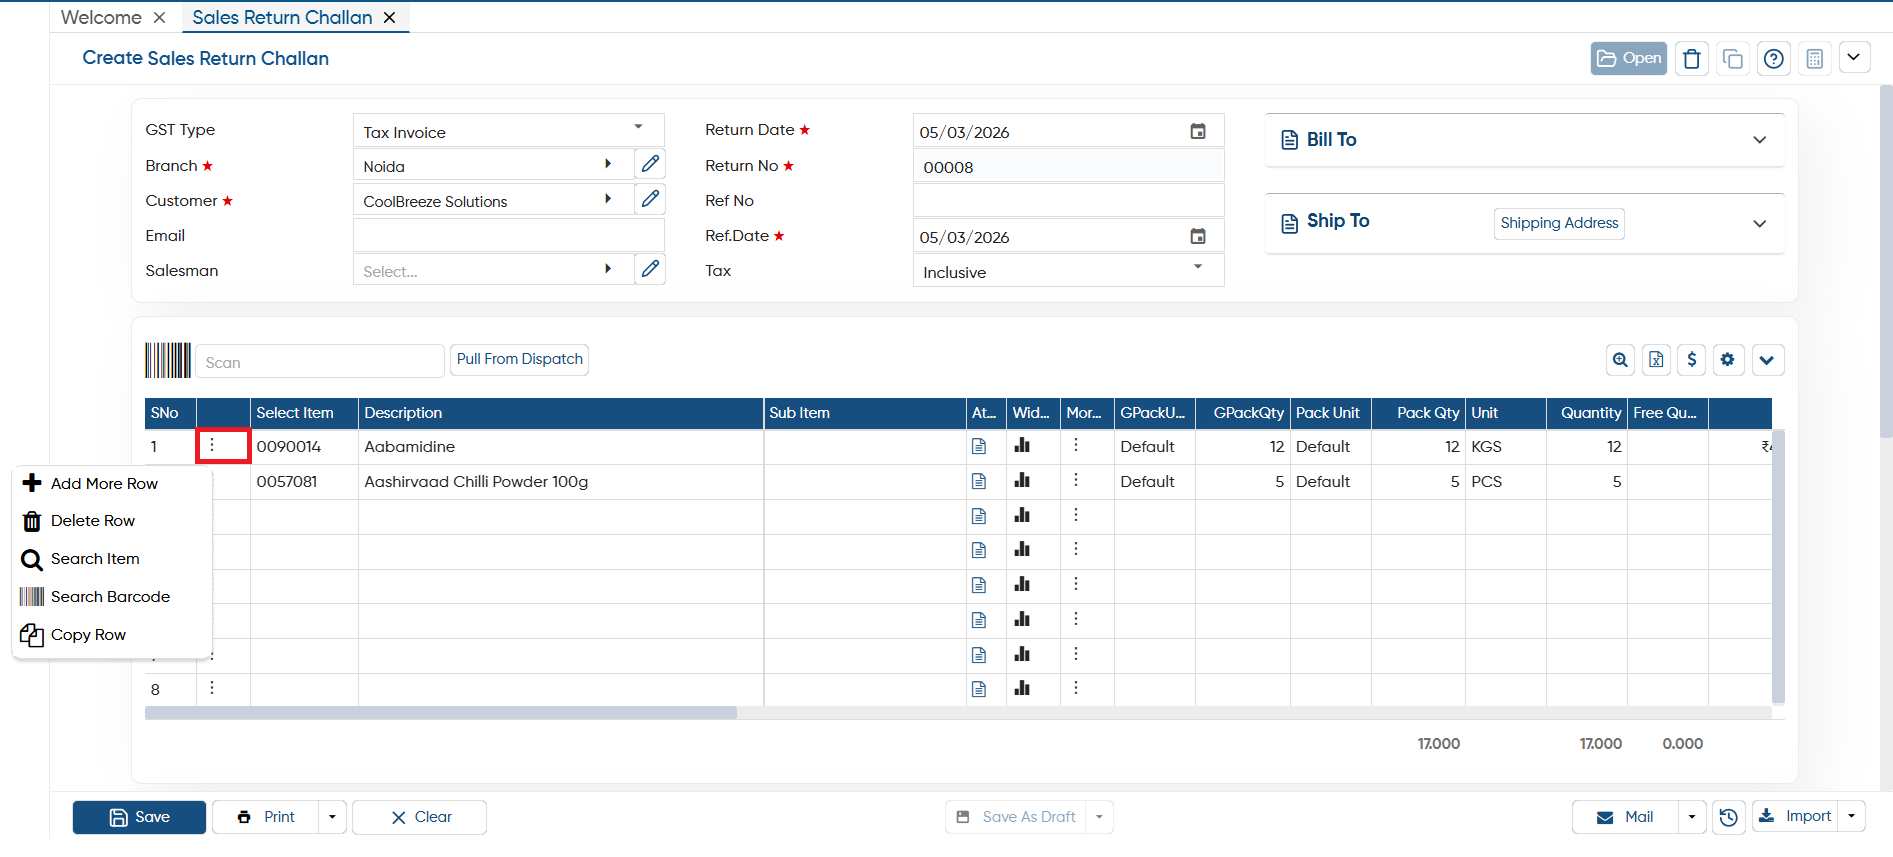
Add More Row: Click on the ‘Add’ option to insert more rows into the Item Table, allowing you to add additional items as needed. This helps you expand the list and include all required items in the invoice.
-
Delete Row: Click on the ‘delete’ option to remove a specific row or item from the invoice. This allows you to delete any unnecessary items with ease.
-
Search Item: Select 'Search Item' on a specific item to view its complete details, including item balance, packing, sale rate, and more. This helps you quickly access important information about the item.
-
Search Barcode: Through this option, you can search and load an item by entering or scanning its barcode.
-
Copy Row: This option allows you to copy a specific row in the invoice, helping you quickly duplicate the same item details.
-
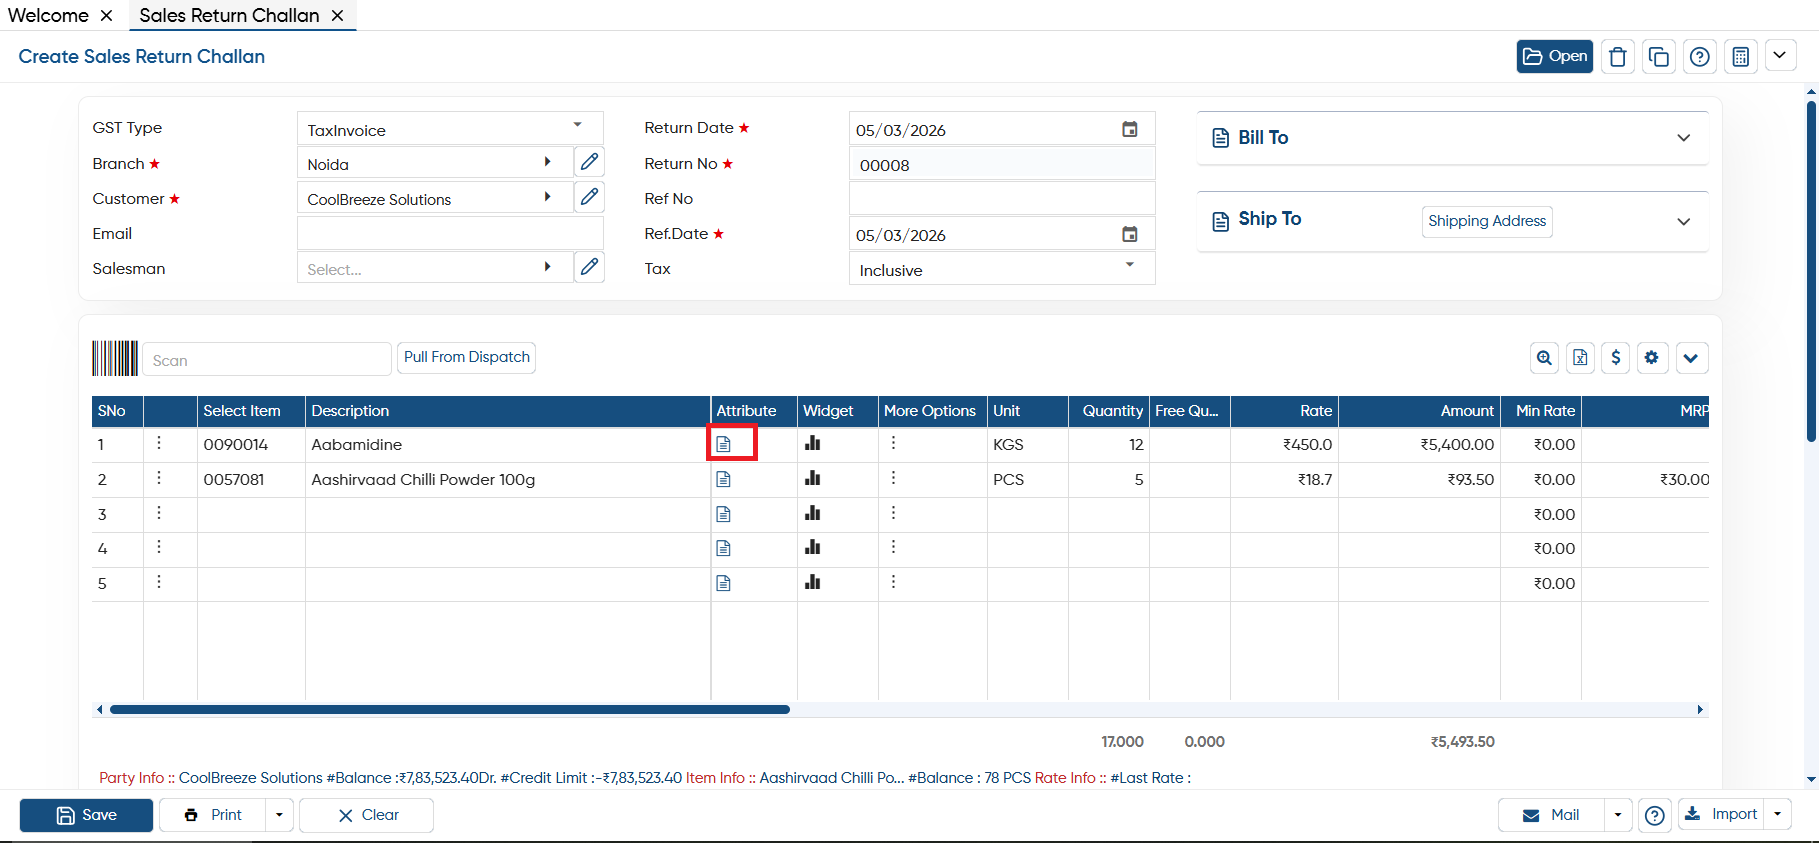
You can click on the Attributes icon to enter item details based on your specific setup.
-
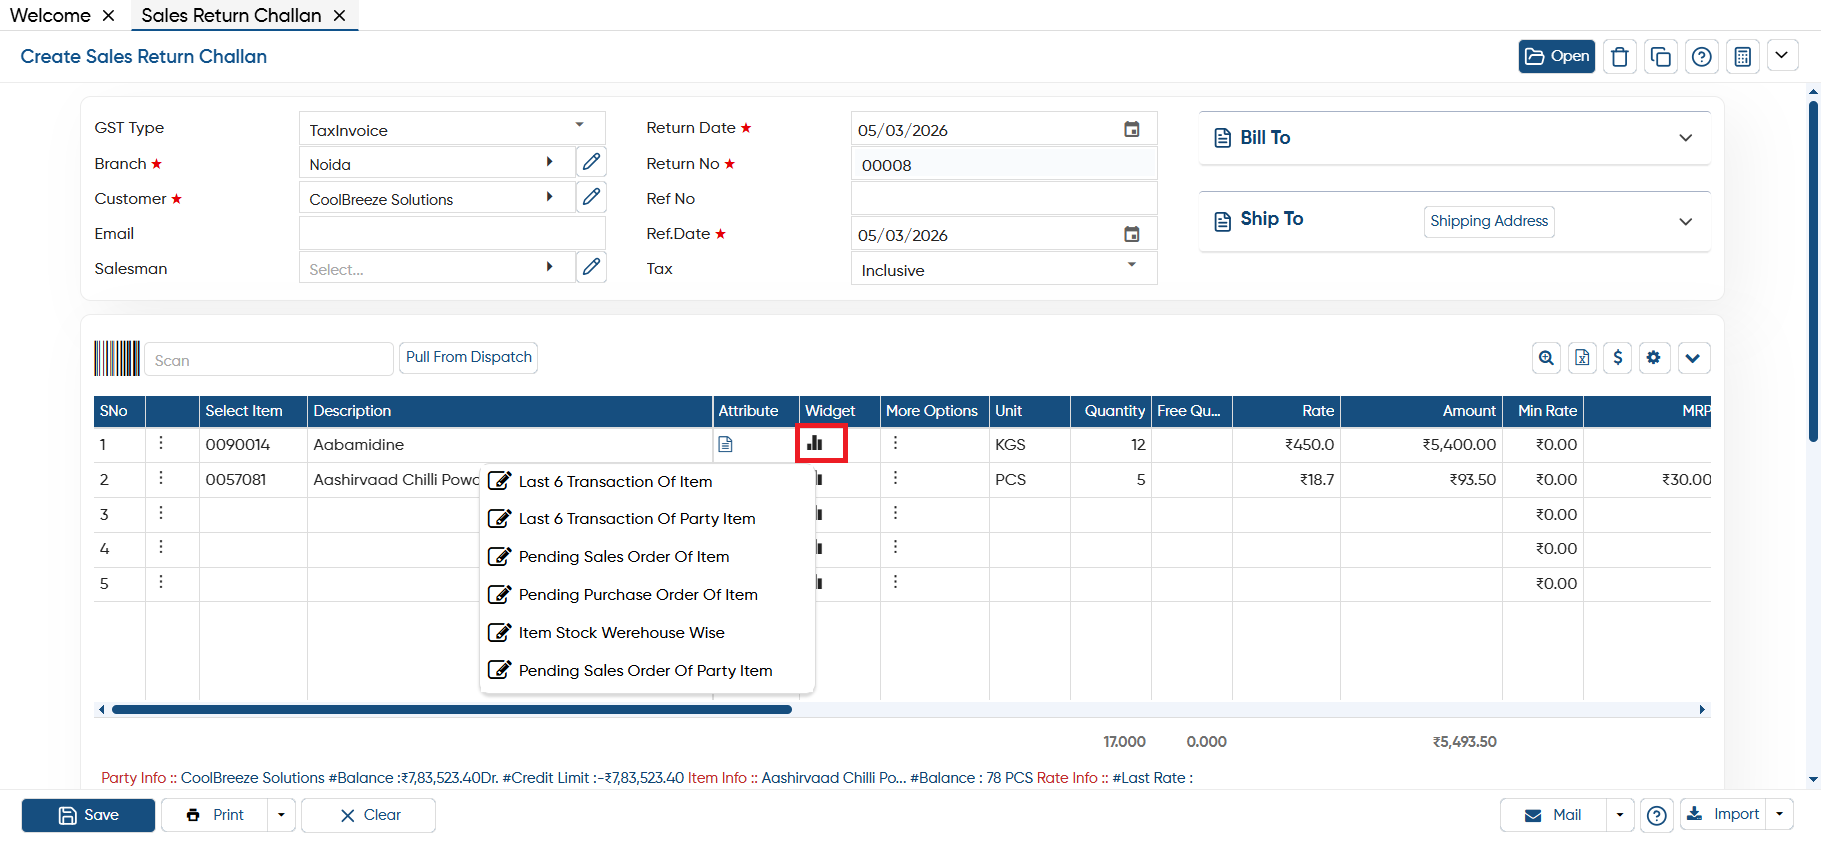
By clicking on the ‘Widgets’ icon, you can view various reports related to the selected item.
-
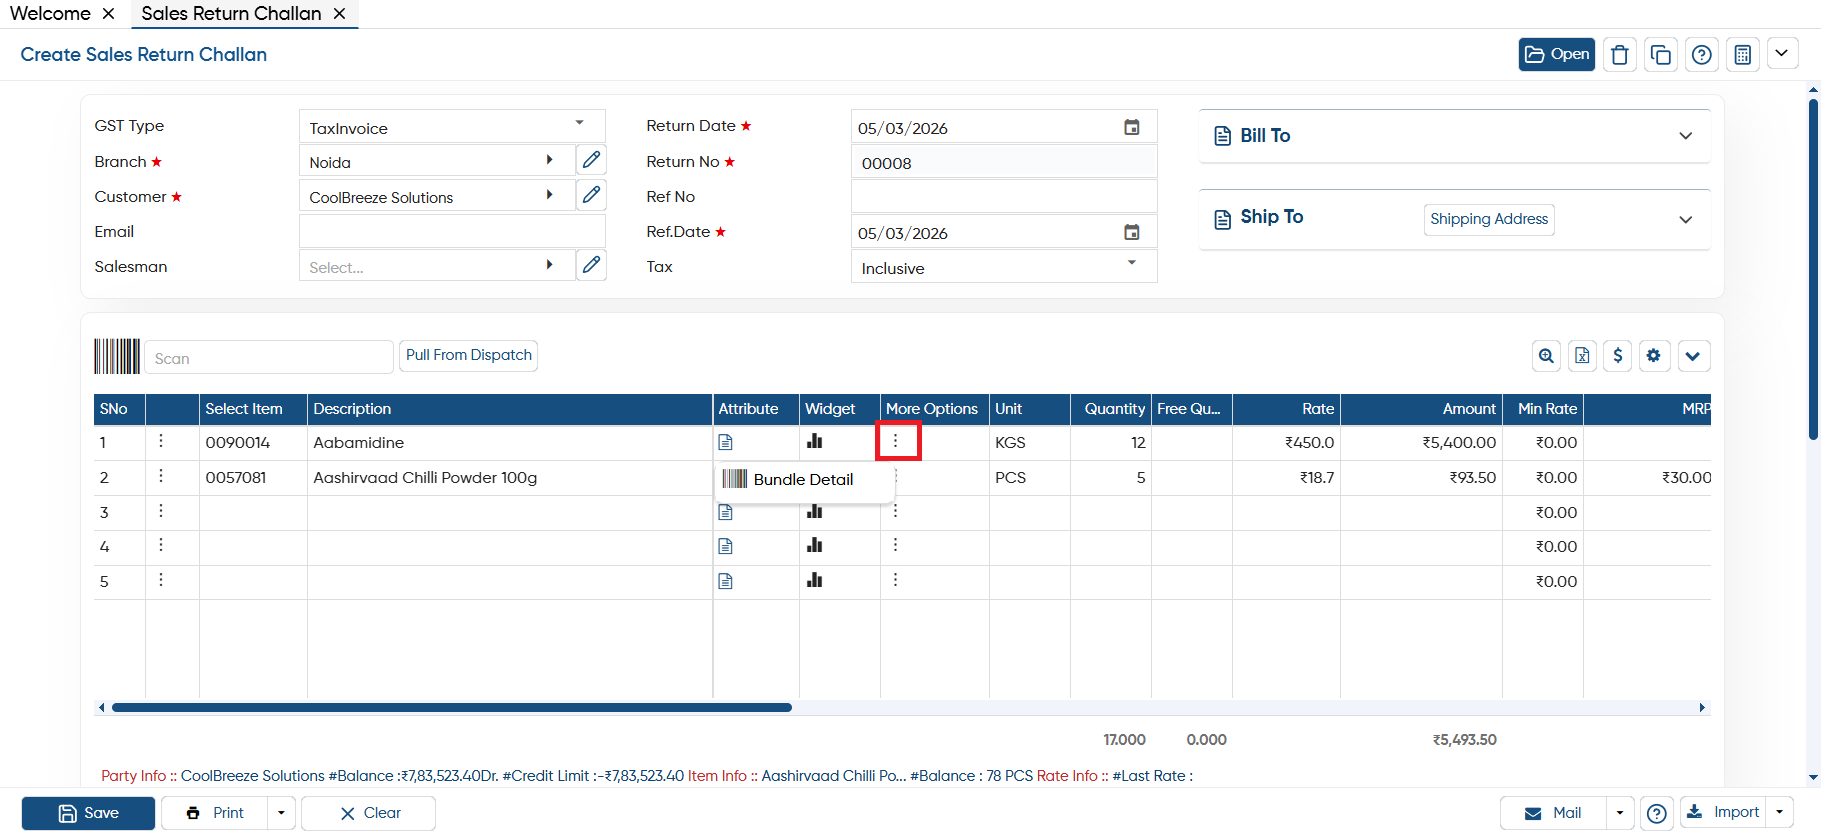
Through the ‘More Options’ icon, you can access Dimension, Bundle Details and Serial Number options based on your business setup, and enter the required item details accordingly.
Document Footer Details
-
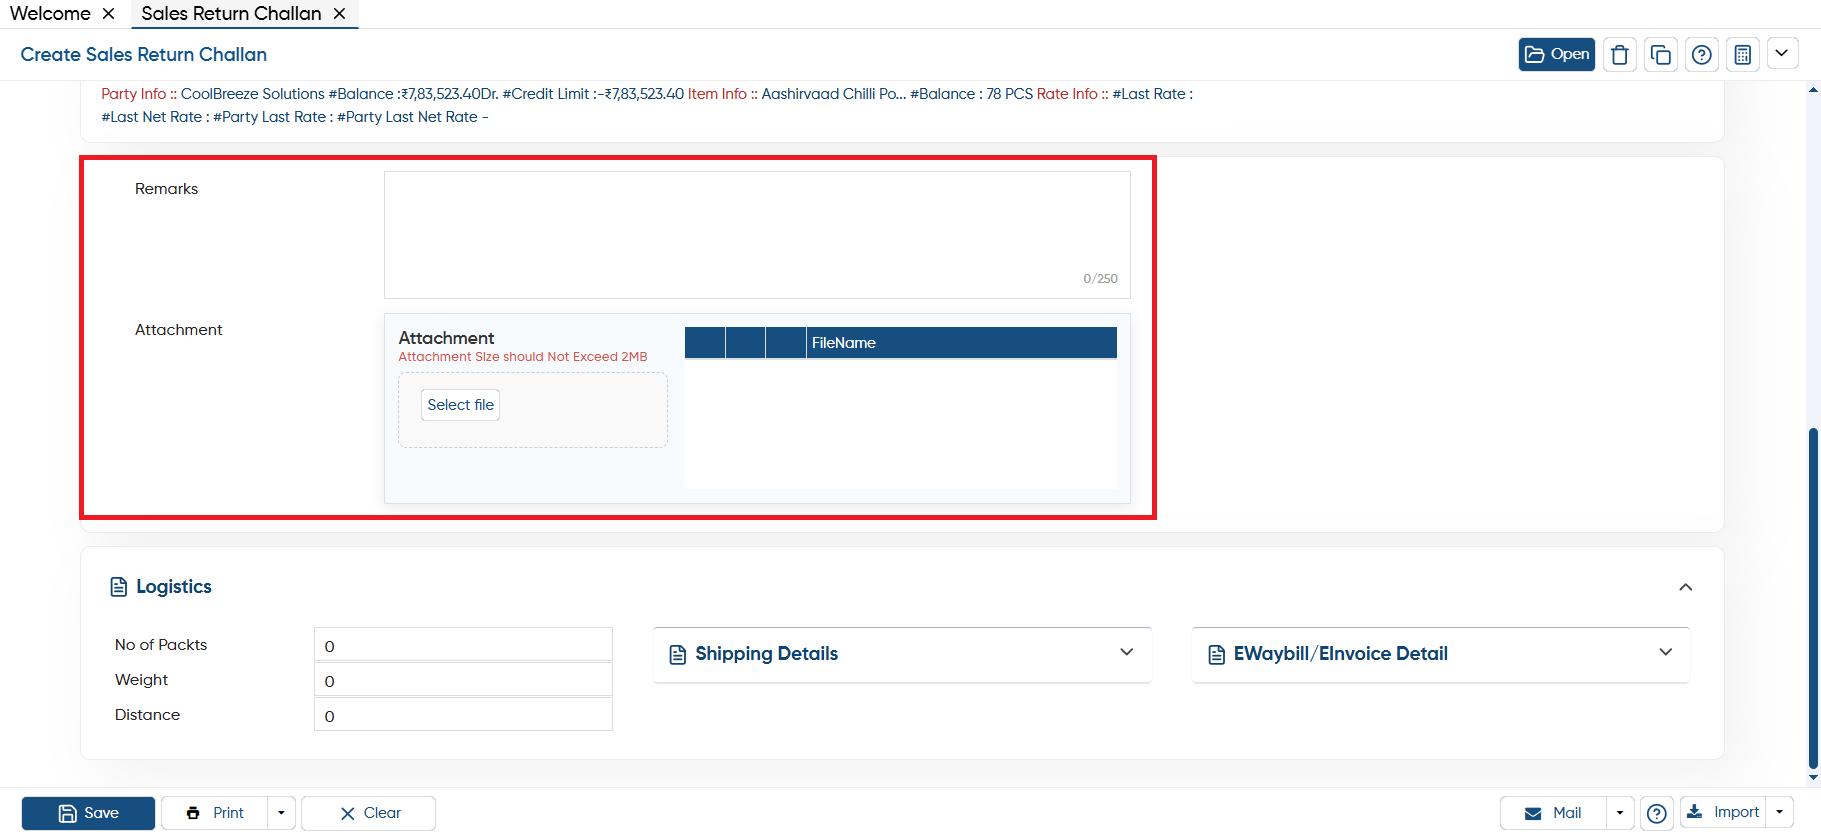
Below the item table, click in the 'Remark' section, software will auto pick the remarks based on your selected customer name. Also, you can enter a remark as per your requirement.
-
While creating a sale return challan, if you need to attach any document or image related to it, click on the 'Select File' button. Then, choose the appropriate directory and upload the file.
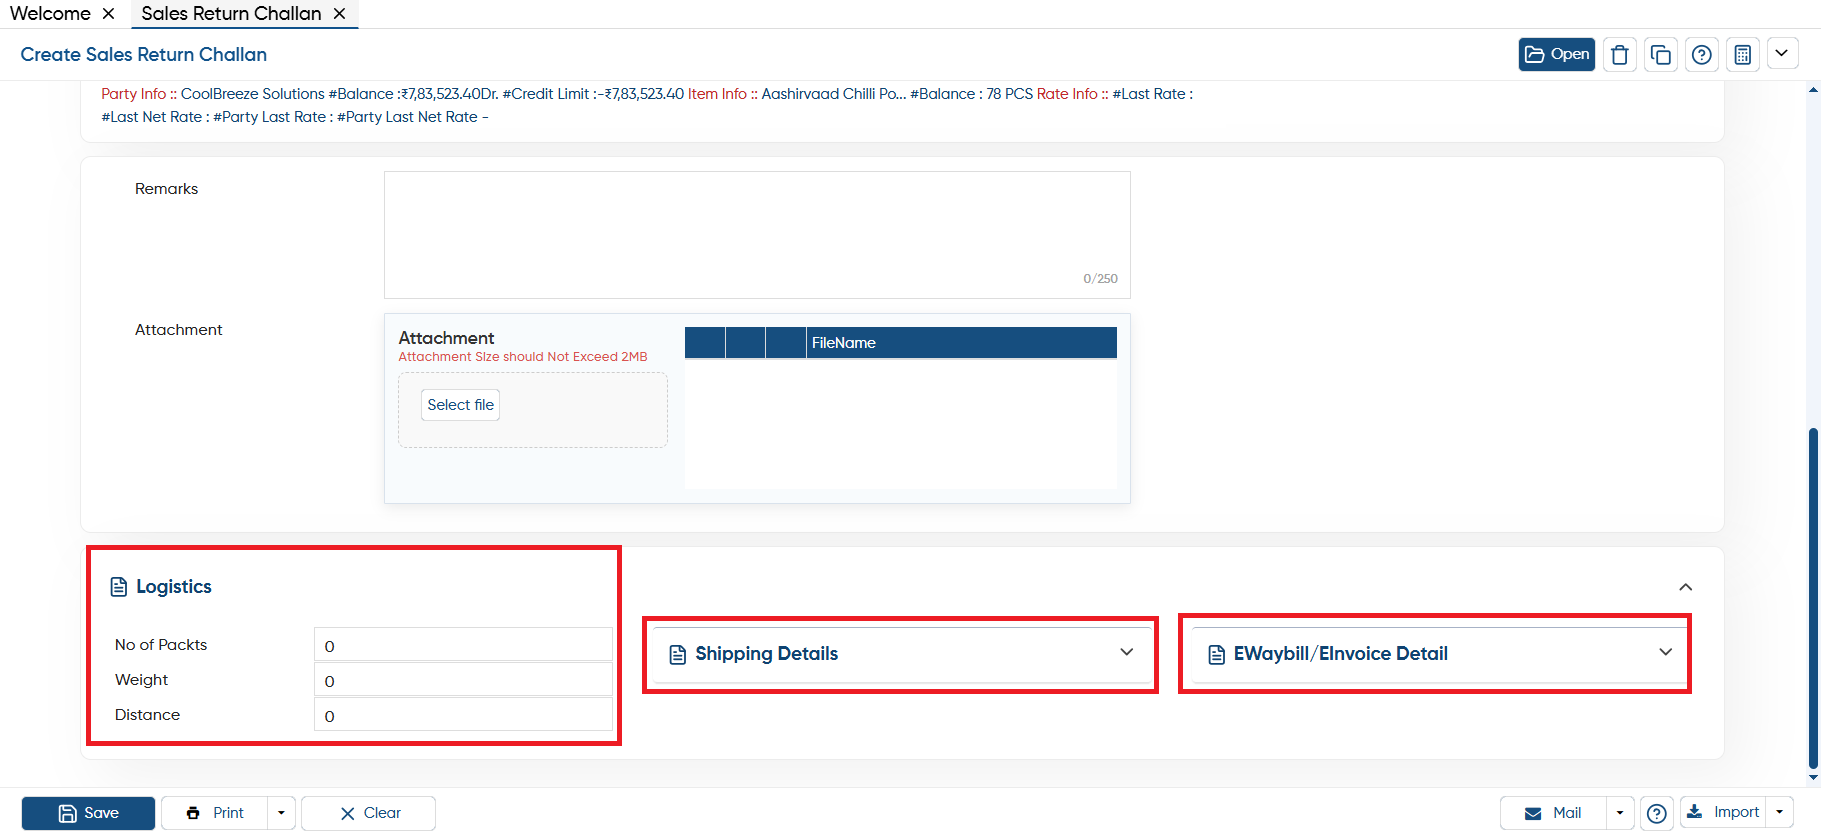
Here, the Logistics details, shipping details, e-way/ e-invoice are categories in separate head.
-
Logistics: If Logistic Details are enabled for invoices in the Company Setup, this section will appear. Here, you can enter the logistics details on the invoice
-
Shipping Details: You can mention the shipping company, details and other shipping related information. Click on the 'Fetch From Last Bill' button to automatically load the details from the previous invoice. To generate an e-Way Bill, you need to fill in the required fields here.
-
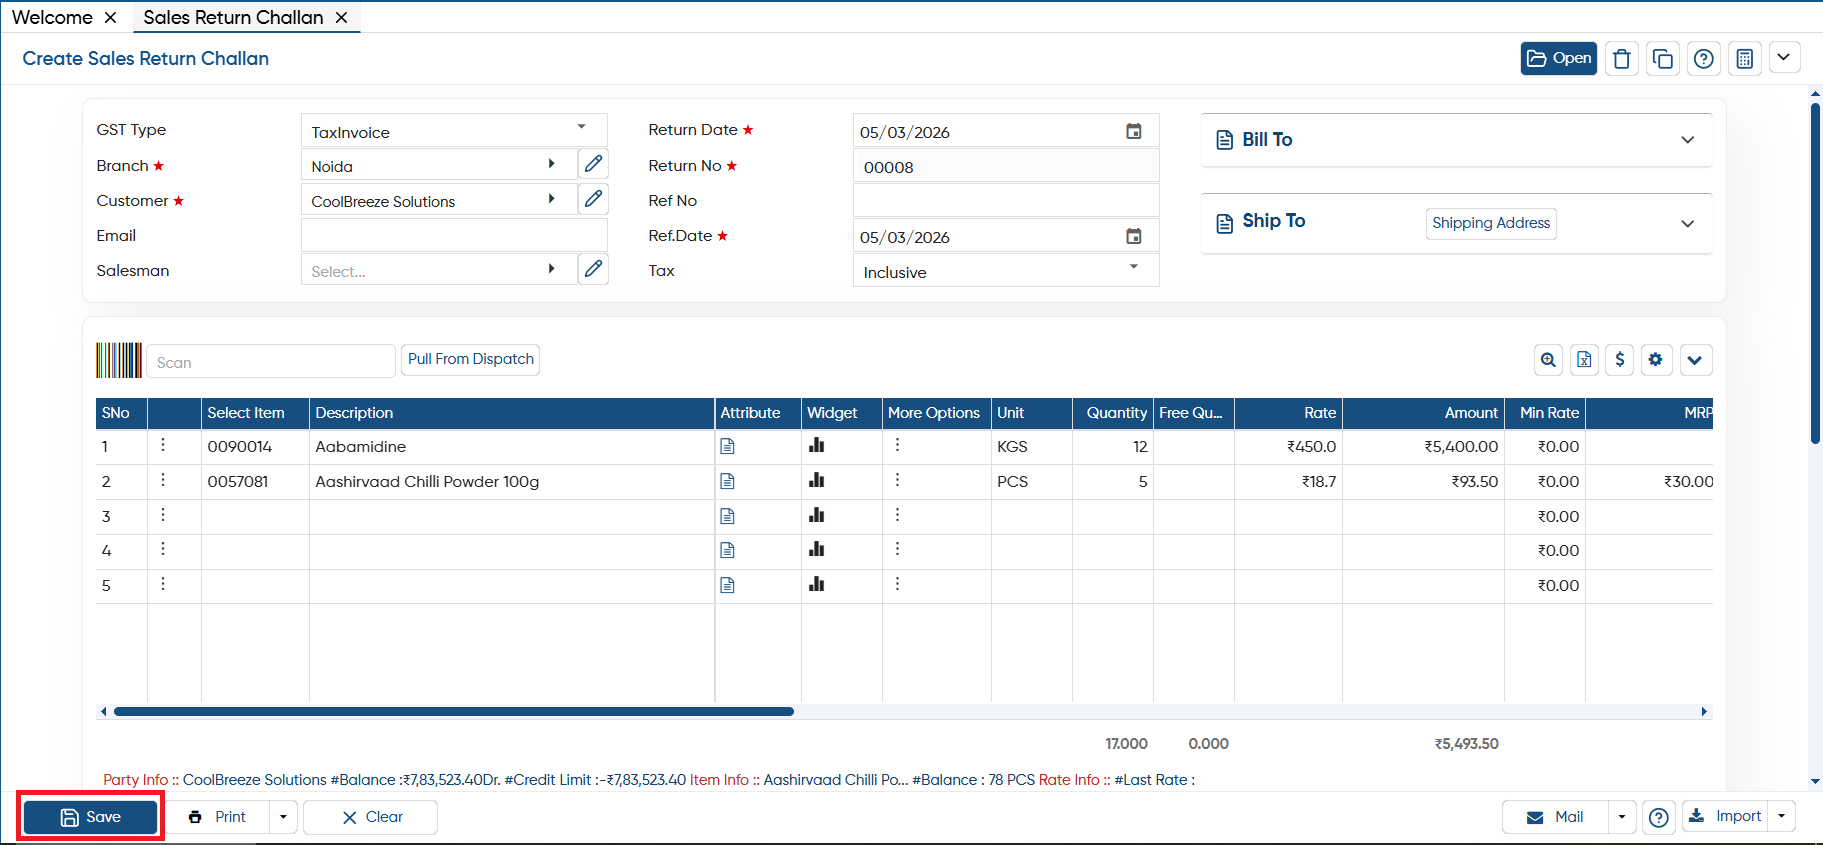
To save the challan you need to click on the 'Save' button.
-
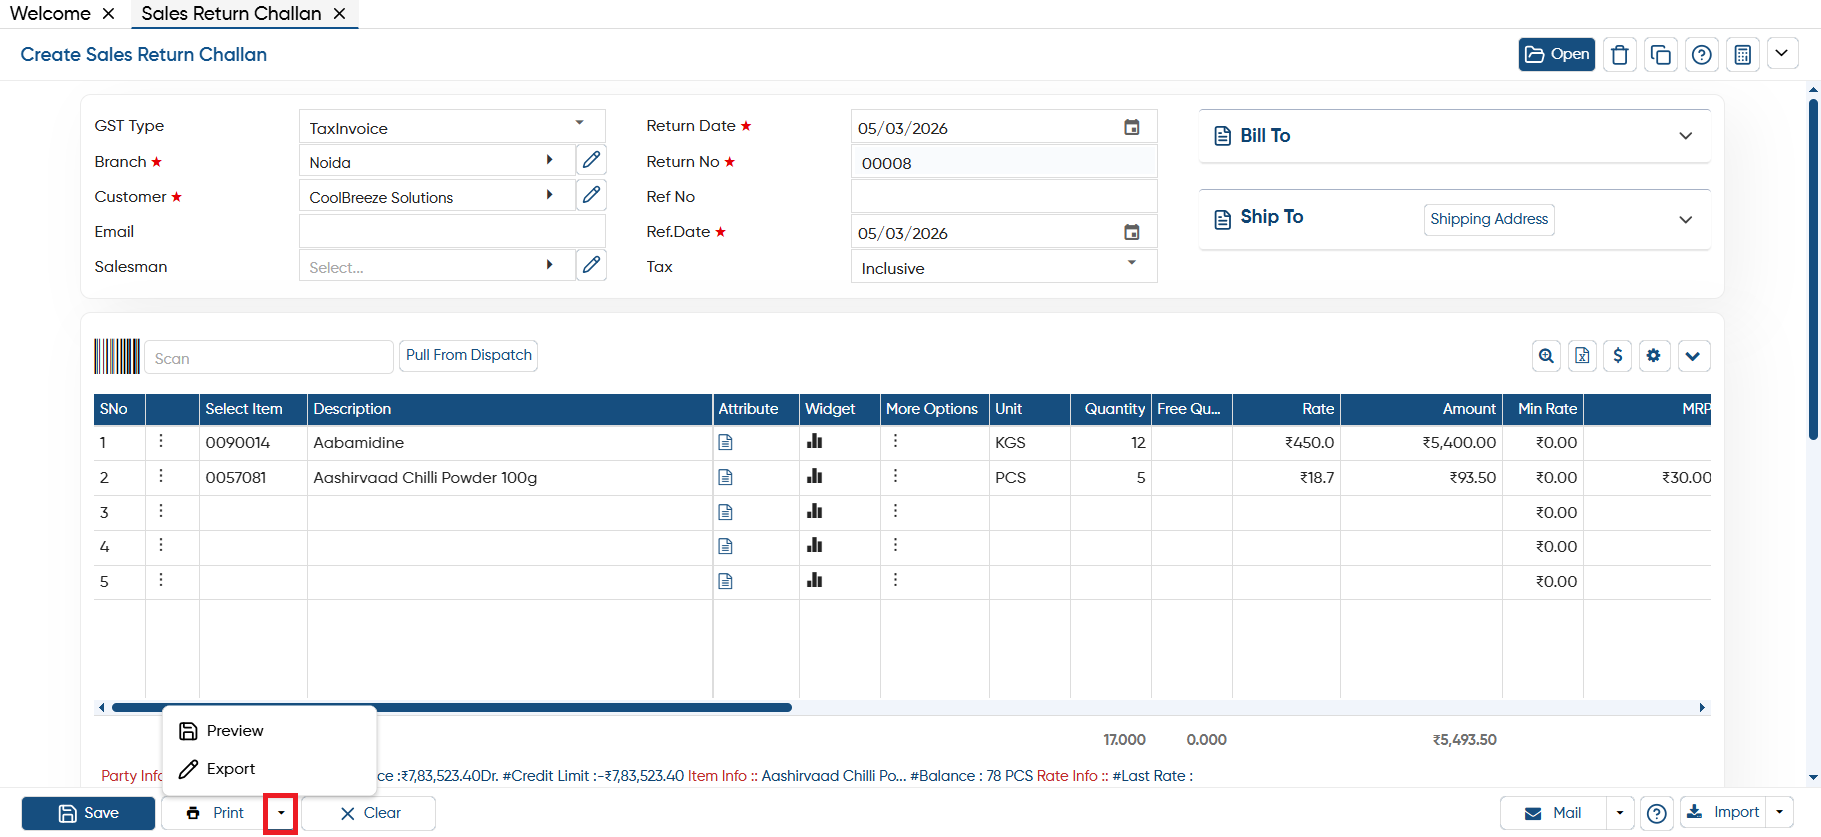
Preview: This option allows you to view a print preview of the challan before finalizing it.
-
Export: If you want to download the document as a PDF, click on the 'Export' button, select your preferred format, and the PDF of challan will be downloaded.
-
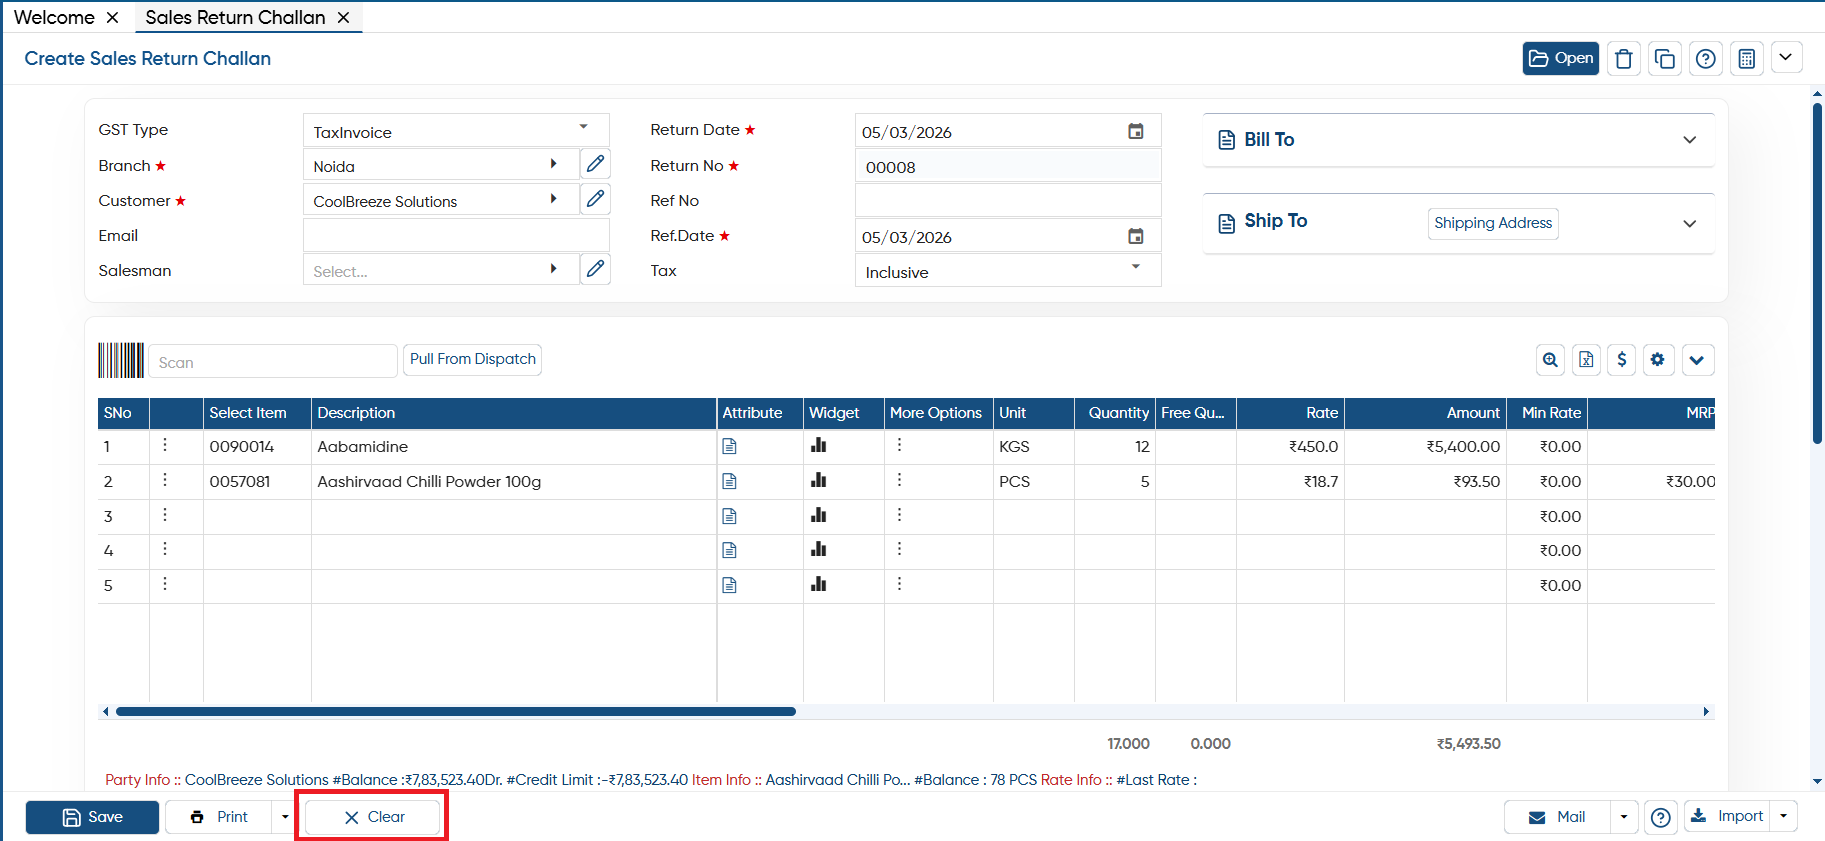
If the data on the current screen is no longer needed or you want to start fresh with a new challan, click the 'Clear' button. This will remove all the data from the current challan, giving you a clean slate to enter new details.
-
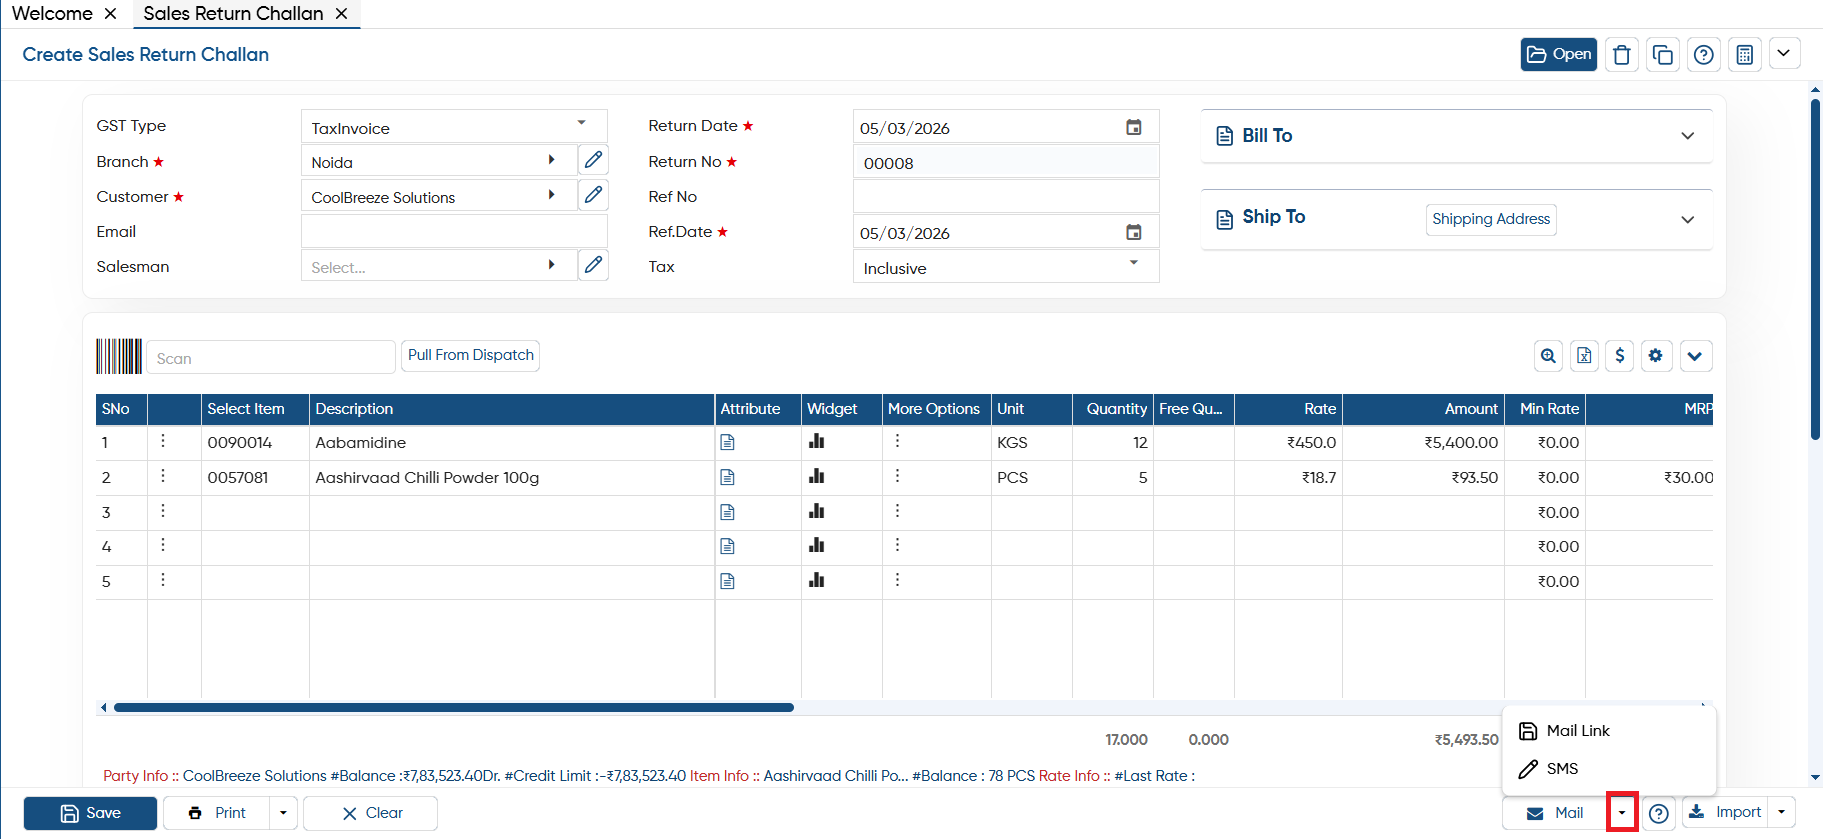
Mail Link: AlignBooks allows you to easily share the invoice link along with an attachment directly to the customer’s email address.
-
SMS: You can also send the challan link and attachment via SMS to the customer, based on your preference.
For sharing challan link and Attachment via Email and SMS you need to Integrate Email and SMS setup in AlignBooks.
|
-
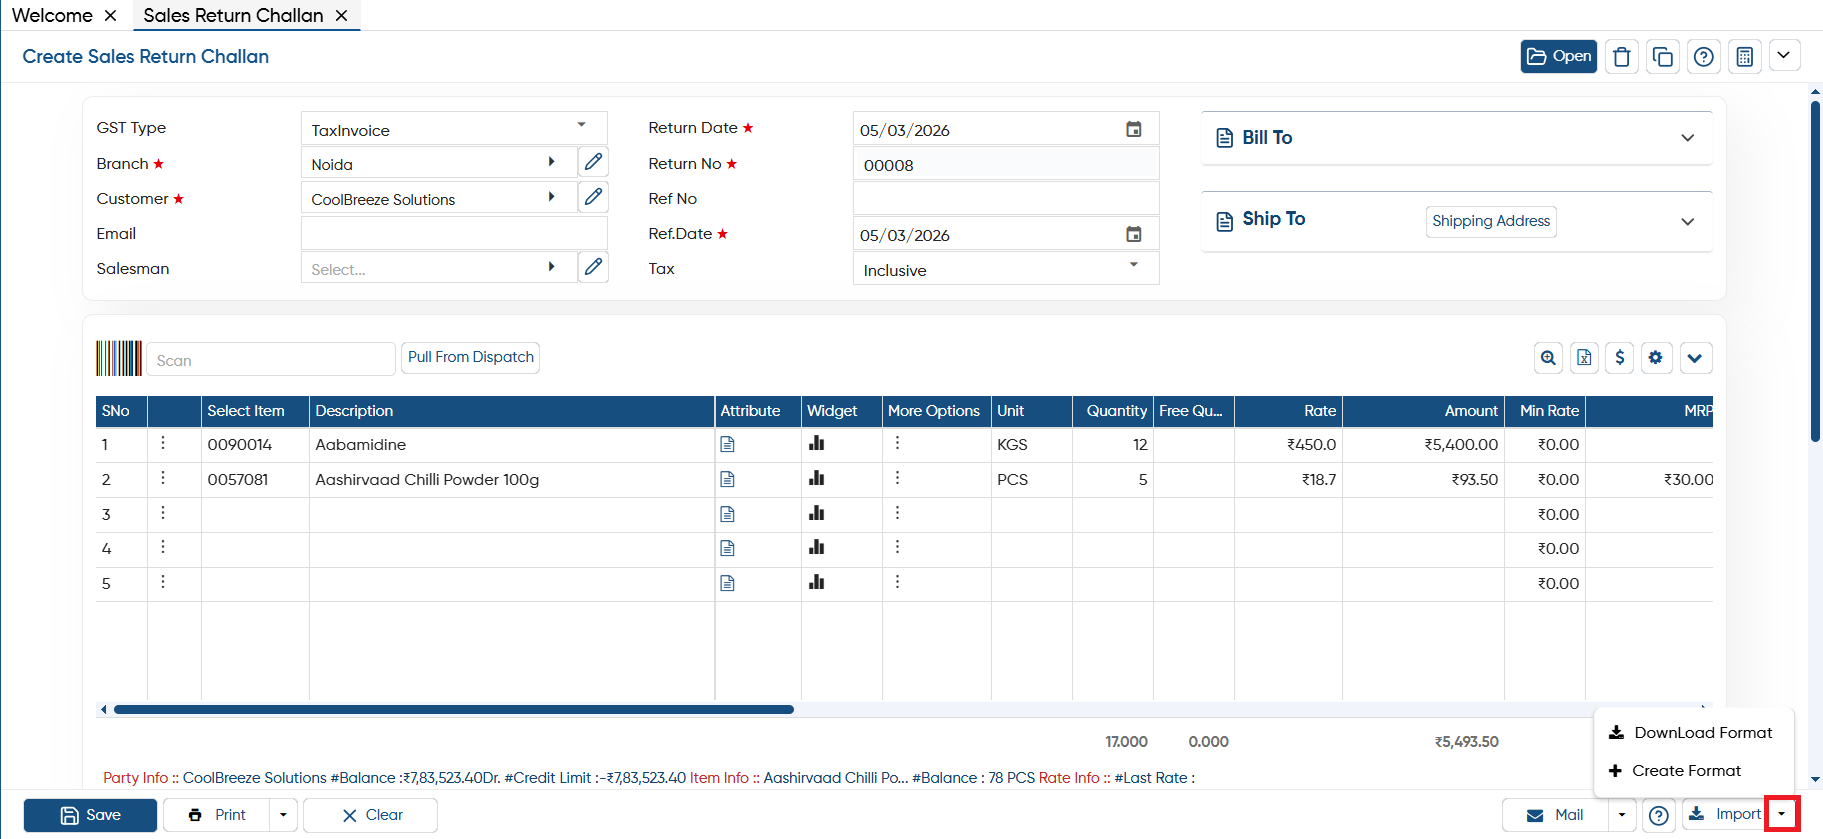
Download Format: If you want to import data from an Excel file, you can download the template through this option. After entering the data, you can directly import the file into AlignBooks.
-
Create Format: You can also create a custom format and map the columns with your Excel file. Make sure the field headings in the Excel file match those in the software when mapping the columns.
In this way you can Create or Manage the Sales Return Challan in AlignBooks.